Removing the Brew Basket From Your Ninja Coffee Maker
Quick answer
- Most Ninja coffee makers have a brew basket that lifts straight out.
- Some models have a locking mechanism or a release button.
- Always ensure the machine is cool and unplugged before attempting removal.
- Consult your specific Ninja model’s manual if it doesn’t lift easily.
- Gentle wiggling is usually all it takes for standard baskets.
- If it feels stuck, don’t force it; there might be a trick.
Who this is for
- Anyone who just got a new Ninja coffee maker and needs to clean it.
- Coffee drinkers who want to deep clean their existing machine.
- Users experiencing issues with their brew basket not coming out.
If you’re experiencing issues with your brew basket not coming out, or if it’s damaged, you might need to look into replacement Ninja coffee maker parts.
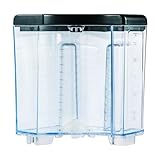
- 【ENHANCED CAPACITY WATER TANK】SLLFLY offers a water reservoir compatible with for the Ninja 12-cup coffee maker, featuring 60-ounce capacity.
- 【STURDY AND RELIABLE CONSTRUCTION 】SLLFLY's removable 60 oz water tank is meticulously crafted from high-quality materials, ensuring a lightweight yet durable construction that is free from odors, reusable, and resistant to breaking or warping. This guarantees a long-lasting and reliable performance.
- 【SIMPLIFIED CLEANING PROCESS 】The SLLFLY water tank Compatible with the Ninja 12-cup coffee maker is designed for easy removal and thorough cleaning. The tank's water flow is meticulously optimized to ensure a consistent and efficient brewing experience.
- 【MODEL CONFIRMATION REQUIRED】Prior to purchasing, please verify that the SLLFLY water tank is compatible with Ninja 12-cup coffee maker model. CE201,CE251, CE200,CE200BRN,CE200C,CE201,CE201BRN,CE201C.This 60 oz water reservoir is designed as a direct replacement part for the Ninja 12-cup coffee maker and does not include the coffee maker itself.
- 【EXEMPLARY CUSTOMER SERVICE 】SLLFLY is committed to providing exceptional customer support. Should you encounter any issues with the replacement water reservoir, our team is ready to assist you promptly, ensuring a seamless and hassle-free resolution.
What to check first
Brewer type and filter type
Know your Ninja. Is it a standard drip, a dual-brew, or something else? This can affect how the basket is designed. Most use a permanent mesh filter, but some might take paper. The basket itself is usually where the magic happens.
Water quality and temperature
While not directly related to removing the basket, good water makes good coffee. For cleaning, make sure the machine has cooled down completely. Hot water and steam are no joke. Let it sit for a bit after brewing.
Grind size and coffee freshness
This is more about brewing than removing the basket, but a super-fine grind can sometimes clog the mesh filter, making the basket harder to remove if it’s full of grounds. Always use fresh beans, ground just before brewing.
Coffee-to-water ratio
Again, a brewing tip. Too much coffee grounds packed in can make the basket heavy and potentially a bit sticky. Stick to the recommended ratios for your machine. Usually, it’s about 1-2 tablespoons per 6 oz of water.
Cleanliness/descale status
If your Ninja hasn’t been descaled in a while, mineral buildup can sometimes make parts stick. Regular cleaning and descaling keep everything running smoothly, including basket removal.
Step-by-step (brew workflow)
This is the general workflow for removing a standard Ninja brew basket. Always refer to your manual if unsure.
1. Ensure the coffee maker is cool.
- What to do: After brewing, wait at least 30 minutes for the machine and all its parts to cool down.
- What “good” looks like: The machine is no longer warm to the touch.
- Common mistake: Trying to remove a hot basket. This is a recipe for burns. Wait it out.
2. Unplug the coffee maker.
- What to do: Disconnect the power cord from the wall outlet.
- What “good” looks like: The power cord is out of the socket.
- Common mistake: Forgetting to unplug. Safety first, always.
3. Locate the brew basket.
- What to do: Open the lid or the brewing area to find the basket.
- What “good” looks like: You can clearly see the basket, usually a plastic or metal container with holes for coffee grounds.
- Common mistake: Looking in the wrong spot. Some machines have multiple compartments.
4. Check for any visible obstructions.
- What to do: Make sure there are no stray coffee grounds or parts of the filter blocking the basket’s path.
- What “good” looks like: The area around the basket is clear.
- Common mistake: Overlooking a stray coffee cherry or a piece of filter paper.
5. Grip the basket handle firmly.
- What to do: Use a secure grip on the designated handle or edge of the basket.
- What “good” looks like: Your hand is comfortably and securely on the basket.
- Common mistake: Gripping too lightly, leading to slippage.
6. Lift straight up.
- What to do: Apply gentle, steady upward pressure.
- What “good” looks like: The basket begins to lift out of its housing.
- Common mistake: Trying to pull it sideways or at an angle. This can bend or break the basket or its housing.
7. Wiggle gently if needed.
- What to do: If it doesn’t lift immediately, try a slight, gentle side-to-side or front-to-back wiggle while lifting.
- What “good” looks like: The basket releases with minimal effort.
- Common mistake: Forcing it aggressively. This can damage the machine.
8. Inspect for a release mechanism (if it doesn’t lift).
- What to do: Look for buttons, levers, or latches around the brew basket area. Some models have these.
- What “good” looks like: You’ve identified a specific part designed to release the basket.
- Common mistake: Not realizing your model has a specific release. Check your manual!
9. Remove the basket completely.
- What to do: Once free, lift the basket away from the machine.
- What “good” looks like: The basket is fully detached.
- Common mistake: Leaving it partially hanging, which can cause issues later.
10. Set aside for cleaning.
- What to do: Place the removed basket on a clean surface for washing.
- What “good” looks like: The basket is safely out of the way.
- Common mistake: Leaving it precariously balanced where it could fall.
Common mistakes (and what happens if you ignore them)
| Mistake | What it causes | Fix |
|---|---|---|
| Trying to remove a hot brew basket | Burns, melted plastic if forced too soon | Always let the machine cool completely before touching any parts. |
| Forgetting to unplug the machine | Electric shock, damage to the appliance | Always disconnect power before attempting to remove any components. |
| Forcing the brew basket | Broken basket, damaged housing, machine malfunction | Lift gently and wiggle; if it’s stuck, consult your manual or check for a release mechanism. |
| Not checking for obstructions | Basket won’t budge, potential damage from pushing grounds | Clear any loose coffee grounds or debris from around the basket before attempting removal. |
| Pulling the basket sideways or at an angle | Bent or broken basket, damaged locking tabs or housing | Always lift straight up. If it resists, try a gentle wiggle while lifting. |
| Assuming all Ninja models are the same | Confusion, frustration, potential damage due to incorrect method | Refer to your specific Ninja coffee maker model’s user manual for precise instructions. |
| Not cleaning regularly | Mineral buildup, sticky residue making removal difficult | Descale and clean your machine regularly as recommended by the manufacturer. |
| Using a fine grind that clogs the filter | Grounds escape, basket is heavier and potentially sticky | Use the recommended grind size for your brewing method; medium grinds are usually best for drip. |
| Not releasing a specific locking mechanism | Basket remains stuck, potential damage from pulling | Look for buttons or levers around the basket area; consult your manual if unsure. |
Decision rules (simple if/then)
- If the brew basket feels stuck, then pause and check your specific Ninja model’s manual because different models have unique designs.
- If you see any loose coffee grounds around the basket, then clear them before attempting to lift because they can prevent a clean release.
- If the basket doesn’t lift with gentle upward pressure, then try a slight wiggle while lifting because this often frees up minor sticking.
- If you hear a clicking sound when trying to remove the basket, then look for a release button or lever nearby because it’s likely a locking mechanism.
- If you’ve tried gentle wiggling and it’s still stuck, then don’t force it; it’s better to re-read the manual or contact customer support because you could break something.
- If you are cleaning the basket after brewing, then ensure the machine is unplugged and cool because hot surfaces and electricity are dangerous.
- If the basket seems to be sticking after a descaling cycle, then ensure all descaling solution residue is rinsed away because leftover film can cause sticking.
- If you notice the basket is warped or damaged, then do not force its removal; order a replacement part because a damaged basket can cause further issues.
- If the brew basket comes out easily, then you’re likely doing it right; proceed with cleaning or reinsertion.
- If you’re unsure about your model’s specific removal process, then err on the side of caution and consult the official documentation because there’s no shame in being thorough.
FAQ
How often should I remove and clean the brew basket?
It’s best to remove and clean the brew basket after every use, or at least daily, to prevent coffee oil buildup and ensure the freshest taste.
Can I put my Ninja brew basket in the dishwasher?
Many Ninja brew baskets are dishwasher safe, but always check your owner’s manual to be sure. Top rack is usually recommended.
My Ninja coffee maker has a separate K-Cup adapter. Does that affect brew basket removal?
Yes, if you’re using the K-Cup adapter, you’ll need to remove that first before accessing or removing the main brew basket.
What if the permanent filter on the brew basket is clogged?
A clogged filter can make removal difficult. Try rinsing it thoroughly under running water, or use a soft brush to gently dislodge any stuck grounds.
Is it normal for the brew basket to feel a little loose when it’s in place?
A slight bit of play is sometimes normal, but it should feel secure when properly seated. If it’s excessively wobbly or falls out easily, check for damage.
My Ninja coffee maker is old, and the plastic seems brittle. What should I do?
If the plastic feels brittle, be extra gentle. Avoid any forceful movements and consider replacing the basket if it shows signs of cracking or wear.
What kind of cleaner should I use on the brew basket?
Mild dish soap and warm water are usually sufficient. For tougher stains or odors, a diluted vinegar solution can be used, but rinse thoroughly afterward.
What this page does NOT cover (and where to go next)
- Detailed troubleshooting for specific Ninja coffee maker error codes.
- Advanced brewing techniques like pour-over or cold brew using a Ninja.
- Recommendations for specific coffee bean origins or roast profiles.
- Repair guides for internal components of the Ninja coffee maker.
- Comparisons of Ninja coffee makers to other brands.