Quick Iced Coffee Using Instant Coffee
Quick answer
- Use a high-quality instant coffee for the best flavor.
- Dissolve the instant coffee in a small amount of hot water first.
- Add your sweetener and any dairy or non-dairy creamer to this hot mixture.
- Fill your glass with ice.
- Pour the dissolved coffee mixture over the ice.
- Top with cold water or milk to your desired strength.
- Stir and enjoy your fast iced coffee.
Who this is for
- The busy bee who needs caffeine now.
- Anyone craving iced coffee without a fancy brewer.
- Campers or travelers looking for a simple coffee fix on the go.
What to check first
Brewer type and filter type
This whole guide is about no brewer, so you’re good here. We’re skipping the drip, the pour-over, the French press. Just a spoon and a mug.
Water quality and temperature
Use filtered water if your tap water tastes funky. You’ll need a little hot water to dissolve the instant coffee. Boiling is fine, but let it cool for 30 seconds so you don’t scorch the coffee. Cold water comes later.
Grind size and coffee freshness
Instant coffee is already processed. So, grind size is a non-issue. Freshness still matters, though. Old instant coffee can taste flat or even bitter. Check the expiry date if you have it.
Coffee-to-water ratio
This is where you get to play. A good starting point is 1-2 teaspoons of instant coffee per 6-8 oz of final drink. But hey, you’re the boss. Like it strong? Add more. Like it mellow? Use less.
Cleanliness/descale status
Make sure your mug and spoon are clean. No one wants yesterday’s breakfast in their iced coffee. Descaling isn’t a thing here, so you’re clear on that front.
Step-by-step (brew workflow)
1. Measure your instant coffee.
- What “good” looks like: You’ve got your coffee ready to go.
- Common mistake: Guessing. Measure it out so you can repeat it later if you nail it.
2. Grab a small mug or heatproof glass.
- What “good” looks like: A vessel ready for dissolving.
- Common mistake: Using a plastic cup that might melt or warp with hot water. Stick to glass or ceramic.
For the best experience, consider using a durable glass coffee mug that can handle both hot and cold temperatures.
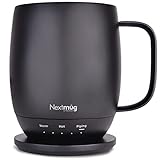
- ALWAYS THE PERFECT TEMPERATURE – The Nextmug will keep your hot coffee, tea or preferred beverage at the perfect temperature wherever you are. Simply select Warm (130° F), Hot (140° F), or Piping (150° F) and enjoy for hours.
- SMART MUG TECHNOLOGY – Long-lasting battery maintains your ideal temperature. LED lights display battery life & real-time temperature. Includes Spill-Resistant Lid & Charging Coaster.
- SUPER SIMPLE – On-board Control Button easily turns mug On/Off & sets the temperature. Takes only seconds to set the mug to your perfect temperature. No app required - no passwords, re-booting or security concerns.
- THE PERFECT GIFT - Give the gift for him and the gift for her that is certain to delight. Perfect for everyone on your list…moms, dads, grandmas, grandpas, teachers, birthdays, graduations and more!
- NEXTMUG CARES - Nextmug cares about our communities and our customers. We care by donating Nextmugs to teachers and first responders . We’re also committed to sustainable packaging by using 100% recyclable materials with all our products. Our dedicated customer service agents are based in the USA and always ready to help.
3. Add hot water to the mug.
- What “good” looks like: About 1-2 tablespoons of hot, but not boiling, water.
- Common mistake: Using too much water. This makes it harder to dissolve and dilutes your final flavor too much.
4. Add instant coffee to the hot water.
- What “good” looks like: The coffee grounds hit the water.
- Common mistake: Not using hot water. Cold water just won’t dissolve instant coffee properly. You’ll end up with a gritty mess.
5. Stir until dissolved.
- What “good” looks like: A smooth, dark liquid with no gritty bits.
- Common mistake: Not stirring enough. You’ll have undissolved coffee clinging to the bottom. Patience, grasshopper.
6. Add sweetener (optional).
- What “good” looks like: Your sugar, syrup, or sweetener is in the mix.
- Common mistake: Adding sweetener after the ice. It might not dissolve as well in cold liquid.
7. Add creamer (optional).
- What “good” looks like: Milk, half-and-half, or your favorite non-dairy option joins the party.
- Common mistake: Adding too much creamer too soon. You might end up with a milky coffee instead of a coffee-flavored drink.
If you’re looking for a non-dairy option, there are many excellent non-dairy creamers available that blend smoothly into hot coffee.

- PLANT-BASED COFFEE CREAMER POWDER - Original non-dairy coffee creamer; shelf-stable powdered creamer infused with beneficial minerals; Dairy-Free, Gluten-Free, Vegan, Soy Free & Non-GMO
- SUPERFOOD NOURISHMENT - Laird Superfood Creamers are crafted from the highest quality all-natural whole food ingredients & sustainably sourced for delicious powder coffee creamer
- NO FILLERS OR ADDITIVES - Laird's Dry Coffee Creamers contain NO sugar additives, artificial ingredients, sweeteners, artificial colors, & chemicals
- CLEAN KETO CREAMER - Superfood creamer made with Coconut Milk Powder, Organic Coconut Sugar, Organic Extra Virgin Coconut Oil
- DIRECTIONS - Add 2 tablespoons to coffee or mix to taste | Simply massage bag to break up contents before use
8. Fill your serving glass with ice.
- What “good” looks like: A glass packed with ice cubes.
- Common mistake: Not using enough ice. Your drink will melt it too fast and get watery. Load it up!
9. Pour the dissolved coffee mixture over the ice.
- What “good” looks like: The rich, dark coffee mixture cascades over the ice.
- Common mistake: Pouring too fast and splashing. Take your time.
10. Top with cold water or milk.
- What “good” looks like: Your glass is filled to your preferred strength.
- Common mistake: Adding too much liquid, making it weak. Start with less and add more if needed.
11. Stir well.
- What “good” looks like: Everything is combined.
- Common mistake: Skipping this. You’ll have a layer of strong coffee at the bottom and weak stuff on top.
12. Taste and adjust.
- What “good” looks like: It’s perfect for you.
- Common mistake: Not tasting. You might be settling for “okay” when you could have “great.”
Common mistakes (and what happens if you ignore them)
| Mistake | What it causes | Fix |
|---|---|---|
| Using cold water to dissolve coffee | Gritty, undissolved coffee grounds | Always use hot water (not boiling) to dissolve instant coffee. |
| Not dissolving coffee fully | Bitter chunks at the bottom of your drink | Stir until completely smooth before adding ice. |
| Using stale instant coffee | Flat, papery, or bitter taste | Use fresh instant coffee; check the expiration date if possible. |
| Too much water for dissolving | Weak final flavor, hard to get strong coffee | Start with 1-2 tablespoons of hot water per 1-2 tsp coffee. |
| Not enough ice | Drink becomes watery very quickly | Fill your glass to the brim with ice. |
| Adding creamer before dissolving coffee | Might not mix well, can cause clumping | Dissolve coffee first, then add sweetener/creamer to that mix. |
| Skipping the final stir | Uneven flavor distribution, concentrated at the bottom | Always stir after adding your final liquid. |
| Using poor quality water | Off-flavors in your coffee | Use filtered water if your tap water has a noticeable taste. |
| Using too much instant coffee | Overly bitter and undrinkable | Start with the recommended amount and adjust to your taste. |
| Using too little instant coffee | Weak, watery, unsatisfying coffee | Add more instant coffee, dissolved in a little hot water first. |
Decision rules (simple if/then)
- If your instant coffee tastes bitter, then use less coffee next time because too much can overwhelm the flavor.
- If your iced coffee tastes weak, then add another half teaspoon of instant coffee dissolved in a little hot water because that’s the easiest way to boost strength.
- If you prefer a sweeter drink, then add your sweetener while dissolving the coffee because it mixes better in hot liquid.
- If you want a creamier iced coffee, then add your creamer after dissolving the coffee and before pouring over ice because it integrates better.
- If you have hard water, then use filtered water for your coffee because tap water can impart mineral flavors.
- If you’re in a hurry, then skip the fancy add-ins and just focus on dissolving the coffee and adding ice and water because speed is the priority.
- If your instant coffee is clumpy, then try breaking it up with the back of your spoon before adding hot water because it helps it dissolve faster.
- If you find instant coffee tastes “off,” then try a different brand or a more premium “specialty” instant coffee because quality varies wildly.
- If you want to avoid a watery drink, then make sure your glass is packed with ice before you pour anything in because more ice means less dilution.
- If you’re making multiple drinks, then dissolve a larger batch of coffee in hot water first before portioning it out over ice because it’s more efficient.
FAQ
Can I use cold water to dissolve instant coffee?
No, it’s best to use hot water. Cold water won’t dissolve instant coffee properly, leaving you with a gritty drink. A little hot water is key to a smooth base.
How much instant coffee should I use?
A good starting point is 1 to 2 teaspoons per 6-8 ounces of final drink. But this is totally up to your taste. Like it strong? Add more. Prefer it mellow? Use less.
Does the type of instant coffee matter?
Absolutely. Just like with regular coffee, quality varies. Some instant coffees are designed for a smoother, richer flavor. Experiment to find one you like.
What if my iced coffee tastes bitter?
You might be using too much instant coffee, or the water was too hot when dissolving. Try using slightly less coffee or letting the hot water cool for 30 seconds before dissolving.
Can I add milk or cream directly to the hot coffee mixture?
Yes, you can. It’s often best to add sweetener and creamer to the hot dissolved coffee before pouring it over ice. This helps them blend better.
Is this method bad for my teeth?
Like any sweetened beverage, frequent consumption can impact dental health. If you add sugar, brush your teeth afterward.
How do I make it taste like “real” iced coffee?
The key is a good quality instant coffee and the right ratio. Also, make sure you don’t dilute it too much with water. Using milk instead of water as your final liquid can also help.
While this guide focuses on instant coffee, if you’re looking to upgrade your iced coffee game without the instant, an iced coffee maker can be a great investment for consistent results.

- BREW BY THE CUP OR CARAFE: Brews both K-Cup pods and coffee grounds.
- MULTISTREAM TECHNOLOGY: Saturates the grounds evenly to extract full flavor and aroma in every cup, hot or cold.
- BREW OVER ICE: Adjusts temperature for maximum flavor and less ice melt for single-cup iced coffees and teas.
- STRONG BREW & EXTRA HOT FUNCTIONALITY: Brews a stronger, more intense-flavored cup and the extra hot feature brews a hotter single cup.
- MULTIPLE BREW SIZES: Brew 6, 8, 10, or 12oz single cups or 6, 8, 10, or 12-cup carafes. 12-cup glass carafe specially designed to limit dripping.
Can I make this ahead of time?
You can dissolve the coffee mixture and store it in the fridge for a day or two. Just give it a good stir before pouring over fresh ice.
What this page does NOT cover (and where to go next)
- Detailed comparisons of different instant coffee brands. (Look for reviews from coffee bloggers or consumer sites.)
- Advanced techniques for cold brew concentrate or Japanese-style iced coffee. (Search for “cold brew coffee” or “Japanese iced coffee brewing.”)
- Specific health benefits or drawbacks of coffee consumption. (Consult health professionals or reputable health organizations.)
- Recipes for complex coffee cocktails or flavored iced coffee drinks. (Explore recipe sites or coffee-specific blogs for inspiration.)