Quick Frothy Coffee Using Your Microwave
Quick answer
- Use a microwave-safe jar or shaker with a tight-fitting lid.
- Combine cold milk and a touch of sweetener (optional) in the jar.
- Shake vigorously for 30-60 seconds until the milk doubles in volume.
- Microwave the frothed milk for 20-30 seconds to stabilize the foam.
- Pour the frothed milk over your brewed coffee.
- Enjoy your quickly frothy coffee!
Who this is for
- Coffee drinkers who want a quick, foamy topping without a dedicated frother.
- Those looking for a budget-friendly way to elevate their morning or afternoon coffee.
- People who enjoy lattes or cappuccinos but only have a microwave available.
If you’re looking for a simple and effective way to achieve that perfect foamy topping, consider a dedicated coffee frothing tool. They are designed to create a rich, stable foam with minimal effort.
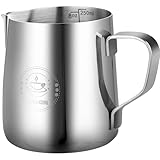
- 8Oz (250ml) Mini Capacity:Perfect for single serve latte,cappuccino, or espresso art, ideal for home baristas who make 1 cup at a time. For larger drinks, consider our 350ml/600ml/900ml options.
- Drip-Free Precision Spout: Designed for accurate and controlled pouring, the tapered spout helps you achieve smooth, clean lines for flawless latte art with no mess.
- Clear Internal Measurement Markings: Etched volume indicators in milliliters make it easy to measure milk accurately, ensuring consistency in every cup.
- Ergonomic Heat-Resistant Handle: The handle is designed for comfort and control, staying cool to the touch and allowing safe, one-handed operation during steaming and pouring.
- Food-Grade Stainless Steel: Made from high-quality 304 stainless steel, this pitcher is rust-resistant, heat-proof, and built to last. Its polished finish adds a touch of elegance to any countertop.
What to check first
Brewer type and filter type
While this guide focuses on using a microwave for frothing milk, the coffee itself can be brewed using any method you prefer. Whether you use a drip coffee maker, a French press, or an AeroPress, ensure your chosen method is clean and functioning correctly. The type of filter used for your coffee can subtly affect its flavor, but for this particular frothing technique, the coffee’s characteristics are secondary to the milk’s texture.
Water quality and temperature
For the coffee base, using filtered water is always recommended for the best taste. The ideal brewing temperature for most coffee methods is between 195°F and 205°F. If your coffee tastes bitter, it might be too hot; if it tastes sour or weak, it might be too cool. For the milk frothing, you’ll be using cold milk initially, and then microwaving it briefly.
Grind size and coffee freshness
The grind size should be appropriate for your brewing method. For drip coffee, a medium grind is typical. For French press, a coarse grind is best. Freshly ground coffee beans will always yield a superior flavor. Aim to grind your beans just before brewing for optimal aroma and taste.
Coffee-to-water ratio
A common starting point for coffee-to-water ratio is around 1:15 to 1:17 by weight. For example, using 20 grams of coffee to 300-340 grams (or milliliters) of water. Adjust this ratio to your personal preference. Too little coffee will result in weak, watery coffee, while too much can lead to bitterness.
Cleanliness/descale status
Ensure your coffee maker is clean. Old coffee oils can impart bitter or stale flavors. If you have a drip machine, check for any mineral buildup. Regularly descaling your coffee maker according to the manufacturer’s instructions will help maintain its performance and the quality of your coffee.
Step-by-step (brew workflow)
1. Brew your coffee: Prepare your coffee using your preferred method. Aim for a standard strength cup.
- What good looks like: A hot, aromatic cup of coffee that tastes balanced and to your liking.
- Common mistake: Brewing coffee too weak or too strong. Avoid this by measuring your coffee grounds and water accurately.
2. Gather your frothing supplies: You’ll need a microwave-safe jar or shaker with a tight-fitting lid, cold milk (dairy or non-dairy), and optionally, a small amount of sweetener like sugar or syrup.
- What good looks like: All necessary items are clean and readily available.
- Common mistake: Using a lid that doesn’t seal well. This will cause milk to spray everywhere in the microwave.
3. Add milk to the jar: Pour your desired amount of cold milk into the jar. Fill it no more than halfway to allow room for expansion.
- What good looks like: The jar is less than half full with milk.
- Common mistake: Overfilling the jar. This can lead to spills and a messy microwave.
4. Add sweetener (optional): If you like a slightly sweeter froth, add a teaspoon or two of sugar, honey, or your preferred sweetener to the milk.
- What good looks like: Sweetener is evenly distributed in the milk.
- Common mistake: Adding too much sweetener. You can always add more to your finished coffee.
5. Seal the jar tightly: Ensure the lid is screwed on securely.
- What good looks like: No gaps or leaks around the lid.
- Common mistake: Not sealing the lid properly. This will result in a milky mess.
6. Shake vigorously: Hold the jar with both hands and shake it up and down as hard as you can for 30-60 seconds.
- What good looks like: The milk has visibly increased in volume and appears foamy.
- Common mistake: Not shaking long enough or hard enough. This won’t create sufficient foam.
7. Microwave the frothed milk: Carefully remove the lid (it might be hot!) and microwave the jar for 20-30 seconds on high power. This step helps stabilize the foam.
- What good looks like: The milk is warm and the foam has settled slightly but remains.
- Common mistake: Microwaving for too long. This can cause the milk to boil over or become too hot to drink.
8. Check the foam: Open the lid and observe the texture. It should be light, airy, and have a noticeable layer of foam.
- What good looks like: A substantial layer of frothy foam on top of the warmed milk.
- Common mistake: Expecting the same microfoam as a professional espresso machine. This method creates a more airy, bubbly foam.
9. Pour the frothed milk: Gently pour the warmed, frothed milk over your brewed coffee. You can hold back the foam with a spoon initially and then spoon it on top.
- What good looks like: The frothed milk and foam are integrated into your coffee.
- Common mistake: Dumping the entire contents too quickly. This can cause the foam to dissipate rapidly.
10. Enjoy: Sip and savor your homemade frothy coffee.
- What good looks like: A delicious, satisfying coffee drink with a creamy, frothy topping.
- Common mistake: Not enjoying the moment!
Common mistakes (and what happens if you ignore them)
| Mistake | What it causes | Fix |
|---|---|---|
| Using a non-microwave-safe container | Container could crack, melt, or break in the microwave. | Always use glass or ceramic containers specifically marked as microwave-safe. |
| Overfilling the jar with milk | Milk will boil over and create a significant mess. | Fill the jar no more than halfway with milk before shaking. |
| Not shaking vigorously or long enough | Insufficient foam, or no foam at all. | Shake with consistent, strong motion for at least 30 seconds. |
| Using warm or hot milk to start | Milk won’t froth as effectively and might curdle. | Always start with cold milk for best frothing results. |
| Not sealing the lid tightly | Milk will spray inside the microwave, creating a mess. | Ensure the lid is screwed on very securely before shaking. |
| Microwaving for too long | Milk can boil over, become too hot, or the foam dissipates. | Microwave in short bursts (20-30 seconds) and check consistency. |
| Using old or dirty jars/lids | Can impart off-flavors to the milk and foam. | Wash all containers thoroughly before and after use. |
| Using milk that’s not cold | Foam will be less stable and may not form well. | Always use milk directly from the refrigerator. |
| Trying to froth skim milk | Skim milk has less fat and protein, making it harder to froth. | Whole milk or 2% milk generally works best for this method. |
Decision rules (simple if/then)
- If your coffee tastes bitter, then reduce the coffee-to-water ratio or use slightly cooler brewing water because these factors can over-extract the coffee.
- If your coffee tastes sour or weak, then increase the coffee-to-water ratio or use slightly hotter brewing water because these factors can under-extract the coffee.
- If your frothed milk is not holding its foam, then try using a different type of milk (e.g., whole milk or 2% instead of skim) because fat and protein content affect frothing.
- If you notice a sputtering sound while microwaving the frothed milk, then stop the microwave immediately because it may be about to boil over.
- If your coffee maker has a mineral taste, then it’s time to descale it because mineral buildup affects both flavor and performance.
- If you want a sweeter froth, then add a small amount of sugar or syrup to the milk before shaking because it will incorporate better.
- If your coffee grounds are too fine for your brewer, then you risk over-extraction and bitterness; use a coarser grind for methods like French press.
- If your coffee grounds are too coarse for your brewer, then you risk under-extraction and weak coffee; use a finer grind for drip machines.
- If the foam isn’t as thick as you’d like after shaking, then shake for an additional 15-20 seconds because more agitation leads to more air incorporation.
- If you’re using a non-dairy milk, check if it’s formulated for frothing, as some may not produce as stable a foam as others.
- If the lid feels hot after microwaving, then use a towel or oven mitt to handle it carefully because steam can make it very hot.
FAQ
Can I use any kind of milk?
Yes, you can use dairy milk (whole, 2%, skim) or many non-dairy alternatives like oat, soy, or almond milk. Whole milk and 2% tend to produce the richest foam due to their fat content, while some non-dairy milks are specifically formulated for better frothing.
How long does the foam last?
The foam created using this microwave method is best enjoyed immediately. It’s an airy foam that will naturally dissipate faster than microfoam from an espresso machine.
Is it safe to microwave milk in a jar?
Yes, as long as the jar is made of microwave-safe glass or ceramic and has a lid that can be vented or removed before microwaving. Avoid using plastic containers unless they are specifically rated for microwave use.
What if my milk doesn’t foam after shaking?
Ensure your milk is very cold, and you’re shaking vigorously for at least 30-60 seconds. If using non-dairy milk, some varieties may not froth as well as others. You might need to shake longer or try a different type of milk.
Can I add flavorings like vanilla extract?
Yes, you can add small amounts of flavorings like vanilla extract or a dash of cinnamon to the milk before shaking. Be careful not to add too much liquid, as it can affect the frothing.
How do I clean the jar after frothing?
Wash the jar and lid with warm, soapy water immediately after use. Most microwave-safe jars are also dishwasher safe; check the manufacturer’s instructions.
Will this method work with cream?
While you can try, heavy cream or half-and-half might be too thick to froth effectively with just shaking. It’s generally best suited for milk.
Why is my frothed milk too hot?
You might be microwaving it for too long. Try reducing the microwave time to 15-20 seconds and checking the temperature. The goal is to warm it and stabilize the foam, not to cook it.
What this page does NOT cover (and where to go next)
- Detailed comparisons of different types of milk for frothing.
- Advanced latte art techniques.
- Recipes for flavored syrups or coffee drinks.
- Maintenance and troubleshooting for electric milk frothers or espresso machines.