
Ninja Coffee Maker Leaking From Bottom? Causes and Fixes
Quick answer
- Leaks often stem from a misplaced water reservoir, a clogged drip stop, or a dirty brew basket.
- Inspect the water tank for cracks or improper seating on the base.
- Check the drip tray and surrounding area for signs of water accumulation.
- Regular cleaning, especially of the brew head and drip stop, can prevent most leaks.
- Ensure all removable parts are correctly assembled and locked into place before brewing.
- If the leak is persistent and not easily identifiable, professional service or replacement might be necessary.
What this problem usually is (and is not)
- This problem is usually a minor issue related to user error or routine maintenance, not a catastrophic machine failure.
- It is often a seal that needs reseating, a component that is not fully closed, or a blockage.
- It is not typically a sign of immediate electrical hazard, but persistent leaks near electrical components should be addressed cautiously.
- It is not usually an indicator that your Ninja Coffee Maker is beyond repair; many leaks are simple to fix.
- It is not a problem that can be ignored; even small leaks can lead to water damage or mold over time.
- It is not a sign that you need to immediately buy a new machine, as most causes are easily remedied.
Likely causes (triage list)
- Water Reservoir Issues: The water tank might not be seated correctly on the base, causing water to escape from the connection point. Check for any visible cracks in the reservoir itself.
- Drip Stop Malfunction: The drip stop mechanism (if your model has one) might be stuck open or partially closed, allowing coffee to drip continuously or leak past the seal. Observe if coffee continues to drip when the carafe is removed.
- Clogged Brew Basket: A build-up of coffee grounds or mineral deposits in the brew basket or showerhead can cause water to overflow the basket and leak down the sides. Remove the brew basket and inspect for blockages.
- Loose Connections/Seals: Over time, seals or connections within the machine’s internal plumbing can become loose or degraded, leading to leaks. Look for water emerging from seams or joints on the machine’s underside.
- Overfilling the Reservoir: Filling the water reservoir beyond the “Max Fill” line can lead to overflow, especially during the brewing cycle, which can appear as a bottom leak. Check the water level before brewing.
- Improper Carafe Placement: If the carafe is not fully pushed in or is slightly misaligned, coffee can miss the carafe and pool on the warming plate, eventually leaking underneath. Ensure the carafe is centered under the brew spout.
- Cracked Housing or Base: Physical damage to the machine’s plastic housing or base can create an exit point for water. Visually inspect the exterior for any cracks or damage.
- Scale Buildup: Extensive mineral buildup inside the machine can impede water flow, create pressure, and force water out through weak points or seals. If you haven’t descaled recently, this could be a factor.
If you suspect a worn-out seal or a loose connection is the culprit, consider replacing worn Ninja coffee maker parts to restore proper function.
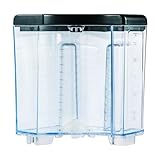
Water Reservoir Compatible with Ninja 12-Cup Programmable Coffee Brewer Maker CE201,CE251,CE200,CE200BR,CE200C,CE201BRN,CE201C
- 【ENHANCED CAPACITY WATER TANK】SLLFLY offers a water reservoir compatible with for the Ninja 12-cup coffee maker, featuring 60-ounce capacity.
- 【STURDY AND RELIABLE CONSTRUCTION 】SLLFLY’s removable 60 oz water tank is meticulously crafted from high-quality materials, ensuring a lightweight yet durable construction that is free from odors, reusable, and resistant to breaking or warping. This guarantees a long-lasting and reliable performance.
- 【SIMPLIFIED CLEANING PROCESS 】The SLLFLY water tank Compatible with the Ninja 12-cup coffee maker is designed for easy removal and thorough cleaning. The tank’s water flow is meticulously optimized to ensure a consistent and efficient brewing experience.
- 【MODEL CONFIRMATION REQUIRED】Prior to purchasing, please verify that the SLLFLY water tank is compatible with Ninja 12-cup coffee maker model. CE201,CE251, CE200,CE200BRN,CE200C,CE201,CE201BRN,CE201C.This 60 oz water reservoir is designed as a direct replacement part for the Ninja 12-cup coffee maker and does not include the coffee maker itself.
- 【EXEMPLARY CUSTOMER SERVICE 】SLLFLY is committed to providing exceptional customer support. Should you encounter any issues with the replacement water reservoir, our team is ready to assist you promptly, ensuring a seamless and hassle-free resolution.
Fix it step-by-step (brew workflow)
1. Unplug the Machine: Always start by unplugging your Ninja Coffee Maker from the power outlet to ensure safety.
- What “good” looks like: The power cord is completely disconnected, and there’s no risk of electrical shock.
- Common mistake & how to avoid it: Forgetting to unplug; always make this the first step for any inspection or cleaning.
2. Empty and Re-seat the Water Reservoir: Remove the water reservoir, empty any remaining water, and then firmly place it back onto the base, ensuring it clicks into place if applicable.
- What “good” looks like: The reservoir sits flush with the base, with no gaps, and feels secure.
- Common mistake & how to avoid it: Not pushing the reservoir down far enough; apply gentle but firm pressure until it’s properly seated.
3. Inspect the Drip Stop Mechanism: If your model has a manual drip stop, ensure it’s fully open before brewing and fully closed when you want to stop the drip. For automatic drip stops, check for any visible debris preventing full closure.
- What “good” looks like: The lever moves freely, or the mechanism appears clear of obstructions.
- Common mistake & how to avoid it: Forcing a stuck lever; instead, gently try to dislodge any visible debris.
4. Clean the Brew Basket and Showerhead: Remove the brew basket, filter, and permanent filter (if used). Wash them thoroughly with warm, soapy water. Use a small brush to clean the showerhead where water dispenses into the grounds.
- What “good” looks like: All components are free of coffee grounds, oils, and mineral residue.
- Common mistake & how to avoid it: Only rinsing; coffee oils can build up and require soap for proper cleaning.
5. Check Carafe Placement: Before brewing, make sure your carafe is centered on the warming plate and pushed completely back, so it properly engages the drip stop mechanism (if applicable).
- What “good” looks like: The carafe is squarely under the brew spout, and the drip stop is pushed open by the carafe’s rim.
- Common mistake & how to avoid it: Not pushing the carafe in far enough; give it a firm push until it can’t go back further.
6. Examine for Visible Cracks: Carefully inspect the water reservoir, brew basket, and the machine’s main housing for any hairline cracks or physical damage.
- What “good” looks like: All plastic components are intact, with no visible breaks or fissures.
- Common mistake & how to avoid it: Overlooking small cracks; even tiny cracks can lead to significant leaks.
7. Perform a Descaling Cycle: If you haven’t descaled recently, run a descaling cycle according to your Ninja Coffee Maker’s manual. This helps clear internal mineral buildup that can cause blockages and pressure issues.
- What “good” looks like: The descaling solution flows freely, and the machine completes the cycle without errors.
- Common mistake & how to avoid it: Using vinegar if your manual advises against it; always use the recommended descaling solution or a suitable alternative.
8. Run a Test Brew (Water Only): After performing the above steps, plug the machine back in and run a brew cycle with only water (no coffee grounds). Place a dry towel under the machine to observe for leaks.
See also: Keeping Your Nuvera Coffee Maker Clean For Optimal Performance.
See also: Troubleshooting Eo Error On Your Cuisinart Coffee Maker.
See also: Troubleshooting Your Coffee Maker Isnt Working.
- What “good” looks like: Water flows into the carafe without any drips or leaks from the bottom or sides of the machine.
- Common mistake & how to avoid it: Skipping this test; it confirms the fix before you waste coffee.
Prevent it next time
- Regular Cleaning Cadence: Clean the brew basket, permanent filter, and carafe after every use to prevent coffee oil and ground buildup.
- Descaling Schedule: Descale your Ninja Coffee Maker every 1-3 months, depending on your water hardness, to prevent mineral buildup.
- Water Quality and Storage: Use filtered water to minimize mineral deposits. Store the reservoir empty if the machine won’t be used for several days.
- Correct Ratio and Grind: Use the recommended coffee-to-water ratio and grind size for your specific Ninja model to prevent overflow or clogging.
- Proper Filter Use: Ensure paper filters are correctly seated and not folded over, or if using a permanent filter, that it’s clean and undamaged.
- Basic Safety Checks: Always ensure the machine is unplugged before cleaning or disassembling parts.
- Reservoir Seating: Double-check that the water reservoir is firmly and correctly seated before every brew cycle.
- Carafe Alignment: Confirm the carafe is perfectly aligned and fully pushed in to engage the drip stop and catch all brewed coffee.
- Avoid Overfilling: Never fill the water reservoir past the “Max Fill” line indicated on the tank.
Common mistakes (and what happens if you ignore them)
| Mistake | What it causes | Fix |
|---|