Nescafé Cold Coffee Recipe For Home
Quick Answer
- Use a 1:1 ratio of Nescafé instant coffee to sugar for a balanced sweetness.
- Dissolve the coffee and sugar in a small amount of hot water to create a concentrated syrup.
- Chill your milk thoroughly before mixing for the best cold coffee experience.
- Whip the dissolved coffee and sugar mixture until it becomes light and frothy.
- Combine the frothy coffee mixture with cold milk and ice for a creamy, delicious drink.
- Adjust the sweetness and coffee intensity to your personal preference.
Who This Is For
- Anyone craving a quick, refreshing, and customizable cold coffee at home.
- Fans of Nescafé instant coffee who want to elevate their beverage game.
- Individuals looking for a simple recipe that requires minimal equipment and ingredients.
What to Check First
Before you start brewing your Nescafé cold coffee, take a moment to ensure you have the right setup. This will help guarantee a smooth and successful outcome.
Brewer Type and Filter Type
While Nescafé cold coffee doesn’t require a traditional brewer or filter, understanding your tools is key. For this recipe, the “brewer” is simply your chosen mixing vessel, and the “filter” is your ability to strain out any undissolved solids if you choose to use a very fine mesh strainer.
- What to Check: Ensure you have a clean glass or shaker for mixing and a spoon or whisk for stirring.
- What Good Looks Like: A clean workspace and appropriate mixing tools ready for use.
- Common Mistake: Using a dirty glass or a utensil that imparts an off-flavor. Always ensure your mixing tools are clean.
Water Quality and Temperature
The quality and temperature of the water you use for dissolving the Nescafé and sugar can impact the final taste.
- What to Check: Use fresh, filtered water if your tap water has a strong taste. For dissolving, hot water is best, but it doesn’t need to be boiling.
- What Good Looks Like: Clean, neutral-tasting water. Hot water that is comfortably warm to the touch, not scalding.
- Common Mistake: Using cold water to dissolve the Nescafé and sugar, which can lead to clumps and an unevenly mixed base.
Grind Size and Coffee Freshness
For Nescafé instant coffee, “grind size” is not applicable as it’s already processed. However, the “freshness” of your instant coffee can still play a role.
- What to Check: Ensure your Nescafé jar is sealed properly after each use to maintain its aroma and flavor.
- What Good Looks Like: Coffee granules that are free-flowing and have a pleasant coffee aroma.
- Common Mistake: Using stale instant coffee that has lost its potent flavor, resulting in a weak-tasting cold coffee.
Coffee-to-Water Ratio
The ratio of Nescafé to water is crucial for creating the concentrated coffee base.
- What to Check: The recipe typically uses a 1:1 ratio of Nescafé to sugar, dissolved in a small amount of hot water. For example, 2 tablespoons of Nescafé and 2 tablespoons of sugar dissolved in 2-3 tablespoons of hot water.
- What Good Looks Like: A thick, syrupy mixture after dissolving.
- Common Mistake: Using too much water, which dilutes the coffee and sugar mixture too early and makes it harder to achieve a frothy texture.
Cleanliness/Descale Status
While Nescafé cold coffee doesn’t involve a complex brewing machine, general cleanliness is always important.
- What to Check: Ensure all utensils, glasses, and any equipment used (like a blender if you choose to use one) are clean.
- What Good Looks Like: A clean and hygienic preparation area.
- Common Mistake: Neglecting to clean the tools used, which can transfer unwanted flavors or bacteria to your drink.
Step-by-Step: How to Make Cold Coffee From Nescafé
This workflow guides you through creating a delicious Nescafé cold coffee, focusing on achieving that perfect frothy texture.
1. Gather Your Ingredients:
- What to do: Have your Nescafé instant coffee, sugar, cold milk, ice cubes, and a small amount of hot water ready.
- What “good” looks like: All necessary items are within reach on a clean surface.
- Common mistake: Realizing you’re missing an ingredient halfway through. Measure and gather everything first.
2. Measure Coffee and Sugar:
- What to do: In a small bowl or mug, measure out your Nescafé instant coffee and sugar. A common starting point is a 1:1 ratio (e.g., 2 tablespoons of Nescafé to 2 tablespoons of sugar).
- What “good” looks like: Precisely measured coffee and sugar, ready for the next step.
- Common mistake: Eyeballing the amounts, which can lead to an overly sweet or too bitter drink. Use measuring spoons for consistency.
3. Add Hot Water:
- What to do: Pour a very small amount of hot (not boiling) water into the bowl with the coffee and sugar. Start with about 2-3 tablespoons for the measured amounts above.
- What “good” looks like: The water is just enough to help dissolve the coffee and sugar into a thick paste or syrup.
- Common mistake: Adding too much water, which dilutes the mixture and makes it harder to achieve froth.
4. Dissolve and Mix:
- What to do: Stir the mixture vigorously with a spoon or small whisk until the coffee and sugar are completely dissolved.
- What “good” looks like: A smooth, uniform, syrupy consistency with no visible sugar granules or undissolved coffee.
- Common mistake: Not stirring enough, leaving behind gritty sugar that won’t dissolve properly.
5. Create the Frothy Base:
- What to do: This is where the magic happens. Whisk or beat the dissolved coffee mixture vigorously for several minutes. You can do this with a hand whisk, an electric hand mixer, or even by vigorously shaking it in a sealed jar or shaker.
- What “good” looks like: The mixture will become lighter in color, thicker, and develop a creamy, frothy foam on top. It should hold its shape somewhat.
- Common mistake: Not whisking long enough. Insufficient whisking will result in a thin, watery coffee layer and less foam.
6. Chill Your Milk:
- What to do: While you’re whisking, ensure your milk is thoroughly chilled in the refrigerator.
- What “good” looks like: Very cold milk, straight from the fridge.
- Common mistake: Using room temperature or slightly cool milk, which will result in a less refreshing drink and melt the ice too quickly.
7. Prepare Your Glass:
- What to do: Fill your serving glass with ice cubes.
- What “good” looks like: A glass packed with ice, ready to chill your coffee.
- Common mistake: Using too few ice cubes, which won’t keep the drink cold for long enough.
To best enjoy your homemade Nescafé cold coffee, make sure you have the right serving vessel. These stylish iced coffee glasses are perfect for showcasing your creation and keeping it perfectly chilled.
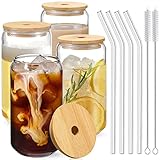
- PRODUCT CONFIGURATION: Drinking glass set includes 4 glass cups [ Diameter - 3 inches, Height - 5.6 inches ],4 nature bamboo lids, 4 reusable glass straws and 2 cleaning brushes, Classic design tumbler
- DURABLE and SAFE: The glasses are made of high-quality durable clear glass, Lead-free and BPA-free. It can be used safely for a long time. This thick clear glass can withstand the sudden changes in the temperature difference between -68°F to 212°F, making them dishwasher safe. If you want to decorate this glass, you can do DIY easily without breakage
- MULTI-PURPOSE: The glassware Great for any Occasion, any hot and cold drinks, home essentials. It is widely loved by families, kitchen, breweries, cafes, bars and restaurants. You can use it to make perfect tea, bubble Pearl Milk Tea, soda, water, iced coffee, smoothie, fruit juice or any other interesting holiday drinks
- AMAZING GIFT: This jar is very fashionable, aesthetic and characteristic. Excellent workmanship. Perfect Gifts for Women, House warming gifts, Tea mug Sets, Highball Glasses, Home Bar Accessories, Birthdays, Graduation, Weddings and Christmas Gifts
- SATISFIED SERVICE: This glass set is packaged in the heavy bubble holder and thick carton box to prevent damage while in transport. If the glass set you received was damaged or imperfect or you are not satisfied, we will offer a satisfactory solution
8. Add the Frothy Coffee:
- What to do: Spoon or pour the frothy Nescafé mixture over the ice in your glass.
- What “good” looks like: A layer of rich, foamy coffee sitting on top of the ice.
- Common mistake: Pouring too quickly, which can cause the foam to deflate prematurely.
9. Pour in Cold Milk:
- What to do: Slowly pour the chilled milk over the frothy coffee and ice.
- What “good” looks like: The milk will layer over the coffee, creating a beautiful gradient.
- Common mistake: Pouring too fast, which can mix the layers too much initially and reduce the visual appeal.
10. Stir Gently (Optional):
- What to do: You can either enjoy the layered effect or gently stir the milk and coffee mixture together with a straw or spoon.
- What “good” looks like: A uniform, creamy coffee color, or a beautiful layered drink.
- Common mistake: Stirring too vigorously, which can break down the foam too much.
11. Taste and Adjust:
- What to do: Take a sip. If it’s not sweet enough, you can add a touch more sugar and stir. If it’s too strong, add a splash more milk.
- What “good” looks like: A perfectly balanced, refreshing cold coffee tailored to your taste.
- Common mistake: Not tasting and adjusting, leading to a less-than-ideal flavor profile for your personal preference.
Common Mistakes (and What Happens If You Ignore Them)
| Mistake | What it Causes | Fix |
|---|---|---|
| Using cold water to dissolve coffee | Clumps of undissolved coffee and sugar; uneven sweetness. | Always use hot water to dissolve Nescafé and sugar initially. |
| Not whisking the coffee mixture long enough | Thin, watery coffee base; very little to no foam; weak coffee flavor. | Whisk vigorously for several minutes until light, frothy, and thickened. |
| Using room temperature milk | Drink is not cold enough; ice melts too quickly; less refreshing. | Ensure milk is thoroughly chilled before pouring. |
| Adding too much water to the coffee base | Diluted flavor; difficult to achieve a good froth; less intense coffee taste. | Use minimal hot water to create a concentrated syrup or paste. |
| Not using enough ice | Drink warms up too fast; loses its refreshing quality quickly. | Fill your serving glass generously with ice cubes. |
| Using stale instant coffee | Weak, flat, or off-flavor; lacks the characteristic Nescafé aroma and taste. | Store Nescafé in an airtight container and use within its best-by date. |
| Not cleaning mixing tools | Off-flavors or residue from previous uses can taint the coffee. | Always use clean spoons, bowls, and shakers for preparation. |
| Over-stirring after combining | Can break down the desirable foam and creamy texture. | Stir gently only if needed to combine layers, or enjoy layered. |
| Incorrect coffee-to-sugar ratio | Too sweet, too bitter, or not sweet enough for personal preference. | Start with a 1:1 ratio of Nescafé to sugar and adjust to taste. |
Decision Rules for Nescafé Cold Coffee
- If your dissolved coffee mixture is too thin, then you likely used too much hot water, and you’ll need to whisk for a longer time to thicken it.
- If the final drink tastes weak, then you may need to increase the amount of Nescafé or sugar in your next batch, or ensure you’re using freshly opened instant coffee.
- If your cold coffee isn’t cold enough, then ensure your milk was very cold and you used plenty of ice.
- If you see clumps of sugar at the bottom, then you didn’t stir enough or used cold water to dissolve the coffee initially.
- If the foam is not forming, then you need to whisk the dissolved coffee and sugar mixture for a longer duration.
- If the drink is too sweet, then reduce the amount of sugar next time or add a bit more milk.
- If the drink is too bitter, then reduce the amount of Nescafé next time or increase the sugar.
- If you want a stronger coffee flavor, then increase the Nescafé proportion relative to sugar and water in the initial dissolving step.
- If you prefer a milder coffee flavor, then decrease the Nescafé proportion or add a little extra milk.
- If you want a creamier texture, then consider using whole milk or adding a splash of cream before stirring.
FAQ
Q: Can I use decaf Nescafé for this recipe?
A: Yes, you can absolutely use decaffeinated Nescafé instant coffee. The process and ratios will remain the same, allowing you to enjoy a decaf version of this cold coffee.
Q: What kind of milk is best for Nescafé cold coffee?
A: Whole milk generally provides the creamiest texture, but you can use any milk you prefer, including skim, 2%, almond, soy, or oat milk. The fat content will affect the richness.
Q: How long does the frothy coffee mixture last if I make extra?
A: The frothy mixture is best used immediately after whisking for optimal texture. If you have leftovers, store them in an airtight container in the refrigerator for up to 24 hours, but you may need to re-whisk or accept a less frothy consistency.
Q: Can I add flavorings like chocolate syrup or vanilla extract?
A: Yes, feel free to experiment! You can add a tablespoon of chocolate syrup to the coffee and sugar mixture before whisking, or a splash of vanilla extract to the milk for added flavor.
Q: Is it essential to use hot water to dissolve the Nescafé and sugar?
A: It is highly recommended. Using hot water ensures that the coffee and sugar dissolve completely, creating a smooth base and making it much easier to achieve the desired frothy texture. Cold water will result in a gritty drink.
Q: What if I don’t have a whisk? Can I still make this?
A: Yes, you can. A fork can be used for whisking, though it will take longer. Alternatively, you can place the coffee, sugar, and hot water in a tightly sealed jar or shaker and shake it vigorously for several minutes.
Q: How can I make this recipe sugar-free?
A: You can substitute the sugar with your preferred sugar-free sweetener. Adjust the amount according to the sweetener’s packaging and your personal taste preference.
What This Page Does Not Cover (And Where to Go Next)
- Detailed nutritional information for specific milk types or sweetener substitutions.
- Next: Consult product packaging or online nutritional databases.
- Advanced coffee brewing techniques beyond instant coffee preparation.
- Next: Explore guides on pour-over, espresso, or French press brewing.
- Recipes for homemade syrups or coffee liqueurs.
- Next: Look for specialized recipe blogs focusing on coffee shop-style drinks.
- Commercial-grade coffee maker maintenance and troubleshooting.
- Next: Refer to the manufacturer’s manual for your specific machine.