Making Ice Cream in a Coffee Can: A Fun Project
Quick answer
- Gather your ingredients: cream, sugar, flavorings, and ice.
- You’ll need a large coffee can and a smaller, sealable container.
- Pack the large can with ice and rock salt.
- Place the smaller container (with your ice cream mix) inside the larger can.
- Seal both cans tightly.
- Roll and shake the cans for about 10-15 minutes.
- Enjoy your homemade ice cream!
This coffee can method is a fun ice cream maker alternative. If you prefer a more traditional approach but still want a DIY feel, consider a compact electric ice cream maker.
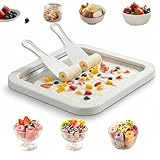
- Ice Cream Roll Tray for Home Use Designed for making rolled-style ice cream at home. Can be used with various liquid dessert mixtures such as milk-based or fruit-based recipes.
- Manual Operation, No Power Needed Requires pre-freezing before use. Pour the prepared mixture onto the cold surface and scrape with the included tools. No electrical components involved.
- Stainless Steel Freezing Plate Tray is made of stainless steel intended for food contact. The cold surface helps freeze mixtures during preparation for repeated use.
- Includes Tray and Scrapers Set includes one freezing plate and two scrapers. Tray size is approximately 9 x 7 inches. Suitable for preparing multiple servings in one session.
- Simple Structure and Cleaning Consists of a flat freezing plate and handheld tools only. Hand wash after use. Compact form allows for standard kitchen storage.
Who this is for
- Anyone looking for a fun, hands-on project, especially with kids.
- Campers or outdoor enthusiasts wanting a simple dessert without fancy equipment.
- People who appreciate a bit of DIY and a nostalgic, old-school approach to treats.
What to check first
- Can Size and Seal: Make sure your large coffee can is clean and the lid seals well. The inner container needs a lid that won’t leak. A quart-sized ice cream container or a sturdy plastic container works.
- Ice and Salt: You’ll need plenty of ice – enough to fill the large can around the inner container. Rock salt is key; it lowers the freezing point of the ice, making it colder. Table salt works in a pinch but rock salt is better.
- Ice Cream Mix Ingredients: Have your cream, sugar, and flavorings ready. A basic vanilla is easy. Think about adding chocolate chips or fruit after it’s churned.
- Protective Gear: Gloves or a towel are a good idea. That can gets really cold.
Rock salt is key for this project; it lowers the freezing point of the ice, making it colder. You can find good quality rock salt on Amazon.

- Genuine Celtic Sea Salt: Sante Naturelle French Sea Salt is meticulously hand-harvested from the pristine French ocean marshes using a traditional method perfected over a thousand years ago.
- 100% Natural and Unrefined: Our French Sea Salt is unprocessed, toxin-free, and hand-harvested. It retains a slightly moist texture, created naturally as seawater evaporates under the sun and wind, allowing the salt to crystallize just as nature intended.
- Rich Mineral Composition: Packed with over 82 essential minerals and micronutrients vital for health, including magnesium, calcium, potassium, and iron. Rich in electrolytes, it supports hydration, digestion, and overall mineral balance, promoting health and well-being.
- Exquisite Flavor and Texture: Sante Naturelle French Sea Salt offers a more complex and nuanced flavor than regular table salt, imparting a subtle and delightful saltiness to dishes.
- Versatile Uses: Ideal for both cooking and finishing, Sante Naturelle French Sea Salt enhances the natural flavors of foods. Use it in boiling water, marinades, or as a flavorful sprinkle over dishes just before serving.
Step-by-step (brew workflow)
1. Prepare the Inner Container: Pour your ice cream mixture into the smaller, sealable container. Don’t fill it to the brim; leave some space for expansion as it freezes.
- What good looks like: A tightly sealed container with about an inch or two of headspace.
- Common mistake: Overfilling the container. This can cause the lid to pop off or the mix to spill. Leave room!
2. Pack the Outer Can with Ice: Fill the bottom of the large coffee can with a layer of ice.
- What good looks like: A solid base of ice.
- Common mistake: Not enough ice. You need enough to surround the inner container.
3. Add Rock Salt: Sprinkle a generous amount of rock salt over the ice. About one part salt to three parts ice is a good starting point.
- What good looks like: Salt mixed evenly with the ice.
- Common mistake: Skimping on salt. This is what makes the magic happen.
4. Place Inner Container: Carefully place the sealed inner container into the large can, right in the middle of the ice and salt mixture.
- What good looks like: The smaller container is centered and surrounded by ice.
- Common mistake: Letting the inner container touch the sides of the outer can directly. The ice needs to surround it.
5. Add More Ice and Salt: Fill the rest of the large can with ice, adding more salt as you go, until the inner container is mostly submerged.
- What good looks like: The inner container is well-covered by the ice/salt mixture.
- Common mistake: Not filling the can completely. You want maximum cold contact.
6. Seal the Outer Can: Securely place the lid on the large coffee can. Make sure it’s on tight.
- What good looks like: A sealed can that won’t let slush escape.
- Common mistake: A loose lid. This leads to a messy situation and less effective freezing.
7. Start Rolling and Shaking: This is the fun part. Roll the can back and forth on the ground or shake it vigorously. Keep at it!
- What good looks like: Continuous motion, keeping the ice and salt working.
- Common mistake: Stopping too soon. Patience is key here.
8. Check for Freezing: After about 10 minutes, carefully open the outer can and check the inner container. The edges should start to freeze.
- What good looks like: Some solidification around the edges of the ice cream mix.
- Common mistake: Expecting it to be fully frozen too quickly. It takes time.
9. Continue Churning: If it’s not firm enough, reseal the outer can and continue rolling and shaking for another 5-10 minutes.
- What good looks like: The ice cream is thickening and starting to hold its shape.
- Common mistake: Giving up before it reaches the desired consistency.
10. Serve: Once it’s reached a scoopable consistency, carefully remove the inner container. You might need to wipe off some salty slush.
- What good looks like: Ice cream that’s firm but scoopable.
- Common mistake: Trying to scoop directly from the frozen outer can.
11. Optional: Harden: For a firmer texture, you can place the inner container in a freezer for an hour or two.
- What good looks like: A firmer, more traditional ice cream texture.
- Common mistake: Not realizing it will be softer than store-bought ice cream right out of the can.
Common mistakes (and what happens if you ignore them)
| Mistake | What it causes | Fix |
|---|---|---|
| Using table salt instead of rock salt | Slower freezing, less cold mixture | Use rock salt for best results. |
| Not enough ice or salt | Ice cream won’t freeze properly or takes too long | Ensure a generous amount of both ice and rock salt. |
| Inner container leaks | Messy process, loss of ice cream mix | Use a container with a truly leak-proof lid. |
| Overfilling the inner container | Lid pops off, mix spills out | Leave plenty of headspace for expansion. |
| Loose lid on the outer can | Slush leaks out, less effective freezing | Seal the outer can tightly. |
| Not rolling/shaking enough | Ice cream doesn’t churn, remains liquid | Keep rolling and shaking until it thickens. |
| Not leaving room for expansion | Lid forced off, mess and potential contamination | Always leave space in the inner container. |
| Not cleaning the cans thoroughly | Off-flavors in the ice cream | Wash cans well before and after use. |
| Not wearing gloves or using a towel | Uncomfortably cold hands | Protect your hands from the extreme cold. |
Decision rules (simple if/then)
- If the ice cream mix is still too liquid after 10 minutes of shaking, then add more ice and salt to the outer can because you might not have had enough to start.
- If the inner container lid is bulging, then release some pressure carefully because the mix is expanding too much.
- If the ice cream is too hard to scoop, then let it sit at room temperature for a few minutes because it will soften.
- If you’re making this with young kids, then supervise closely and let them do the rolling and shaking part because it’s safe and fun for them.
- If you want a richer ice cream, then use heavy cream instead of half-and-half because it has more fat.
- If you notice a salty taste, then rinse the inner container thoroughly before serving because some brine might have gotten in.
- If you don’t have rock salt, then use coarse sea salt if available, but know it might not work as efficiently because it’s not as pure.
- If the outer can lid is difficult to remove, then let it sit for a minute to allow the ice to melt slightly because the seal can freeze shut.
- If you want to add mix-ins like chocolate chips, then add them in the last few minutes of shaking or stir them in after it’s mostly frozen because they can get in the way of churning.
- If the ice cream is too icy, then you may have churned it too quickly or not had enough fat content in your mix, so try a richer base next time.
FAQ
How long does it take to make ice cream this way?
It usually takes about 15 to 25 minutes of active rolling and shaking. The exact time depends on how cold your ice/salt mixture gets and how much you work at it.
Can I use any kind of can?
A standard large coffee can (like a 3-pound can) works well. Make sure it’s clean and has a lid that seals tightly. Avoid cans with sharp edges.
What kind of salt should I use?
Rock salt is best because it’s impure and lowers the freezing point of ice more effectively. If you can’t find rock salt, coarse sea salt or kosher salt can work, but they might not be as efficient.
What if my ice cream is too soft?
You can put the inner container in a regular freezer for an hour or two to harden it up. This method makes a softer, more “soft-serve” style ice cream right away.
Can I make chocolate ice cream?
Absolutely! Just add cocoa powder to your cream and sugar mixture before you start. You might need to adjust the sugar slightly.
Is this safe for kids to do?
Yes, it’s a great project for kids, but adult supervision is always recommended, especially when handling ice and potentially cold cans. Let them do the rolling and shaking!
What happens if the ice cream mix leaks into the ice?
It makes a mess and can contaminate your ice cream. Always ensure your inner container has a very secure, leak-proof lid.
Can I use a different container instead of a coffee can?
You could, but a coffee can is ideal because it’s sturdy and the lid seals well. A large, strong plastic container with a lid could potentially work.
What this page does NOT cover (and where to go next)
- Detailed recipes for various ice cream flavors. (Look for ice cream recipe books or websites.)
- The science behind freezing point depression. (Explore basic chemistry resources.)
- Comparisons to electric ice cream makers. (Research different types of ice cream appliances.)
- Advanced churning techniques for smoother ice cream. (Search for professional ice cream making guides.)