Identifying the Water Reservoir on Your Coffee Maker
Quick answer
- Most coffee makers have a clear or translucent tank on the side or back.
- Look for a lid that opens and a spout or opening for filling.
- Some models have removable reservoirs; check for a handle or base that detaches.
- Drip machines usually have it integrated, while others like espresso machines might have a rear-mounted, often removable, tank.
- If you’re still stumped, your brewer’s manual is your best friend.
- A full reservoir is key for a decent cup.
Who this is for
- New coffee maker owners figuring out the basics.
- Anyone who’s moved their machine and can’t find the darn thing.
- Folks troubleshooting why their coffee isn’t brewing properly.
What to check first
Brewer type and filter type
This is your starting point. Is it a classic drip machine, a pour-over setup, an espresso maker, or something else? The reservoir’s location and design depend heavily on this. For example, a simple drip machine likely has an integrated tank, while a fancy espresso machine might have a removable one tucked away. Filter type matters less for locating the reservoir itself, but it’s good to know what you’re working with.
If you’re unsure about your brewer type, a good starting point is to identify your coffee maker water reservoir. This will help you understand its design and location.
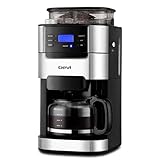
- 【𝟐-𝟏𝟎 𝐂𝐮𝐩 𝐅𝐥𝐞𝐱𝐢𝐛𝐥𝐞 𝐂𝐚𝐩𝐚𝐜𝐢𝐭𝐲】Our drip coffee maker with built-in grinder lets you brew anywhere from 2 to 10 cups. Simply use the “POWDER 2-10” button to adjust the ratio of coffee to water for your perfect strength.
- 【𝐂𝐮𝐬𝐭𝐨𝐦𝐢𝐳𝐚𝐛𝐥𝐞 𝐁𝐫𝐞𝐰 & 𝐆𝐫𝐢𝐧𝐝】This all-in-one machine with a burr grinder offers 3 grind strength levels and 8 adjustable settings. Grind fresh whole beans right before brewing for consistently smooth, flavorful coffee.
- 【𝐑𝐞𝐮𝐬𝐚𝐛𝐥𝐞 & 𝐄𝐚𝐬𝐲-𝐂𝐥𝐞𝐚𝐧 𝐅𝐢𝐥𝐭𝐞𝐫】The coffee maker includes a durable reusable filter that is easy to clean—just rinse with water for quick maintenance and less waste.
- 【𝐈𝐦𝐩𝐨𝐫𝐭𝐚𝐧𝐭 𝐍𝐨𝐭𝐞】Product dimensions: 12.36"D x 8.38"W x 16.93"H. Please measure your countertop and cabinet space beforehand to ensure proper fit.
- 【𝐏𝐫𝐞-𝐁𝐫𝐞𝐰 𝐄𝐱𝐭𝐫𝐚𝐜𝐭𝐢𝐨𝐧 𝐓𝐞𝐜𝐡𝐧𝐨𝐥𝐨𝐠𝐲】Featuring advanced pre-brew technology, this black & silver coffee maker evenly saturates coffee grounds through precise temperature control, unlocking richer flavor and aroma before full brewing.
Water quality and temperature
While not directly about finding the reservoir, good water is crucial for good coffee. Always use filtered water if your tap water is hard or has a funky taste. The reservoir is where this water lives before it hits the grounds. For most drip machines, the water heats up inside the machine, so you don’t need to worry about pre-heating it.
Grind size and coffee freshness
Again, this is about the coffee, not the reservoir. But knowing your coffee is fresh and ground to the right size for your brewer is essential for a good brew. The reservoir just holds the water. Make sure your coffee is ready to go before you start hunting for the water tank.
Coffee-to-water ratio
This ratio is what determines the strength of your coffee. You’ll measure your coffee grounds and your water. The reservoir’s capacity will dictate how much coffee you can make at once. A common starting point is around 1:15 to 1:18 (coffee to water by weight), but check your brewer’s recommendations.
Cleanliness/descale status
A clean brewer makes better coffee. If your reservoir is hard to find, it might be time for a clean-up anyway. Mineral buildup can make parts sticky or obscure markings. Regularly descaling your machine ensures it runs smoothly and your coffee tastes its best.
Step-by-step (brew workflow)
Locate the Reservoir
- What to do: Visually inspect the exterior of your coffee maker. Look for a clear or translucent tank, often with water level markings. It’s usually on the side or back.
- What “good” looks like: You can clearly see the tank, and it’s easy to access for filling.
- A common mistake and how to avoid it: Assuming it’s always on the side. Some machines, especially single-serve or espresso types, have rear-mounted or even removable reservoirs. Don’t give up; check all sides.
Identify the Filling Port
- What to do: Once you’ve found the tank, look for a lid or opening designed for adding water. This is usually at the top.
- What “good” looks like: The lid opens smoothly, revealing a clear path to pour water in.
- A common mistake and how to avoid it: Trying to pour water directly into the coffee basket area. That’s for grounds, not water. Stick to the designated filling port.
Check for Removable Reservoirs
- What to do: If the reservoir isn’t integrated, see if it detaches. Look for a handle or a base that seems to slide or lift out.
- What “good” looks like: The reservoir comes out easily, allowing you to fill it at the sink.
- A common mistake and how to avoid it: Forcing a non-removable reservoir. If it doesn’t pull out with moderate effort, it’s probably fixed in place.
When checking for removable reservoirs, look for a handle or a base that seems to slide or lift out. If you have a removable coffee maker reservoir, this makes filling at the sink much easier.

- 4 WAYS TO BREW ICED OR HOT COFFEE: This single serve coffee maker can brew a cup of iced or hot coffee with a K-Cup * pod or ground coffee.
- COMPACT, SPACE-SAVING DESIGN: Since it's only 5.5" wide, this single serve coffee machine easily fits every kitchen.
- BREW 5 SERVINGS WITHOUT REFILLING THE REMOVABLE 45 OZ. WATER RESERVOIR: Brew up to five 8 oz. cups of coffee without refilling — the water reservoir saves you time because there's no need to manually pour water into the coffeemaker every time you brew.
- CUSTOMIZE HOT COFFEE WITH REGULAR OR BOLD BREW STRENGTH: This single serve coffee brewer allows you to control the strength of your coffee with your choice of regular and bold brewing options.
- FAST BREWING — BREW A SINGLE CUP IN 2 MINUTES: In the morning, every second counts. This k cup coffee maker prepares an 8 oz. cup of hot coffee in 2 minutes so you have more time to enjoy your coffee.
Note Water Level Indicators
- What to do: Observe any markings on the reservoir or the machine itself. These indicate the amount of water for a certain number of cups.
- What “good” looks like: Clear lines or numbers that help you measure the right amount of water.
- A common mistake and how to avoid it: Overfilling. This can lead to spills or an over-extracted, bitter brew. Stick to the indicated cup levels.
Fill with Water
- What to do: Pour fresh, preferably filtered, water into the reservoir up to the desired level.
- What “good” looks like: The water is clear, and you’ve reached your target line without spilling.
- A common mistake and how to avoid it: Using hot water. Most machines are designed to heat the water themselves. Adding hot water can sometimes damage components or affect the brewing temperature.
Close the Filling Port
- What to do: Securely close the lid or cap of the water reservoir.
- What “good” looks like: The lid clicks shut or seals properly, preventing steam from escaping during brewing.
- A common mistake and how to avoid it: Leaving the lid ajar. This can cause steam to escape, potentially affecting brewing temperature and pressure, and can be a minor safety hazard.
Ensure Proper Seating (if removable)
- What to do: If your reservoir is removable, make sure it’s properly seated back in the machine.
- What “good” looks like: The reservoir is snug and secure, with no wiggling or gaps.
- A common mistake and how to avoid it: Not pushing it in all the way. This can prevent the machine from drawing water, leading to a brew cycle that starts and stops or fails entirely.
Start the Brew Cycle
- What to do: Add your coffee grounds to the filter basket and press the start button.
- What “good” looks like: The machine begins to heat the water and dispense it over the grounds.
- A common mistake and how to avoid it: Forgetting to add coffee. You’ll just get hot water, and it’s a waste of electricity.
Common mistakes (and what happens if you ignore them)
| Mistake | What it causes | Fix |
|---|---|---|
| Not finding the actual reservoir | Can’t brew coffee; frustration | Consult your manual; look for side/rear tanks or removable units. |
| Using tap water with high minerals | Scale buildup, altered taste, reduced machine lifespan | Use filtered water; descale regularly. |
| Overfilling the reservoir | Spills, potential damage to electronics, weak brew | Use water level indicators; don’t go above the max line. |
| Using hot water in the reservoir | Can damage plastic components, affect brew temp | Always use cold or room-temperature water. |
| Leaving the reservoir lid open | Steam loss, inefficient brewing, potential burns | Ensure the lid is securely closed before brewing. |
| Not seating a removable reservoir | Machine won’t draw water, brew cycle fails | Push the reservoir firmly into place until it clicks or feels secure. |
| Assuming all reservoirs look alike | Confusion, incorrect filling technique | Understand your specific machine’s design (integrated vs. removable). |
| Ignoring low water indicators | Brewing with insufficient water, potential burnout | Pay attention to markings; refill when needed. |
| Not checking the manual | Wasted time, potential damage, suboptimal coffee | The manual is your ultimate guide for your specific model. |
Decision rules (simple if/then)
- If the reservoir is clear plastic and on the side, then it’s likely integrated for a drip coffee maker because that’s a common design.
- If you see a handle on a tank that looks like it might detach, then try gently pulling it out because it’s probably a removable reservoir.
- If the back of the machine has a slot with a dark plastic piece, then check if that piece has a handle or can be slid out because it might be a rear-mounted reservoir.
- If your machine is an espresso maker with a portafilter, then the water reservoir is almost certainly on the back or side, often removable, because that’s standard for those units.
- If you can’t find any obvious tank, then consult your coffee maker’s manual because some designs are less intuitive.
- If the markings on the reservoir seem unclear, then use a separate measuring cup to ensure you add the correct amount of water because precision matters for consistent coffee.
- If the reservoir is difficult to access, then consider descaling your machine because mineral buildup can sometimes obscure parts or make them stick.
- If you’re making a single cup, then look for a smaller reservoir or a pod-style machine because those are designed for individual servings.
- If water isn’t flowing during the brew cycle, then check if the reservoir is properly seated (if removable) because a loose connection will prevent water uptake.
- If the water level seems too low for the number of cups you want, then add more water because under-filling will result in a weak brew.
FAQ
Q: Where is the water reservoir on a Keurig?
A: On most Keurig models, the water reservoir is a removable, clear plastic tank located on the side or back of the machine. It usually has a handle for easy removal and filling.
Q: My coffee maker doesn’t seem to have a water tank. What gives?
A: Some very basic or older drip coffee makers might have a water inlet directly on the top of the machine where you pour water into a chute, rather than a distinct tank. Check the top area carefully.
Q: Can I use any container to fill the reservoir if mine is removable?
A: While you can use any clean container, it’s best to fill it directly at the sink if possible. Using a pitcher can help prevent spills and ensure you’re adding the right amount of water.
Q: What if my reservoir is opaque or colored?
A: If your reservoir isn’t clear, look for external markings on the machine itself that indicate water levels, or check the lid for fill lines. If it’s truly opaque with no markings, you’ll need to rely on your manual or a measuring cup.
Q: How often should I clean the water reservoir?
A: It’s a good idea to rinse and wipe down your reservoir weekly and descale your machine every 2-3 months, depending on your water hardness and usage. This prevents mold and mineral buildup.
Q: My reservoir has a filter in it. Do I need to replace it?
A: Yes, if your reservoir has a water filter (often a charcoal filter), you’ll need to replace it periodically according to the manufacturer’s recommendations. This improves water quality for better-tasting coffee.
Q: What happens if I put coffee grounds in the water reservoir?
A: That’s a big no-no! Coffee grounds in the reservoir will clog the machine, potentially damage it, and make a huge mess. Always put grounds in the designated filter basket.
Q: Is it okay to leave water in the reservoir overnight?
A: For most machines, it’s fine for a day or two, but it’s best practice to empty and rinse the reservoir if you won’t be using the machine for a while. Stagnant water can breed bacteria.
What this page does NOT cover (and where to go next)
- Specific troubleshooting for error codes or unusual noises from your brewer. (Consult your manual or manufacturer support).
- Detailed cleaning and descaling procedures for every single coffee maker model. (Check your brewer’s manual for exact instructions).
- Advanced brewing techniques like blooming or specific pour-over methods. (Explore coffee brewing guides online or in books).
- The best coffee beans for your brewing method. (Visit a local roaster or specialty coffee shop).