How to Steep Coffee Without A Coffee Maker: Step-by-Step Guide
Quick answer
- Use coarse grounds for steeping.
- Heat water to just off the boil, around 200°F.
- Aim for a 1:15 to 1:18 coffee-to-water ratio.
- Steep for 4 minutes, then stir gently.
- Strain thoroughly to remove grounds.
- Experiment with brew time for strength.
Who this is for
- Campers and travelers who need coffee on the go.
- Anyone whose coffee maker is on the fritz.
- Coffee lovers curious about simpler brewing methods.
What to check first
Brewer type and filter type
You’re not using a traditional brewer here, so this is about your straining method. Are you using a fine-mesh sieve, cheesecloth, or a French press plunger? A finer mesh will catch more sediment. A coarser one might let a little more through, giving a fuller body. Think about what you have available.
Water quality and temperature
Good water makes good coffee. If your tap water tastes funky, your coffee will too. Filtered water is usually best. For temperature, you want it hot, but not boiling. Boiling water can scorch the grounds. Aim for around 200°F. A kettle with a thermometer is handy, but if you don’t have one, just let boiling water sit for about 30 seconds before pouring.
For precise water temperature control, a coffee kettle with a built-in thermometer is incredibly helpful to avoid scorching your grounds.
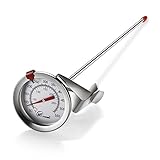
- Multi-purpose: Mechanical induction, can be directly and accurately measure the oil pan, frying, barbecue temperature control.
- Measuring a wide range: This Candy thermometer has a range of 50 degrees Fahrenheit to 550 degrees Fahrenheit, measurable boiling or frozen things.
- Compact stainless steel construction: The durable, stainless-steel casing provides strength and corrosion resistance. Easy to use and easy to clean.
- Equipped with temperature clamp: Can be used to hold the thermometer when the temperature is measured, which prevents the thermometer from falling into the container at the measured temperature
- Reliable and friendly customer service: Always be ready to respond within a 24-hour time frame.
Grind size and coffee freshness
This is key for steeping. You want a coarse grind, like sea salt. Too fine, and you’ll get mud in your cup. Too coarse, and the flavor won’t extract well. Freshly ground beans are always superior. If you can, grind them right before you brew. Pre-ground coffee loses its zing fast.
Coffee-to-water ratio
This is how much coffee to how much water. A good starting point is 1:15. That means for every gram of coffee, use 15 grams of water. Or, for a more US-friendly measure, about 2 tablespoons of coffee for every 6 oz of water. You can adjust this later based on how strong you like it.
Cleanliness/descale status
Even without a machine, cleanliness matters. Make sure your kettle, your stirring utensil, and your straining device are all clean. Old coffee oils can turn bitter and ruin a fresh brew. If you’re using a French press, make sure the plunger screen is clean.
Step-by-step (brew workflow)
1. Measure your coffee. Use a scale for precision or tablespoons. For example, start with 2 tablespoons of coarsely ground coffee.
- What “good” looks like: The right amount of coffee for your desired cup strength.
- Common mistake: Guessing the amount. Too little coffee means weak coffee. Too much means wasted beans and potentially bitter coffee. Measure it out.
Using a coffee scale for measuring your grounds ensures consistency and helps you nail the perfect coffee-to-water ratio every time.

- 𝗕𝗮𝗿𝗶𝘀𝘁𝗮-𝗟𝗲𝘃𝗲𝗹 𝗣𝗿𝗲𝗰𝗶𝘀𝗶𝗼𝗻: Featuring a 0.1 g sensor with rapid refresh rates, this coffee weight scale responds instantly to changes, giving you fine control over extraction for consistent pour-over and espresso results.
- 𝗜𝗻𝘁𝗲𝗴𝗿𝗮𝘁𝗲𝗱 𝗕𝗿𝗲𝘄 𝗧𝗶𝗺𝗲𝗿: This espresso weight scale includes a built-in timer to track bloom and extraction with count-up or down control, and auto shutoff extends battery life between sessions.
- 𝗗𝘂𝗿𝗮𝗯𝗹𝗲, 𝗦𝗽𝗶𝗹𝗹-𝗥𝗲𝘀𝗶𝘀𝘁𝗮𝗻𝘁 𝗕𝘂𝗶𝗹𝗱: A heat-resistant, dishwasher-safe silicone cover with an engineered fit shields the platform from spills and hot gear. The grooved surface stabilizes your brewing setup, making it an ideal scale for coffee.
- 𝗩𝗲𝗿𝘀𝗮𝘁𝗶𝗹𝗲 𝗠𝗲𝗮𝘀𝘂𝗿𝗲𝗺𝗲𝗻𝘁 𝗢𝗽𝘁𝗶𝗼𝗻𝘀: Quick-tare and multiple units - g, oz, lb, ml, and fl oz - make this small coffee scale ideal for weighing beans, shots, or everyday kitchen ingredients.
- 𝗜𝗻𝘁𝘂𝗶𝘁𝗶𝘃𝗲, 𝗪𝗼𝗿𝗸𝗳𝗹𝗼𝘄-𝗙𝗼𝗰𝘂𝘀𝗲𝗱 𝗗𝗲𝘀𝗶𝗴𝗻: A bright, easy-to-read display and simple controls keep your brewing routine smooth. Designed for clarity and clean operation, it also serves as a compact matcha scale.
2. Heat your water. Bring fresh, filtered water to just off the boil (around 200°F).
- What “good” looks like: Water that’s hot enough to extract flavor but not so hot it burns the coffee.
- Common mistake: Using boiling water straight from the kettle. This can lead to a bitter taste. Let it cool for about 30 seconds.
3. Add coffee to your vessel. Pour your measured grounds into a heatproof jar, mug, or French press.
- What “good” looks like: All the coffee grounds are ready to meet the water.
- Common mistake: Adding water first. You want the grounds to be fully saturated when the water hits them.
4. Bloom the coffee (optional but recommended). Pour just enough hot water over the grounds to saturate them. Let it sit for 30 seconds. You’ll see them bubble.
- What “good” looks like: The coffee grounds release CO2, which is a sign of freshness and helps with even extraction.
- Common mistake: Skipping this step. Blooming allows for a more even flavor extraction.
5. Pour the remaining water. Gently pour the rest of your hot water over the grounds.
- What “good” looks like: All the coffee grounds are submerged and ready to steep.
- Common mistake: Pouring too aggressively, which can agitate the grounds unevenly.
6. Stir gently. Give the coffee and water a gentle stir to ensure all grounds are wet.
- What “good” looks like: A brief, gentle mix to break up any dry clumps.
- Common mistake: Over-stirring. This can break up the grounds and lead to a muddier cup.
7. Steep for 4 minutes. Put a lid on your vessel (if you have one) or cover it with a plate. Let it sit.
- What “good” looks like: The coffee is steeping, allowing the flavors to develop.
- Common mistake: Steeping for too short or too long. Too short results in weak coffee; too long can lead to bitterness. 4 minutes is a solid starting point.
8. Break the crust (optional). After 4 minutes, you might see a crust of grounds on top. Gently push them down with a spoon.
- What “good” looks like: The grounds are submerged, encouraging them to sink.
- Common mistake: Not doing this. It can help ensure all grounds are pulled down, making straining easier.
9. Strain the coffee. Carefully pour the steeped coffee through your chosen strainer (sieve, cheesecloth, French press plunger) into your mug.
- What “good” looks like: Clear coffee with minimal sediment.
- Common mistake: Pouring too fast or too much at once. This can clog your strainer and push grounds through.
10. Discard grounds. Once strained, dispose of the wet grounds.
- What “good” looks like: A clean straining device and grounds ready for composting.
- Common mistake: Leaving grounds in the vessel for too long, which can lead to over-extraction and bitterness if any liquid remains.
11. Serve and enjoy. Pour into your favorite mug and savor your hard-earned coffee.
- What “good” looks like: A delicious cup of coffee, brewed by you, no fancy equipment needed.
- Common mistake: Drinking too quickly and noticing sediment. If you find this, strain again or use a finer method next time.
Common mistakes (and what happens if you ignore them)
| Mistake | What it causes | Fix |
|---|---|---|
| Using fine grounds | Muddy coffee, over-extraction, bitter taste | Use a coarse grind (like sea salt). |
| Water too hot (boiling) | Scorched grounds, bitter, harsh flavor | Let water cool to ~200°F (30 seconds off boil). |
| Water too cool | Under-extraction, weak, sour flavor | Ensure water is hot enough to extract properly. |
| Incorrect coffee-to-water ratio | Too weak or too strong/bitter coffee | Start with 1:15 ratio (2 tbsp coffee per 6 oz water) and adjust. |
| Not stirring gently | Uneven extraction, some grounds underdeveloped | Give a brief, gentle stir after adding water. |
| Steeping too long | Over-extraction, bitter, astringent taste | Stick to around 4 minutes for steeping. |
| Steeping too short | Under-extraction, weak, sour, underdeveloped flavor | Increase steep time in 30-second increments. |
| Inadequate straining | Gritty, muddy coffee, unpleasant mouthfeel | Use a fine-mesh sieve, cheesecloth, or French press plunger; strain slowly. |
| Using stale coffee beans | Flat, dull, uninspired flavor | Use freshly roasted and freshly ground beans. |
| Dirty equipment | Off-flavors, rancid taste | Clean all brewing and straining tools thoroughly. |
Decision rules (simple if/then)
- If your coffee tastes bitter, then reduce the steep time or use slightly cooler water because over-extraction causes bitterness.
- If your coffee tastes weak or sour, then increase the coffee-to-water ratio or steep for a bit longer because under-extraction leads to these flavors.
- If you have a lot of sediment in your cup, then use a finer straining method or ensure your grounds are coarser next time because fine particles pass through coarse filters.
- If you’re camping without a kettle, then use water heated over a campfire and let it cool slightly before pouring because direct boiling can scorch grounds.
- If you only have pre-ground coffee, then use it immediately and accept it might be less flavorful because it loses freshness quickly.
- If you want a richer body, then consider using a French press or a cloth filter because they allow more oils to pass through.
- If you’re making coffee for a crowd, then scale up your ingredients proportionally and use a larger vessel for steeping, but be mindful of extraction times.
- If you notice an off-flavor, then check the cleanliness of your equipment first because old coffee oils are a common culprit.
- If your bloom is weak or non-existent, then your coffee might be stale, or your water might not be hot enough because freshness and temperature are key for degassing.
- If you want to experiment, then try adjusting only one variable at a time (grind, time, ratio) to see its specific impact.
FAQ
Can I use any kind of coffee grounds?
It’s best to use coarse grounds. Fine grounds will make your coffee muddy and over-extracted, which tastes bitter. Think of the texture of coarse sea salt.
How long should I steep the coffee?
A good starting point is 4 minutes. If it’s too weak, try 4.5 or 5 minutes. If it’s too bitter, try 3.5 minutes. Adjust based on your taste.
What if I don’t have a fine-mesh sieve?
You can use cheesecloth folded over a few times, a clean bandana, or even the plunger mechanism of a French press if you have one. Just ensure it’s clean.
Will the coffee be as good as machine-brewed coffee?
It can be, but it depends on your ingredients and technique. This method can produce a really satisfying cup, especially if you focus on fresh beans and proper ratios.
Is it okay to have a little bit of coffee sediment in my cup?
Some people don’t mind a little sediment; others find it off-putting. If you prefer a cleaner cup, strain more carefully or use a finer filter.
How do I make it stronger without making it bitter?
Try increasing the coffee-to-water ratio slightly, or extending the steep time by just 30 seconds. Avoid using finer grounds or hotter water, as those are more likely to cause bitterness.
Can I reheat steeped coffee?
It’s best to drink it fresh. Reheating can make coffee taste stale and bitter. If you must, do it gently and for a short time.
What’s the best way to store leftover coffee?
If you have leftovers, let them cool completely and store them in an airtight container in the fridge. It’s not ideal, but better than letting it go to waste.
What this page does NOT cover (and where to go next)
- Specific grind settings for different grinder types.
- Detailed analysis of water mineral content and its impact.
- Advanced extraction theory for espresso or cold brew.
- Recommendations for specific coffee bean origins or roast profiles.
- Comparison of various commercial travel coffee makers.