How To Set The Clock On Your Ninja Coffee Maker
Quick answer
- Press and hold the “Clock” button for a few seconds.
- Use the “Hour” and “Minute” buttons to adjust the time.
- Press “Clock” again to confirm.
- For AM/PM, make sure the indicator is showing correctly.
- If you have a dual timer model, check both.
- It’s usually pretty straightforward, don’t overthink it.
Who this is for
- Anyone who just got a new Ninja coffee maker.
- Folks who recently unplugged their machine and lost the time.
- Campers who like their coffee ready right at dawn.
- Anyone who just wants their appliance to show the right dang time.
If you’re new to Ninja coffee makers, consider a model like the Ninja coffee bar, which offers advanced features and reliable performance for all your brewing needs.
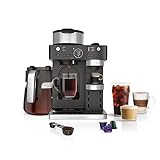
- BARISTA PLUS TECHNOLOGY: The 19-bar pressure system delivers ultra-flavorful espresso with a silky-smooth crema by brewing at the optimal temperature and pressure.
- COFFEEHOUSE DRINKS AT HOME: The built-in, fold-away frother allows you to create espresso-based cappuccinos, lattes, flat whites, and more.
- BREW SINGLE-SERVE ESPRESSO: Choose your favorite espresso capsule and brew up to 3 styles: Espresso (1.35 oz), Lungo (3.75 oz), and Over Ice (1 oz).
- BREW THROUGH COFFEE GROUNDS: Make a Classic, Rich, or Over Ice brew. Select 9 different sizes ranging from cup, to travel mug, to a full 12-cup carafe.
- VERSATILITY TO ENTERTAIN: Treat your guests to an espresso-based coffeehouse drink or brew a 12-cup carafe for the crowd.
What to check first
Brewer type and filter type
Your Ninja might have a few different models. Some are basic, others are fancy with built-in grinders. The clock setting process is usually the same, but it’s good to know what you’re working with. Same goes for filters – paper, permanent, or none at all. This won’t affect the clock, but it’s part of the coffee maker DNA.
Water quality and temperature
This isn’t about setting the clock, obviously. But hey, if you’re fiddling with your machine, make sure your water’s good. Filtered water makes a world of difference in taste. And always use fresh, cold water. Don’t be that person who uses yesterday’s lukewarm stuff.
Grind size and coffee freshness
Again, not directly related to the clock. But good coffee starts here. Use freshly ground beans if you can. The grind size depends on your brew method. Too fine can clog things up, too coarse makes weak coffee. Just a general PSA from your friendly neighborhood coffee nerd.
Coffee-to-water ratio
This is crucial for taste, but not for setting the clock. A good starting point is about 1-2 tablespoons of coffee grounds for every 6 ounces of water. Adjust to your preference. Don’t stress about it for clock-setting purposes.
Cleanliness/descale status
Is your machine clean? A clean coffee maker makes better coffee. If it’s been a while, run a descaling cycle. This usually involves vinegar or a descaling solution. It won’t help you set the clock, but it’ll make your coffee taste better and keep your machine happy.
Step-by-step (brew workflow)
This section is actually about brewing, not setting the clock. I’ll walk you through a typical brew cycle.
1. Add water to the reservoir.
- What to do: Pour fresh, cold water into the designated water tank. Use the markings on the reservoir or your carafe to measure.
- What “good” looks like: The water level is between the minimum and maximum fill lines. You’re using the right amount for the number of cups you want.
- Common mistake: Overfilling or underfilling. Too much water can overflow, too little means a weak brew or an error. Always check the markings.
2. Add coffee grounds to the filter basket.
- What to do: Place your chosen filter (paper or permanent) into the brew basket. Add your pre-measured coffee grounds.
- What “good” looks like: Grounds are evenly distributed in the filter. You’ve used the correct amount for your water volume.
- Common mistake: Not using a filter when required, or using the wrong type. This can lead to grounds in your coffee or a messy cleanup.
3. Place the carafe on the warming plate.
- What to do: Make sure the carafe is correctly positioned on the warming plate. Some machines have a pause-and-serve feature that needs the carafe to be in place.
- What “good” looks like: The carafe is seated properly, and the brew basket is securely closed.
- Common mistake: Forgetting to put the carafe there. This is a classic! The coffee will just pour onto the warming plate. Yikes.
4. Select brew size and strength (if applicable).
- What to do: Use the buttons on your Ninja to choose how many cups you want to brew and what strength you prefer (e.g., classic, rich, bold).
- What “good” looks like: Your desired settings are illuminated or indicated on the display.
- Common mistake: Not selecting the right brew size. Brewing a full carafe when you only want one cup can lead to over-extraction.
5. Press the “Brew” or “Start” button.
- What to do: Hit the main brew button to start the coffee-making process.
- What “good” looks like: The machine powers up, and you hear the brewing sounds begin. The timer might start counting down.
- Common mistake: Pressing the wrong button. Double-check you’ve hit the brew command, not a cleaning cycle or something else.
6. Wait for the brew cycle to complete.
- What to do: Let the machine do its thing. Resist the urge to peek too early unless you have the pause-and-serve feature.
- What “good” looks like: The brewing sounds stop, and the machine indicates it’s done, often with a beep or a light change.
- Common mistake: Trying to pull the carafe out too soon. This can trigger the pause-and-serve, but if you yank it, you might get a mess.
7. Serve your coffee.
- What to do: Carefully remove the carafe from the warming plate and pour your freshly brewed coffee.
- What “good” looks like: Hot, delicious coffee filling your mug.
- Common mistake: Not being careful. The carafe and warming plate are hot! Use caution.
8. Turn off the machine or let the auto-shutoff engage.
- What to do: Most Ninjas have an auto-shutoff feature for the warming plate. You can also manually turn it off.
- What “good” looks like: The warming plate light goes off.
- Common mistake: Leaving the warming plate on indefinitely. This can burn your coffee and is a minor fire hazard. Use the auto-shutoff or turn it off.
Common mistakes (and what happens if you ignore them)
| Mistake | What it causes | Fix |
|---|---|---|
| Not setting the clock correctly | Delayed brews, wrong auto-start times | Follow the button sequence precisely. |
| Using stale coffee grounds | Flat, bitter, or weak coffee | Use freshly roasted and ground beans. |
| Incorrect grind size | Under-extracted (sour) or over-extracted (bitter) | Match grind to brew method (medium for drip). |
| Wrong coffee-to-water ratio | Coffee too weak or too strong | Start with 1-2 tbsp per 6 oz water, adjust to taste. |
| Using tap water with high mineral content | Scaly buildup, off-tasting coffee, shorter machine life | Use filtered or bottled water. |
| Not cleaning the coffee maker regularly | Bitter taste, clogged parts, potential mold | Descale monthly, clean brew basket and carafe after each use. |
| Forgetting to put the carafe in place | Coffee floods the warming plate | Always ensure the carafe is properly seated before brewing. |
| Overfilling the water reservoir | Overflow, messy counter, potential machine damage | Stick to the max fill line indicated on the reservoir. |
| Using paper filters when not needed | Can sometimes impart a papery taste | Use permanent filters or test different paper filter brands. |
| Not pressing “Clock” to confirm time | Time resets or stays on the old setting | Make sure you press “Clock” again after setting Hour/Minute. |
| Not paying attention to AM/PM | Coffee brews at the wrong time of day | Verify the AM/PM indicator is correct before confirming the time. |
Decision rules (simple if/then)
- If your coffee tastes weak, then increase the coffee-to-water ratio because you’re likely not using enough grounds.
- If your coffee tastes bitter, then try a coarser grind or reduce the coffee amount because you might be over-extracting.
- If your machine is making strange noises, then it likely needs descaling because mineral buildup is common.
- If the clock keeps resetting, then check if the machine is properly plugged in or if there’s a power issue because it needs consistent power.
- If you want the coffee ready when you wake up, then set the auto-brew timer after you’ve correctly set the clock.
- If you’re brewing a full pot, then use more grounds than you would for a single cup because the extraction dynamics change.
- If you’re using pre-ground coffee, then try to use it within a few weeks of opening the bag because freshness matters a lot.
- If the brew cycle seems unusually long, then check the water level and filter basket for clogs because a blockage can slow things down.
- If you accidentally set the clock to PM when it’s AM, then simply repeat the clock setting process to correct it because it’s an easy fix.
- If you’re unsure about a specific button’s function, then consult your Ninja coffee maker’s manual because it has all the details.
- If your coffee tastes metallic, then it might be time to descale or check your water source because impurities can affect taste.
FAQ
How do I reset the clock on my Ninja coffee maker if I mess it up?
Just repeat the process. Press and hold the “Clock” button, use “Hour” and “Minute” to adjust, and press “Clock” again to save. It’s pretty forgiving.
Do I need to set the clock every time I unplug my Ninja?
Yes, unfortunately. Like most appliances without a battery backup for the clock, unplugging it will clear the time. So, you’ll have to set it again.
What does the AM/PM indicator mean on my Ninja’s clock?
It simply shows whether the time displayed is in the morning (AM) or the afternoon/evening (PM). Make sure it’s correct for your auto-brew settings.
Can I set the clock to a 24-hour format?
Most Ninja coffee maker models display the time in a 12-hour format with AM/PM indicators. Check your specific model’s manual to be sure, but 24-hour format is rare on these.
My Ninja coffee maker has a dual timer. How do I set both?
Your model might have separate timers for different functions, like a brew timer and a keep-warm timer. Consult your manual; typically, you’ll set the main clock first, then access timer settings individually.
Is there a way to keep the clock display on all the time?
The clock display usually stays on when the machine is powered and the clock is set. It might dim or turn off after a period of inactivity on some models, especially if they have an energy-saving mode.
What if the buttons aren’t responding when I try to set the clock?
Ensure the coffee maker is plugged in and has power. If buttons are still unresponsive, try unplugging the unit for a minute, then plugging it back in to reset it. If it persists, contact Ninja support.
Does setting the clock affect my coffee brewing?
Only if you plan to use the auto-brew feature. The clock needs to be set correctly for the auto-brew timer to start your coffee at the desired time.
What this page does NOT cover (and where to go next)
- Detailed troubleshooting for error codes. (Check your manual or Ninja’s support site.)
- Specific cleaning and descaling instructions for every model. (Your manual is the best guide.)
- Advanced brewing techniques like pour-over or cold brew. (Explore dedicated brewing guides.)
- Comparisons of different Ninja coffee maker models. (Look for product reviews and comparisons.)
- Recipes for coffee drinks. (Plenty of recipe sites out there.)