How to Make Tie Dye Coffee Filters: Step-by-Step Guide
Quick answer
- Grab some plain white coffee filters.
- Use food-grade dyes or natural food items.
- Fold and secure the filter like a tie-dye shirt.
- Apply dye carefully to avoid soaking through too much.
- Let it dry completely before brewing.
- Rinse thoroughly to remove excess dye.
- Brew your coffee as usual.
Who this is for
- Anyone who likes a bit of visual flair with their morning brew.
- Crafters looking for a fun, simple project.
- Home baristas who want to experiment with aesthetics.
What to check first
Brewer type and filter type
Are you using a pour-over, drip machine, or something else? This matters for filter size and shape. Standard cone and basket filters are the most common and easiest to work with for this project. Make sure your filters are plain white or unbleached. Colored filters will just muddy the tie-dye effect.
Water quality and temperature
For brewing, clean, filtered water is key. For dyeing, tap water is usually fine. You’ll want your dye to be a liquid, so room temperature water is perfect for mixing.
Grind size and coffee freshness
This is about the coffee you’ll brew after your filters are ready. A medium grind is typical for most drip and pour-over brewers. Freshly roasted beans, ground just before brewing, will always give you the best flavor.
Coffee-to-water ratio
Again, this is for the brewing step. A good starting point is usually 1:15 to 1:17 – that’s about 1 gram of coffee to 15-17 grams of water. You can adjust this to your taste.
Cleanliness/descale status
Your brewer should be clean for the best coffee. For the tie-dye filters, just make sure your hands and workspace are clean. You don’t want stray coffee grounds getting mixed up in the dye process.
Step-by-step (brew workflow)
This workflow is for the tie-dye process, not brewing coffee.
1. Gather your supplies. You’ll need plain white coffee filters, food-grade dyes (liquid or powder), rubber bands or string, and a workspace protector (like old newspaper or a plastic sheet).
- What “good” looks like: Everything is laid out and ready to go. No last-minute scrambling.
- Common mistake: Forgetting a key item. You’ll end up with a half-finished project and a mess. Keep it simple, keep it organized.
For vibrant colors, make sure to use food-grade dyes. You can find a great selection of liquid and powder options online.
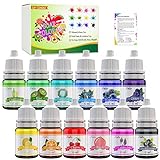
- ✔ATTRACTIVE COLOR - 12 color bright colorants, which easy to disperse and blend, can create a variety of different shades of color as you like. Simply blend them to achieve your own custom colors. Unleash your creativity!
- ✔SAFE - Our dyes are created with food grade ingredients which TOXIC FREE, IRRITATION FREE, STAIN-FREE, VEGAN, CRUELTY FREE, BABY FRIENDLY. Our improved formula can make your DIY soap and bath bomb stay clear and vibrant for longer.
- ✔EASY TO USE - Different from MICA, liquid colorants are no prep required, and doesn't require a higher usage rate. What's more, we provide 14 instructions(e-Guide) including recipes and steps for you to enjoy our water soluble colorants!
- ✔WIDELY USED - The vivid colorants can be used for dyeing CP SOAPS, BATH BOMBS, BATH SALT, SLIME, PLAYDOUGH, LOTIONS etc. Due to the Water Solubility, liquid soap dye would bleed and fade in MP soap. You may add some mica to solve the problem.
- ✔ECONOMICAL - 100% satisfaction guarantee. It comes with 12 bottles(total 2.52oz) of colorants. A few drops will transform your soap from blah to beautiful. Click ‘Add to Cart’ now and enjoy the surprise in every drop!
2. Prepare your dyes. Mix your food-grade dyes according to package directions. If using natural items like beet juice or turmeric, prepare those liquids. Aim for vibrant colors.
- What “good” looks like: The dye is mixed to a good consistency – not too watery, not too thick.
- Common mistake: Dye too concentrated. This can lead to colors bleeding too much or staining your hands excessively. Dilute a bit if needed.
3. Fold the filter. Take a white coffee filter and fold it in half, then in half again, creating a cone shape.
- What “good” looks like: A neat, layered cone.
- Common mistake: Folding unevenly. This can create weird dye patterns and make the filter sit funny in your brewer. Take your time here.
4. Secure the filter. Wrap a rubber band or tie a string tightly around the pointed end of the folded filter, about an inch or two up from the tip. This helps hold the layers together and creates a tie-dye effect.
- What “good” looks like: The rubber band is snug, keeping the layers compressed.
- Common mistake: Not securing it tightly enough. The dye will just seep everywhere, and you won’t get distinct color sections.
To achieve those classic tie-dye sections, you’ll need to secure the filter tightly. A pack of sturdy rubber bands is perfect for this step.

- Quantity: About 200Pieces Light brown rubber bands,rich quantities can keep a long time to use.
- Size: #33:Flat length is approx 90mm/ 3.55inches,3mm/ 0.125inch in width and 1.5mm/ 0.056inch in thickness.
- Material: Made of quality rubber,with strong elasticity and stretch.
- High stretchy: these rubber bands have good elasticity, can help to avoid the strain and injury associated with repetitive banding tasks.
- Rubber bands: can be used to bundle office supplies, trash cans, folders, furniture, DIY art craft in daily life.
5. Apply the dye. Carefully apply small amounts of your prepared dyes to the fabric-like layers of the filter. You can dab, drip, or use a small paintbrush. Avoid saturating the entire filter.
- What “good” looks like: Concentrated pops of color on the filter’s edges and surfaces.
- Common mistake: Drowning the filter. Too much dye will make it soggy and the colors will blend into a muddy mess. Less is more.
6. Let colors spread (optional). You can gently swirl the filter or let it sit for a few minutes to allow the colors to bleed slightly into each other, creating softer transitions.
- What “good” looks like: Subtle color blending, not a uniform wash.
- Common mistake: Over-swirling. You’ll lose all the distinct tie-dye patterns.
7. Dry the filters. Place the dyed filters on a protected surface (like a wire rack over newspaper) and let them air dry completely. This can take several hours, or even overnight.
- What “good” looks like: The filters are completely dry to the touch. No damp spots.
- Common mistake: Rushing the drying process. Brewing with a damp filter can affect extraction and flavor, and you might transfer unwanted dye to your coffee. Patience is key.
8. Rinse thoroughly. Once dry, carefully unfold the filter. Rinse it under cool running water until no more dye comes off. You want to remove any excess dye that could affect your coffee’s taste.
- What “good” looks like: The water runs clear when rinsing the filter.
- Common mistake: Not rinsing enough. This is crucial for flavor. You don’t want your coffee tasting like tie-dye.
9. Dry again. Pat the filter gently with a clean towel or let it air dry again briefly to remove excess moisture before placing it in your brewer.
- What “good” looks like: The filter is damp but not dripping.
- Common mistake: Putting a very wet filter into the brewer. It can disrupt the coffee bed.
10. Brew your coffee. Place the tie-dyed filter in your brewer, add your coffee grounds, and brew as you normally would. Enjoy the visual treat!
- What “good” looks like: A delicious cup of coffee with a pretty filter.
- Common mistake: Overthinking the brew. The tie-dye is just for looks; focus on your usual brewing technique for good taste.
Common mistakes (and what happens if you ignore them)
| Mistake | What it causes | Fix |
|---|---|---|
| Using non-food-grade dyes | Potentially harmful chemicals in your coffee | Always use food-grade dyes or natural food items. |
| Not rinsing thoroughly | Off-flavors and colors in your coffee | Rinse until water runs clear. |
| Brewing with a damp filter | Uneven extraction, weak coffee, potential dye bleed | Ensure the filter is dry before brewing. |
| Over-saturating with dye | Muddy colors, filter integrity issues | Apply dye sparingly, in small amounts. |
| Not letting the filter dry completely | Reduced filter performance, potential dye transfer | Allow ample drying time; be patient. |
| Using colored filters | Colors will not show up or will be distorted | Start with plain white filters. |
| Folding the filter unevenly | Poor fit in brewer, uneven dye distribution | Fold carefully and deliberately. |
| Securing the filter too loosely | Dye bleeds excessively, less distinct patterns | Use a tight rubber band or string. |
| Not protecting your workspace | Stained countertops or tables | Use newspaper, a plastic sheet, or an old towel. |
| Using too much dye | Can clog filter pores, affecting water flow | Apply dye in small, targeted areas. |
Decision rules (simple if/then)
- If you want vibrant, distinct colors, then use food-grade liquid dyes because they are concentrated and easy to control.
- If you prefer a more natural look, then use natural food items like beet juice or turmeric because they offer softer, earthier tones.
- If you are in a hurry, then skip this project and use a plain filter because tie-dying coffee filters requires significant drying time.
- If you notice dye still coming off after rinsing, then rinse again because you need to remove all excess dye for a clean taste.
- If the filter seems too saturated with dye, then let it dry longer because it might take more time for the moisture to evaporate.
- If you’re unsure about a dye’s safety, then don’t use it because your health comes first.
- If the tie-dye effect isn’t as pronounced as you’d like, then try folding the filter more tightly next time because compression helps create sharper lines.
- If your coffee tastes a bit off after using a tie-dyed filter, then you likely didn’t rinse enough, so rinse more thoroughly next time.
- If you want to experiment with patterns, then try different folding techniques before dyeing because this will alter the final look.
- If you’re using a very fine grind coffee, then ensure your tie-dyed filter is completely dry and structurally sound because a weak filter could collapse.
- If you’re using a dark dye like black or dark blue, then be extra diligent with rinsing because these colors can be stubborn.
FAQ
Can I use regular fabric dye?
No, stick to food-grade dyes or natural food items. Regular fabric dyes are not meant for consumption and could be harmful if they leach into your coffee.
Will tie-dyeing affect my coffee’s taste?
It can, if you don’t rinse the filter thoroughly after dyeing and drying. The goal is to remove any excess dye that could impart unwanted flavors.
How long does it take to dry?
Drying can take anywhere from a few hours to overnight, depending on humidity and how much dye you used. Make sure it’s bone dry before brewing.
Can I reuse these filters?
These are designed for single use, just like regular coffee filters. Once you brew with them, they should be discarded.
What if my colors look dull?
This could be due to the type of dye, or if you didn’t use enough. Try a more concentrated dye mix or a different brand next time.
Will the dye bleed into the coffee itself?
If rinsed properly, no. The idea is that the dye is absorbed by the paper fibers and then washed out before brewing.
Can I make a pattern that covers the whole filter?
You can, but it’s harder to get a distinct tie-dye look. Applying dye to the edges and letting it spread naturally usually gives the best results.
Is this safe for my coffee maker?
Yes, as long as you’re using food-grade materials and rinsing thoroughly. The tie-dye process itself doesn’t interact with the machine.
What this page does NOT cover (and where to go next)
- Advanced coffee brewing techniques beyond the basic workflow. (Explore specific brew methods like AeroPress or Chemex).
- Detailed color theory for dye mixing. (Look for general tie-dye guides).
- The chemical composition of coffee flavor compounds. (Dive into coffee science resources).
- Commercial production of coffee filters. (This is a DIY project, not industrial).
- Alternative methods for decorating coffee filters that don’t involve dyes. (Consider stencils or edible inks if you’re feeling adventurous).