How to Drain Your Keurig Coffee Maker: Step-by-Step Guide
Quick answer
- Draining your Keurig prevents water stagnation and potential mold growth.
- It’s essential for long-term storage or before moving the machine.
- Always unplug the brewer first for safety.
- Remove the water reservoir and empty it completely.
- Run several “brew cycles” without a K-Cup to clear internal lines.
- For thorough drying, leave the reservoir lid and K-Cup holder open.
- Consult your specific Keurig model’s manual for unique draining procedures.
Who this is for
- Keurig owners planning to store their machine for an extended period.
- Individuals moving their Keurig to a new location.
- Anyone concerned about water quality or preventing mold buildup in their Keurig brewer.
What to check first
Before you begin to drain your Keurig coffee maker, a quick check ensures a smooth process.
Brewer type and filter type
Keurig brewers come in various models, and while the basic draining principle is similar, some might have slight differences. Note if your model has an internal water filter (often found in the reservoir stem). If so, you’ll want to remove and properly dispose of it before draining for storage. Check your manual for filter replacement instructions.
If your Keurig has an internal water filter, remember to remove it before draining. You can find replacement filters and other Keurig replacement parts if needed.
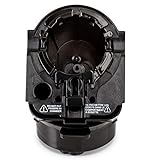
- Designed for all Keurig 2.0 models such as K200, K225, K250, K300, K325, K350, K400, K425, K450, K500, K525, K550, K600, K650, K675. Perfectly compatible with keurig 2.0 model coffee machine.
- Made from high quality materials, 100% BPA free plastic, Helping produce the best brews you ever had!
- Part 1, 2 and 3 for all Keurig 2.0 Models (Full Assembly)
- Remove side sticker and insert full assembly into Brewing Chamber
- We provide a 1-year warranty, Feel free to contact us if there are any problems with the item, we will replace at no charge to you
Water quality and temperature
The water quality you normally use impacts how often you might need to clean or descale, but for draining, it’s about getting all water out. Ensure the water in the reservoir is at room temperature before starting the draining process to avoid handling hot water unnecessarily.
Grind size and coffee freshness
This is less critical for draining, as you won’t be brewing coffee. However, if you’re draining because of issues with your coffee’s taste, remember that stale coffee or an incorrect grind size for your brewing method can significantly impact flavor.
Coffee-to-water ratio
Again, not directly relevant to draining. But if you’re troubleshooting brew issues that led to your decision to drain, remember that the coffee-to-water ratio (typically 2 tablespoons of ground coffee per 6 ounces of water for drip coffee) is crucial for a balanced cup.
Cleanliness/descale status
If your Keurig hasn’t been descaled recently, draining is an excellent opportunity to perform a full descale cycle before you drain and store it. This ensures the internal components are clean and free of mineral buildup. Check your manual for descaling instructions specific to your model.
Step-by-step to drain your Keurig coffee maker (brew workflow)
Draining your Keurig properly ensures it’s ready for storage or transport.
1. Unplug the brewer.
- What to do: Locate the power cord and unplug the Keurig from the wall outlet.
- What “good” looks like: The brewer’s lights are off, and it’s completely de-energized.
- Common mistake and how to avoid it: Forgetting to unplug can lead to accidental operation or electrical shock. Always unplug first.
2. Remove and empty the water reservoir.
- What to do: Carefully lift the water reservoir from its base and pour out any remaining water into a sink.
- What “good” looks like: The reservoir is completely empty and dry to the touch inside.
- Common mistake and how to avoid it: Spilling water. Carry the reservoir steadily and empty it slowly.
3. Remove the K-Cup holder and drip tray.
- What to do: Detach the K-Cup holder assembly and the drip tray. Empty any liquid from the drip tray.
- What “good” looks like: Both components are separated from the main unit and empty.
- Common mistake and how to avoid it: Not checking the drip tray for accumulated liquid. Always empty it.
4. Run “empty” brew cycles.
- What to do: With the reservoir empty (or removed), place a large mug on the drip tray. Close the K-Cup holder (without a K-Cup). Plug the machine back in. Select the largest brew size and press the brew button. Repeat this 2-3 times. Note: Some Keurig models may not allow brewing without water in the reservoir or may display an “add water” prompt. If so, skip this step and proceed to manual drying.
- What “good” looks like: The machine attempts to brew, and ideally, only a few drops or no water come out, indicating the internal lines are mostly clear.
- Common mistake and how to avoid it: Expecting a full stream of water. The goal is to clear residual water, not brew.
5. Unplug again.
- What to do: Once the “empty” cycles are complete, unplug the brewer from the wall outlet again.
- What “good” looks like: The machine is safely de-energized.
- Common mistake and how to avoid it: Plugging it back in too soon. Ensure it’s unplugged before further handling.
6. Tilt and gently shake (if safe for your model).
- What to do: Carefully tilt the brewer over a sink or towel, gently rocking it to encourage any last drops of water to exit. Refer to your manual if this is recommended.
- What “good” looks like: No more water drips out, or only a very minimal amount.
- Common mistake and how to avoid it: Tilting too aggressively or in an unsupported way, potentially damaging internal components. Be gentle and support the machine.
7. Wipe down and air dry.
- What to do: Use a clean, dry cloth to wipe all accessible internal and external surfaces, including the reservoir interior and the K-Cup holder area. Leave the reservoir lid open and the K-Cup holder open for several hours, or even overnight.
- What “good” looks like: All visible surfaces are dry, and there’s good airflow to prevent moisture buildup.
- Common mistake and how to avoid it: Sealing the machine immediately. This traps moisture and can lead to mold. Always air dry thoroughly.
8. Reassemble and store.
- What to do: Once completely dry, reassemble the K-Cup holder and drip tray. You can leave the reservoir detached or place it loosely on the base. Store the brewer in a clean, dry place.
- What “good” looks like: The brewer is clean, dry, and ready for storage or transport.
- Common mistake and how to avoid it: Storing while still damp. Ensure complete dryness to prevent mold and mildew.
Common mistakes when you drain your Keurig coffee maker (and what happens if you ignore them)
| Mistake | What it causes | Fix |
|---|---|---|
| Not unplugging the brewer | Electrical hazard, accidental operation | Always unplug before handling any internal parts or moving the machine. |
| Not fully emptying the reservoir | Water stagnation, potential mold growth, unpleasant odors | Pour out all water and wipe dry. |
| Skipping “empty” brew cycles | Residual water in internal lines, potential mold/mineral buildup | Run 2-3 cycles with an empty reservoir (if your model allows). |
| Not drying thoroughly | Mold/mildew growth, musty smell, damage to components | Air dry with lid and K-Cup holder open for several hours. |
| Storing in a damp environment | Mold/mildew, damage to electrical components | Store in a cool, dry place away from humidity. |
| Forgetting to remove the water filter | Filter can dry out and become ineffective, or harbor bacteria | Remove and discard the filter before draining for storage. |
| Tipping too aggressively | Internal damage, leaks | Gently tilt and shake, only if your manual suggests it. Support the brewer. |
| Draining without descaling first | Mineral buildup remains, affecting future performance | Perform a descale cycle before draining if the machine is due for one. |
| Not cleaning the K-Cup holder/drip tray | Residual coffee grounds or old water, attracting pests or mold | Wash these components thoroughly before drying and storing. |
Decision rules for how to drain your Keurig coffee maker
- If you are storing your Keurig for more than a few weeks, then fully drain and dry it because stagnant water can lead to mold and odors.
- If you are moving your Keurig to a new location, then fully drain it because water inside can leak and damage the machine or surroundings during transport.
- If your Keurig has an “add water” prompt but the reservoir is full, then check for mineral buildup because heavy scale can prevent proper water flow, even if it’s not time to drain.
- If you notice mold or a musty smell, then perform a thorough cleaning and descaling, then drain and dry completely because this indicates a hygiene issue that needs addressing.
- If your Keurig will be exposed to freezing temperatures, then drain it completely because freezing water can expand and crack internal components.
- If your Keurig model does not allow “empty” brew cycles, then rely on manual tilting and extensive air drying because some models are designed to prevent brewing without water.
- If you are unsure about a specific draining step, then consult your Keurig’s user manual because different models may have unique features or requirements.
- If you plan to use your Keurig again within a few days, then emptying the reservoir and wiping it dry might be sufficient because short-term storage doesn’t always require full internal draining.
- If you are descaling your machine, then drain the descaling solution completely and rinse thoroughly before refilling with fresh water for brewing.
- If you are replacing the water filter, then remove the old filter before draining because it’s part of the maintenance process.
FAQ
Q: Why is it important to drain my Keurig coffee maker?
A: Draining your Keurig is crucial for preventing water stagnation, which can lead to mold growth and unpleasant odors. It’s especially important before long-term storage or when moving the machine to avoid leaks and potential damage from freezing temperatures.
Q: Can I just empty the water reservoir and call it a day?
A: While emptying the reservoir is a good first step, it’s not enough for thorough draining. Residual water can remain in the internal lines and heating element, making it susceptible to mold or damage. It’s best to follow the full draining procedure.
Q: How often should I drain my Keurig?
A: You should drain your Keurig whenever you plan to store it for more than a few weeks, move it, or if it will be exposed to freezing temperatures. For regular use, cleaning and descaling are more frequent maintenance tasks.
Q: What if my Keurig won’t let me run “empty” brew cycles?
A: Some newer Keurig models are designed to prevent brewing without water in the reservoir. If yours displays an “add water” prompt, simply skip that step and rely on thoroughly emptying the reservoir, tilting the machine (if safe), and extensive air drying.
Q: Will draining my Keurig damage it?
A: No, when done correctly, draining your Keurig will not damage it. In fact, it helps preserve the machine’s longevity and prevents issues like mold or damage from freezing. Always unplug the unit and handle it gently.
Q: How long does it take for the Keurig to fully dry after draining?
A: It’s best to allow the Keurig to air dry for several hours, or even overnight, after draining. Leave the reservoir lid and K-Cup holder open to promote airflow and ensure all internal components are thoroughly dry before reassembly or storage.
What this page does NOT cover (and where to go next)
- Detailed descaling procedures for specific Keurig models.
- Troubleshooting common brewing issues like weak coffee or slow dispense.
- In-depth comparisons of different Keurig brewer types and their features.
- Repairing internal leaks or electrical faults in a Keurig machine.
- Specific recommendations for water filters or coffee brands.
- How to clean the exterior of your Keurig or remove stubborn stains.