DIY Coffee Fragrance Oil for Candles and More
Quick answer
- Infuse coffee beans in a carrier oil for a few weeks.
- Use high-quality, roasted coffee beans for the best scent.
- Store your DIY coffee fragrance oil in a cool, dark place.
- Test the scent throw in small batches of wax.
- Consider adding a few drops of vanilla or chocolate essential oil for complexity.
- Properly cured oil will have a rich, deep coffee aroma.
Who this is for
- Candle makers who want a natural, custom coffee scent.
- DIY enthusiasts looking for unique fragrance options.
- Coffee lovers who enjoy bringing their favorite aroma into their home in new ways.
What to check first
Brewer type and filter type
This isn’t really about brewing coffee here, but the method you use to infuse your beans matters. For DIY fragrance oil, you’re not brewing. You’re steeping. So, no fancy brewers needed. Just a clean jar.
Water quality and temperature
Again, no water here. We’re using oil. So, the “quality” of your carrier oil is key. Use a light, neutral-smelling oil like fractionated coconut oil or sweet almond oil. Avoid heavy oils that might compete with the coffee scent.
Grind size and coffee freshness
This is crucial. You want whole, roasted coffee beans. A medium to dark roast will give you the deepest, richest coffee aroma. Freshly roasted beans are best, but even good quality beans from a few weeks ago will work. Don’t use pre-ground coffee; it loses its aromatic compounds too quickly.
Coffee-to-water ratio
Think coffee-to-oil ratio. You want enough coffee to really saturate the oil. A good starting point is a 1:2 ratio by volume – one part coffee beans to two parts carrier oil. So, if you use 1 cup of beans, use 2 cups of oil.
Cleanliness/descale status
Sanitation is your friend. Make sure your jar, any funnels, and storage bottles are sparkling clean and dry. This prevents unwanted mold or bacteria from messing with your fragrance.
Step-by-step (brew workflow)
1. Gather your supplies.
- What to do: Get whole roasted coffee beans, your chosen carrier oil, a clean glass jar with a tight-fitting lid, and a fine-mesh sieve or cheesecloth.
- What “good” looks like: Everything is clean and ready to go. No dust bunnies in sight.
- A common mistake and how to avoid it: Using dirty equipment. Always wash and thoroughly dry your jar and sieve.
For the best results, use a high-quality glass jar with a lid, like this one, to ensure a proper infusion.
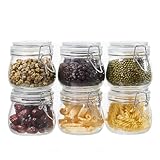
- 【Premium Glass Jars with Airtight Lids】These airtight glass jars feature a wire clip fastening system with clear preserving seals, locking in freshness and flavor. Ideal for dry goods and long-term food storage.
- 【Perfect Size: 17 oz Capacity – Set of 6】Each jar holds 17oz, just right for storing beans, flour, sugar, cereal, pasta, or snacks. Comes as a 6 pack to organize your kitchen efficiently.
- 【Durable & Safe Food Storage Containers】Made from thick, lead-free, glass food storage containers that are BPA-free, odor-resistant, and safe for everyday use.
- 【Multi-Purpose Glass Canisters for Kitchen & Pantry】Great for kitchen canning and pickling jars – also suitable for DIY jam, honey, kimchi, spices, and more. A functional and elegant solution for pantry storage jars.
- 【Stylish & Practical Storage Jars】Sleek square design saves space and looks beautiful on shelves. These glass storage jars are easy to stack and clean, combining utility with minimalist decor.
2. Measure your coffee beans.
- What to do: Fill your clean jar about halfway with whole coffee beans.
- What “good” looks like: The beans are evenly distributed in the bottom of the jar.
- A common mistake and how to avoid it: Overfilling the jar with beans. You need room for the oil to move around.
3. Add your carrier oil.
- What to do: Pour your carrier oil over the coffee beans until they are completely submerged, leaving about an inch of headspace at the top.
- What “good” looks like: All the beans are covered, and the oil level is below the rim of the jar.
- A common mistake and how to avoid it: Not submerging all the beans. Any exposed beans can spoil.
4. Seal the jar.
- What to do: Screw the lid on tightly.
- What “good” looks like: The lid is secure, no leaks.
- A common mistake and how to avoid it: A loose lid. This can let air in and reduce the infusion quality.
5. Shake it up.
- What to do: Give the jar a good shake to start the infusion process.
- What “good” looks like: The oil and beans are mixed.
- A common mistake and how to avoid it: Forgetting to shake. You need to agitate it to help release the coffee’s oils.
6. Let it steep.
- What to do: Store the jar in a cool, dark place for 2-4 weeks. Shake it gently every couple of days.
- What “good” looks like: The oil is slowly taking on the color and aroma of the coffee.
- A common mistake and how to avoid it: Rushing the process. Patience is key for a strong scent.
7. Strain the oil.
- What to do: Once steeped, pour the oil through a fine-mesh sieve lined with cheesecloth (if needed) into a clean bowl or another clean jar.
- What “good” looks like: You have clear, coffee-scented oil, and the beans are left behind.
- A common mistake and how to avoid it: Not straining well enough. You don’t want coffee grounds in your final product.
8. Optional: Double infusion.
- What to do: If you want an even stronger scent, you can repeat steps 2-7 using the strained oil and fresh coffee beans.
- What “good” looks like: The oil has a noticeably deeper coffee aroma.
- A common mistake and how to avoid it: Using too many beans in the second infusion, which can make it bitter. Stick to the same ratio.
9. Bottle your fragrance oil.
- What to do: Pour your finished coffee fragrance oil into clean, dark glass bottles with droppers or tight-fitting caps.
- What “good” looks like: Your oil is stored safely and ready for use.
- A common mistake and how to avoid it: Storing in clear glass. Light can degrade fragrance oils.
10. Test and use.
- What to do: Add a small amount to your candle wax or other DIY projects. Test the scent throw.
- What “good” looks like: You get a pleasant, noticeable coffee aroma.
- A common mistake and how to avoid it: Adding too much at once. Start small and add more if needed.
Common mistakes (and what happens if you ignore them)
| Mistake | What it causes | Fix |
|---|---|---|
| Using stale or pre-ground coffee | Weak, dull, or non-existent coffee aroma | Use whole, freshly roasted coffee beans. |
| Not fully submerging coffee beans | Mold growth, inconsistent scent, spoiled oil | Ensure all beans are covered by carrier oil. |
| Using a carrier oil with a strong scent | The carrier oil overpowers or clashes with coffee | Opt for neutral oils like fractionated coconut or sweet almond oil. |
| Not shaking the jar periodically | Uneven infusion, weaker scent | Shake the jar gently every day or two during steeping. |
| Rushing the steeping process | A weak, underdeveloped coffee fragrance | Allow at least 2-4 weeks for proper infusion. |
| Not straining the oil thoroughly | Coffee grounds in your final product, cloudy oil | Use a fine-mesh sieve, and consider cheesecloth for extra filtration. |
| Storing in clear glass bottles | Degradation of fragrance due to light exposure | Use dark amber or cobalt blue glass bottles. |
| Adding too much oil in the first go | Diluted scent, requires more beans for stronger aroma | Start with a 1:2 coffee-to-oil ratio and adjust as needed. |
| Using too much fragrance in candles | Overpowering scent, potential for wax issues | Start with 3-6% fragrance load and test. |
Decision rules (simple if/then)
- If your DIY coffee fragrance oil smells weak, then add more coffee beans and re-infuse because a higher coffee-to-oil ratio means more scent.
- If you see any sign of mold, then discard the batch and start over because moldy oil is unsafe and will ruin your projects.
- If your carrier oil has a noticeable scent, then try a different, more neutral oil for your next batch because strong carrier oils compete with the coffee aroma.
- If you want a bolder coffee scent, then let it steep for the full 4 weeks or try a double infusion because longer steeping or a second round extracts more oils.
- If your finished oil looks cloudy, then strain it again through a finer filter because residual coffee particles can affect clarity and scent.
- If you’re making this for candles and the scent isn’t strong enough when burned, then increase the fragrance load slightly (e.g., from 4% to 5%) because candle wax can hold and release scent differently.
- If you want to add complementary notes, then consider a drop of vanilla or chocolate essential oil because these pair well with coffee.
- If your coffee beans are very old, then the resulting oil may have a muted or stale scent, so use the freshest beans you can find.
- If you’re using this for soap making, then research its compatibility with lye and cure times because some fragrance oils can accelerate or discolor soap.
- If you’re sensitive to certain scents, then do a small skin patch test with a diluted version of your oil before widespread use because even natural scents can cause reactions.
FAQ
How long does DIY coffee fragrance oil last?
Stored properly in a cool, dark place in an airtight container, your DIY coffee fragrance oil should last for about 6-12 months. After that, the scent might start to fade.
Can I use any kind of coffee beans?
For the best results, use whole, roasted coffee beans. Darker roasts tend to yield a richer, more intense coffee aroma. Avoid instant coffee or decaf if you want a robust scent.
What is a good carrier oil to use?
Fractionated coconut oil, sweet almond oil, or jojoba oil are excellent choices. They are light, have a neutral scent, and don’t go rancid too quickly, allowing the coffee aroma to shine.
How do I make the scent stronger?
You can increase the ratio of coffee beans to oil, steep for the full 4 weeks (or even a bit longer), or perform a double infusion where you re-steep the oil with fresh beans.
Can I add other scents to my coffee oil?
Absolutely! Vanilla, chocolate, cinnamon, or even a hint of hazelnut essential oils can complement the coffee aroma beautifully. Just add a few drops during the steeping process or after straining.
How much fragrance oil should I use in candles?
A good starting point for most candle waxes is a 3-6% fragrance load by weight. Always test a small candle first to see how it performs before making a large batch.
What if my oil smells burnt?
This could happen if your coffee beans were roasted too dark or if the oil got too warm during steeping. Try using a medium roast and ensure it stays in a cool, dark place.
Is this oil safe for direct skin application?
While made with natural ingredients, it’s always best to do a patch test on a small area of skin first. Dilute it further if you have sensitive skin, as the coffee oils can be potent.
What this page does NOT cover (and where to go next)
- Commercial fragrance oil production and regulations.
- Specific essential oil blending ratios for complex perfumes.
- Using coffee grounds instead of whole beans (which can lead to a different, often less potent, result).
- Advanced scent extraction techniques like CO2 extraction.
- The science behind scent molecules and how they interact with wax or other mediums.