Disassembling Your Keurig: A Step-By-Step Guide
Quick answer
- Disassembling your Keurig is usually for deep cleaning or repair.
- Unplug it first. Always.
- You’ll likely need a Phillips head screwdriver, maybe a flathead for prying.
- Start with the water reservoir and drip tray.
- The main housing often has hidden screws.
- Take photos as you go. Seriously.
For disassembling your Keurig, a small appliance repair kit with various screwdriver heads and pry tools will be incredibly useful. This kit can help you tackle hidden screws and gently separate panels without damage.
![Wesdut 49in1-S2 Precision Screwdriver Set, [Super Durable] Ultra Compact Small Magnetic Mini Repair Tool Kit, Tiny Screw Driver with Torx Flat bits Fits Ring Doorbell, Watch, Laptop, Eyeglass, Camera](https://m.media-amazon.com/images/I/410iUzx9S6L._SL160_.jpg)
- [49in1 Double-Sided Precision Kit | All-In-One for Every Repair Job] This compact set includes 49 versatile double-sided bits (Phillips, Torx, Security Torx, Pentalobe, Hex, etc.) to cover disassembly and maintenance for iPhones, Android phones, laptops, desktops, game consoles, watches, eyeglasses, and all small electronics. One investment-grade set replaces multiple bulky tools, so you’ll never be missing the right bit for home DIY or on-the-go fixes. A smart choice that saves you money on expensive professional repairs and upgrades your DIY capabilities for long-term use.
- [Aluminum Alloy Pen-Style Handle | Ergonomic & Effortless Operation] The full-metal diamond-textured handle with a smooth swivel cap provides a strong non-slip grip and flexible rotation, effectively reducing hand fatigue and wrist strain during long precision repairs. The pen-like design fits comfortably and stably in your hand, allowing you to tackle tiny screws on delicate devices safely and with minimal effort. It’s built for comfort, stability, and safer, longer repair sessions.
- [Premium S2 Steel Bits | Anti-Slip & Durable for Safe Repairs] Forged from high-strength S2 steel (HRC65+), these bits resist wear, stripping, and corrosion, protecting delicate screws and your expensive electronics from accidental damage. Strong magnetic tips securely grip tiny screws to prevent loss and speed up disassembly, so you can work confidently without fumbling or losing small parts. Built to last, this is a reliable tool you can invest in for years of safe, consistent use.
- [Labeled Hard Storage Case | Neat, Portable & Hassle-Free Organization] The sturdy black case features a secure latch and clear bit specifications printed on the interior, keeping every tip sorted and easy to identify. Its slim, pocket-sized design saves space and enables easy carrying for home use, travel, or on-the-go repairs. No more messy, lost bits or frustrating mid-project delays — just clean, organized, stress-free fixing.
- [Practical Household Essential & Thoughtful Gift for Tech Lovers] Designed for both beginners and DIY enthusiasts, this all-in-one precision repair kit brings lasting convenience to daily life. Durable, multi-functional, and user-friendly, it’s more than a tool — it’s a practical investment for anyone who loves fixing, tinkering, or maintaining their own devices. A well-received, useful gift for family, friends, and tech lovers that delivers real, long-lasting value.
What this problem usually is (and is not)
- This guide is for when you need to get inside your Keurig, not just clean the outside.
- It’s not for simple maintenance like descaling or cleaning the needle.
- We’re talking about taking off panels to get to internal components.
- This is for folks who are comfortable with a screwdriver and aren’t afraid of a few small parts.
- If your machine is under warranty, check that first. Messing with it might void it.
- Safety first. Always unplug and let it cool down.
Likely causes (triage list)
Accessing Internal Components:
- You’re looking to reach the pump, heating element, or internal tubing. This requires disassembly.
- Confirm by checking if external cleaning methods aren’t solving your issue (e.g., persistent clogs, leaks from inside).
Performing a Deep Clean:
- Mineral buildup or mold might be lurking where regular cleaning can’t reach.
- Confirm if you’ve descaled and run cleaning cycles, but still taste off-flavors or see gunk.
Troubleshooting a Specific Malfunction:
- A component might be visibly damaged, or you suspect a loose connection.
- Confirm if a specific error code or symptom points to an internal issue.
Preparing for Repair or Replacement:
- You might be trying to salvage parts or diagnose a failure before tossing it.
- Confirm if a thorough visual inspection of the exterior and simple troubleshooting hasn’t yielded a solution.
Gathering Tools and Workspace:
- You need the right tools and a clear space to work.
- Confirm you have screwdrivers of various sizes, possibly small pliers, and a container for screws.
Fix it step-by-step (brew workflow)
1. Unplug and Cool Down:
- What to do: Disconnect the Keurig from the power outlet. Let it sit for at least 30 minutes to cool completely.
- What “good” looks like: The machine is completely inert, no lights are on, and it’s safe to touch.
- Common mistake: Forgetting to unplug. This is a shock hazard, plain and simple.
2. Remove the Water Reservoir:
- What to do: Lift the water reservoir straight up and off the base.
- What “good” looks like: The reservoir comes off easily, revealing the area where it connects to the machine.
- Common mistake: Forcing it. Some reservoirs have clips; check how it detaches before yanking.
3. Remove the Drip Tray and Tray Holder:
- What to do: Slide out the drip tray. Then, lift out the plastic tray holder underneath.
- What “good” looks like: Both pieces come out without resistance, exposing the base of the machine.
- Common mistake: Not removing the holder. It often hides screws for the base panel.
4. Locate and Remove Base Screws:
- What to do: Flip the Keurig over. Look for screws on the bottom panel. These are usually Phillips head.
- What “good” looks like: You’ve found all the screws securing the bottom. Keep them in a labeled container.
- Common mistake: Losing screws. They’re small and disappear easily. A magnetic tray or a muffin tin works wonders.
5. Remove the Bottom Panel:
- What to do: Gently pull the bottom panel away from the machine. It might be a bit snug.
- What “good” looks like: The panel separates cleanly, giving you access to the internal wiring and some components.
- Common mistake: Prying too hard and breaking plastic clips. Be patient.
6. Locate and Remove Rear/Side Panel Screws:
- What to do: With the bottom panel off, look for screws securing the main housing panels. These might be on the back or sides.
- What “good” looks like: You’ve identified and removed all screws holding the outer shell together.
- Common mistake: Assuming all screws are the same size. Some might be longer or shorter.
7. Carefully Separate Main Housing Panels:
- What to do: Gently pull the main panels apart. They might snap or slide into place. Use a plastic pry tool if needed, but be gentle.
- What “good” looks like: The panels come apart without excessive force, revealing the internal mechanics.
- Common mistake: Ripping wires. Always check for wires connecting panels before fully separating them.
8. Photograph Internal Components:
- What to do: Take clear pictures of the internal layout, especially around the pump, heating element, and any wires.
- What “good” looks like: You have a visual record to help you reassemble correctly.
- Common mistake: Not taking photos. Reassembly becomes a guessing game.
9. Access Specific Components (Pump, Heater, etc.):
- What to do: Depending on your goal, you can now access and potentially disconnect or remove specific parts. Follow any guides specific to the component you’re working on.
- What “good” looks like: You can clearly identify and reach the part you need to service or replace.
- Common mistake: Trying to remove something without understanding how it’s connected. Check for clips, screws, and hose connections.
Once you’ve identified the faulty component, you can often find Keurig replacement parts online to complete your repair. Having the right part on hand will make the repair process much smoother.
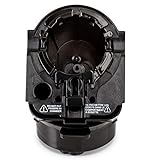
- Designed for all Keurig 2.0 models such as K200, K225, K250, K300, K325, K350, K400, K425, K450, K500, K525, K550, K600, K650, K675. Perfectly compatible with keurig 2.0 model coffee machine.
- Made from high quality materials, 100% BPA free plastic, Helping produce the best brews you ever had!
- Part 1, 2 and 3 for all Keurig 2.0 Models (Full Assembly)
- Remove side sticker and insert full assembly into Brewing Chamber
- We provide a 1-year warranty, Feel free to contact us if there are any problems with the item, we will replace at no charge to you
10. Reassembly:
- What to do: Reverse the disassembly steps. Ensure all wires are reconnected, all panels are aligned, and all screws are back in place.
- What “good” looks like: The machine looks and feels like it did before you started, with no leftover parts.
- Common mistake: Forgetting a screw or misaligning a panel. This can lead to rattling or improper function.
Prevent it next time
- Clean Regularly: Wipe down the exterior and brew head area after each use.
- Descale Consistently: Follow your Keurig’s descaling recommendations (usually monthly or as needed).
- Use Filtered Water: Good water means less buildup. It tastes better too.
- Store Water Properly: If you don’t use the reservoir daily, empty and rinse it.
- Check for Blockages: Periodically check the needle and drip tray for clogs.
- Don’t Force It: If a part feels stuck, re-check for hidden screws or clips.
- Keep it Dry: Avoid getting excess water into vents or openings.
- Listen for Odd Noises: Unusual sounds can be early warnings.
Common mistakes (and what happens if you ignore them)
| Mistake | What it causes | Fix |
|---|---|---|
| Not unplugging the machine | Electric shock hazard, damage to components | Unplug immediately, let cool, then proceed. |
| Forcing parts to separate | Broken plastic clips, damaged housing, potential injury | Check for hidden screws or clips, use gentle prying. |
| Losing small screws | Inability to reassemble correctly, loose parts | Use a magnetic tray, muffin tin, or labeled containers for screws. |
| Not taking photos during disassembly | Difficulty reassembling, incorrect wiring | Take detailed photos at each step before removing parts. |
| Ripping wires during panel removal | Short circuits, non-functional components, fire hazard | Carefully inspect for and disconnect any wires before separating panels. |
| Not cleaning the needle assembly | Clogged brews, weak coffee, potential internal pressure | Use a paperclip or cleaning tool to clear the needle regularly. |
| Using tap water with high mineral content | Rapid scale buildup, reduced performance, machine failure | Use filtered or bottled water. |
| Ignoring strange noises or leaks | Minor issues escalating to major failures, water damage | Investigate the source of the noise/leak; disassemble if necessary. |
| Overfilling the water reservoir | Leaks, potential damage to the base or internal parts | Fill to the MAX line only. |
| Not letting the machine cool down | Burns, melted plastic, damage to components | Always allow ample cooling time after unplugging. |
Decision rules (simple if/then)
- If you see a persistent leak from the bottom of the machine, then it’s likely an internal hose or seal issue, and disassembly might be required.
- If your coffee tastes consistently bad after descaling and cleaning, then the problem might be deeper, possibly requiring access to internal tubing or the brew head mechanism.
- If the Keurig makes unusual grinding or rattling noises during operation, then it could be a pump issue or a loose internal part, suggesting disassembly for inspection.
- If the machine is completely unresponsive (no lights, no power), then check the power cord and outlet first; if those are fine, it could be an internal power supply issue requiring disassembly.
- If you’re experiencing inconsistent brew temperatures (too hot or too cold), then the heating element or its sensor might be malfunctioning, which might need a closer look internally.
- If your Keurig is under warranty, then contact customer support before attempting any disassembly, as it will likely void the warranty.
- If you’ve tried all external cleaning and descaling methods and the machine still clogs frequently, then the internal brew path might be severely obstructed, necessitating disassembly.
- If you’re not comfortable working with small electronics and plastic parts, then consider professional repair or replacement rather than attempting disassembly yourself.
- If you notice any signs of corrosion or mold inside the machine, then it’s a strong indicator for disassembly and thorough cleaning to prevent health issues.
- If the machine is very old and has never been serviced internally, then scale buildup is almost certainly a factor, making disassembly a potential, albeit involved, solution.
- If you suspect a specific component failure (e.g., the pump is loud but no water moves), then you can target your disassembly efforts towards that area.
FAQ
Q: Do I really need to disassemble my Keurig for routine cleaning?
A: No. Routine cleaning, descaling, and needle cleaning can all be done externally. Disassembly is for deep cleaning or repair.
Q: How often should I descale my Keurig?
A: It depends on your water hardness and usage. Many recommend monthly, or when the descale light comes on. Check your manual.
Q: Can I fix a Keurig without taking it apart?
A: Often, yes. Most common issues like clogs or weak coffee can be resolved with descaling, cleaning the needle, and ensuring proper water levels.
Q: What tools do I need to disassemble a Keurig?
A: Typically, a Phillips head screwdriver is essential. You might also need a smaller flathead screwdriver or a plastic pry tool for stubborn panels.
Q: Will disassembling void my Keurig warranty?
A: Almost certainly. If your machine is still under warranty, contact the manufacturer before attempting any internal work.
Q: What if I can’t get a panel off?
A: Double-check for any missed screws, especially in hidden spots or under rubber feet. Gentle prying with a plastic tool can help, but don’t force it.
Q: Is it safe to work on a Keurig?
A: Only if you unplug it and let it cool completely. Water and electricity are a dangerous mix.
Q: My Keurig is leaking. Can disassembly fix this?
A: It might. Leaks often come from internal hoses or seals that can be accessed and replaced or reseated after disassembly.
Q: What are the risks of disassembling my Keurig?
A: The main risks are electric shock if unplugged, damaging plastic parts, losing small components, and reassembly errors that could cause further malfunction.
Q: Where can I find specific instructions for my Keurig model?
A: Search online for your specific Keurig model number plus “disassembly” or “repair.” Many user guides and videos are available.
What this page does NOT cover (and where to go next)
- Specific repair instructions for individual components (e.g., replacing a pump).
- Electrical diagnostics or troubleshooting of internal wiring.
- Warranty claims or official repair services.
- Detailed cleaning procedures for specific internal parts beyond general access.
- Advanced modifications or “hacking” of the Keurig machine.