Decadent Coffee Ice Cream Cake Recipe
Quick Answer
- Chill your ice cream thoroughly before starting.
- Use strong, cold-brewed coffee for the best flavor.
- Crush cookies or cake for the base while they’re cold.
- Layer ingredients quickly to prevent melting.
- Freeze each layer until firm before adding the next.
- Allow ample freezing time for the final cake to set.
Who This Is For
- Home bakers looking to impress with a unique dessert.
- Coffee lovers who want to combine their two favorite things.
- Anyone hosting a party and needing a show-stopping, make-ahead treat.
What to Check First
- Ice Cream Softness: Make sure your ice cream is very firm, almost rock solid. If it’s too soft, it’ll melt too fast. Give it an extra hour or two in the coldest part of your freezer. I usually pull mine out just before I need it.
- Coffee Concentrate: For the coffee flavor, a strong, cold-brewed concentrate works best. It’s less watery and has a richer taste. If you don’t have cold brew, make a very strong batch of hot coffee and let it cool completely.
- Crumb Base: Your cookie or cake crumbs need to be fine enough to pack well but not so fine they turn to dust. Oreos, chocolate chip cookies, or even leftover cake work great. Make sure they are completely cool before crushing.
- Cake Pan/Mold: A springform pan is ideal for easy removal. If you don’t have one, a regular cake pan lined with plastic wrap works, but be gentle when unmolding. Make sure it’s clean and dry.
A springform pan is ideal for easy removal, ensuring your beautiful ice cream cake comes out perfectly. If you don’t have one, a regular cake pan lined with plastic wrap works, but be gentle when unmolding.
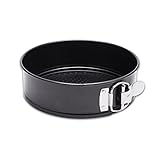
- HEALTHY COATING: Our Non-stick coating is a food grade safety coating with no harsh chemicals or hazardous substances. The true double layer coating allows the cake be easily removed without damage. Avoid making it difficult to clean the cake because it sticks to the pan or leaves a lot of cake residue.
- THE STAINLESS SPRINGFORM BUCKLE PROVIDES SMOOTH, EASY RELEASE: The stainless steel springform buckle has been upgraded which is stronger and easier to switch but will not fall off or crack, allowing the cake to be pulled out perfectly with little effort.
- OVEN-SAFE UP TO 450℉: The premium material allows the pan to heat up quickly and evenly during the heating process on the stove or in the oven, with a heat resistance of up to 450°F, the food can be baked safely and presents a perfect look.
- MAKING IT YOUR FAVOURITE BAKING TOOL: Now this is the proven choice in restaurant and bakery kitchens and is also the best gadget for DIY desserts and food if you love baking stuff like cheese cake, yogurt cake, mousse, coffee cake, lasagna, quiche, paella, cookies, fruit pie, pecan pie and any similar recipe. And it also makes a great and practical gift for your friends. Hand wash recommended.
- Freezer Space: Clear out enough space in your freezer. This cake needs to freeze solid between layers and at the end. Don’t try to rush it.
Step-by-Step Coffee Ice Cream Cake Workflow
1. Prepare the Pan: Line a springform pan with parchment paper or plastic wrap, making sure it goes up the sides. This helps with removal.
- Good looks like: A clean, well-lined pan ready for the first layer.
- Common mistake: Not lining the pan well, leading to a cake that sticks. Avoid this by ensuring the lining is smooth and covers all surfaces.
2. Make the Crumb Base: Crush your cookies or cake into fine crumbs. Mix with melted butter and a tablespoon or two of sugar if desired. Press this mixture firmly into the bottom of the prepared pan.
- Good looks like: A compact, even layer of crumbs that holds its shape when pressed.
- Common mistake: Crumb layer is too loose. This happens if you don’t press hard enough or use too little butter. Pack it down with the bottom of a glass.
3. Freeze the Base: Place the pan with the crumb base into the freezer for at least 30 minutes, or until it’s firm to the touch.
- Good looks like: A solid, frozen base that won’t mix with the next layer.
- Common mistake: Not freezing long enough. This results in a crumb layer that gets smushed when you add the ice cream. Patience is key here.
4. Soften the First Ice Cream Layer: Take your first flavor of ice cream (e.g., vanilla or coffee) out of the freezer and let it soften slightly on the counter. It should be spreadable, not melted.
- Good looks like: Ice cream that’s pliable and easy to spread without dripping.
- Common mistake: Letting it get too soft. If it’s runny, it will melt the base and make a mess. Work quickly or put it back in the freezer for a few minutes if it gets too soft.
5. Add the First Ice Cream Layer: Spread the softened ice cream evenly over the frozen crumb base.
- Good looks like: A smooth, consistent layer of ice cream.
- Common mistake: Uneven spreading. This leads to an unbalanced texture. Use an offset spatula for a smooth finish.
6. Freeze the First Ice Cream Layer: Return the pan to the freezer for at least 1-2 hours, or until the ice cream layer is firm.
- Good looks like: A solid, frozen layer that’s hard to the touch.
- Common mistake: Not freezing long enough. This means the next layer will sink or mix. Again, wait until it’s truly firm.
7. Prepare and Add the Second Ice Cream Layer: Repeat steps 4-6 with your second ice cream flavor (e.g., chocolate or coffee). If you’re adding a coffee syrup or sauce, drizzle it over the second ice cream layer before freezing.
- Good looks like: A distinct, firm second layer on top of the first.
- Common mistake: Adding the second layer while the first is still soft. This causes them to blend. Ensure the previous layer is solid.
8. Add Optional Mix-ins/Toppings: If you’re adding things like chocolate chips, cookie chunks, or a coffee ganache, now’s the time. Spread them evenly over the second ice cream layer.
- Good looks like: Evenly distributed additions that will freeze nicely.
- Common mistake: Adding too much or too little. Overcrowding can make the cake hard to slice. Aim for balance.
9. Final Freeze: Cover the pan tightly with plastic wrap and then foil. Freeze for at least 6-8 hours, or preferably overnight, until the entire cake is solid.
- Good looks like: A completely frozen, firm cake ready for unmolding.
- Common mistake: Not freezing long enough. A soft cake will collapse. This is the most crucial freezing step.
10. Unmold and Decorate: Briefly dip the bottom of the springform pan in warm water (just a few seconds) or run a warm knife around the edge. Carefully release the sides of the springform pan. Invert the cake onto a serving plate if needed, then flip it back over. Decorate as desired.
- Good looks like: A clean, well-defined cake that releases easily.
- Common mistake: Forcing the release. This can break the cake. Gentle heat and patience are your friends here.
Common Mistakes (and What Happens If You Ignore Them)
| Mistake | What It Causes | Fix |
|---|---|---|
| Ice cream is too soft when layering | Layers mix, cake becomes messy and uneven. | Freeze ice cream until rock solid before starting; work quickly when spreading. |
| Crumb base is too loose | Crumb layer crumbles when slicing or serving. | Pack crumbs very firmly into the pan; use enough butter to bind them. |
| Not freezing between layers | Layers blend into a mushy mess; cake loses shape. | Freeze each layer until completely firm (at least 1-2 hours) before adding the next. |
| Using weak coffee | Lack of distinct coffee flavor in the final cake. | Use a strong cold brew concentrate or very strong, cooled hot coffee. |
| Over-softening ice cream during prep | Melting leads to watery cake and loss of structure. | Work in a cool environment; have all ingredients ready; return ice cream to freezer if it gets too soft. |
| Rushing the final freeze | Cake is soft, won’t hold its shape, melts quickly. | Allow at least 6-8 hours, or overnight, for the final freeze. |
| Forcing the unmolding process | Cake breaks, looks unappealing, crumbles. | Use a warm knife or dip the pan briefly in warm water to loosen; be gentle. |
| Adding too many heavy mix-ins | Cake becomes difficult to slice and serve. | Be judicious with mix-ins; ensure they are evenly distributed. |
| Not lining the pan properly | Cake sticks to the pan, difficult to remove. | Use parchment paper or plastic wrap generously, ensuring it covers all surfaces. |
| Using stale cookies for the base | Base flavor is off, texture can be dry. | Use fresh cookies or cake for the crumb base. |
Decision Rules
- If your ice cream is too soft, then refreeze it until it’s firm enough to spread without melting.
- If the crumb base crumbles when you press it, then add a little more melted butter to help it bind.
- If you can see the layers starting to mix, then you likely didn’t freeze the previous layer long enough.
- If you want a stronger coffee flavor, then use a double-strength cold brew or add a shot of espresso to your ice cream before spreading.
- If your cake is sticking to the sides of the springform pan, then run a thin, warm knife around the edge before attempting to release the sides.
- If the cake seems too hard to slice, then let it sit at room temperature for 5-10 minutes before cutting.
- If you’re using a regular cake pan instead of a springform, then make sure to line it very well with plastic wrap so you can lift the cake out.
- If your coffee flavor is too subtle, then consider adding a coffee liqueur or a bit of instant espresso powder to your ice cream.
- If the cake is melting too quickly on the serving plate, then serve it on a chilled platter or from a cooler.
- If you want to add a drizzle on top, then make sure your ice cream cake is completely frozen and solid before adding it.
FAQ
Q: Can I use different types of cookies for the crust?
A: Absolutely. Chocolate chip, graham crackers, or even leftover brownies work great. Just make sure they crush well and you adjust the butter amount as needed.
Q: How do I get a really strong coffee flavor?
A: Use a concentrated cold brew or a very strong, cooled hot coffee. You can also add a tablespoon of instant espresso powder to your softened ice cream before spreading.
Q: What if I don’t have a springform pan?
A: A regular cake pan lined with plastic wrap works. You’ll lift the whole cake out using the plastic wrap before slicing.
Q: How long does coffee ice cream cake last?
A: Stored properly in an airtight container in the freezer, it can last for about 2-3 weeks. The texture is best when eaten within the first week.
Q: Can I make this dairy-free?
A: Yes, use dairy-free ice cream alternatives and ensure your cookie crust ingredients are also dairy-free.
Q: Should the ice cream be completely melted?
A: No, it should be softened enough to spread easily, but not liquid. Think of very soft butter consistency.
Q: What happens if I add hot coffee directly?
A: Hot coffee will melt your ice cream layers instantly, ruining the cake’s structure. Always use completely cooled coffee.
Q: How do I prevent ice crystals from forming?
A: Ensure the cake is tightly covered with plastic wrap and foil during freezing. This minimizes air exposure.
Q: Can I make this ahead of time?
A: Yes, this cake is perfect for making ahead. It needs significant freezing time, so at least a day in advance is ideal.
What This Page Does Not Cover (And Where to Go Next)
- Specific brand recommendations for ice cream or cookies. (Check online reviews for popular choices.)
- Advanced decorating techniques like fondant or intricate piping. (Look for cake decorating tutorials.)
- Nutritional information or allergen details for specific ingredients. (Consult ingredient packaging or a nutritionist.)
- Detailed explanations of different coffee bean varietals and their impact on flavor. (Explore coffee tasting guides.)
- Recipes for homemade ice cream from scratch. (Search for “homemade ice cream recipes.”)
- Gluten-free or vegan ice cream cake variations beyond basic substitutions. (Seek out specialized baking blogs.)