Decadent Coffee Cheesecake Recipe
Quick answer
- Use good quality coffee for the best flavor.
- Don’t overmix the batter; it can cause cracks.
- A water bath is your friend for even baking.
- Chill it completely before slicing.
- Freshness matters for both coffee and ingredients.
- Taste as you go, especially the coffee strength.
Who this is for
- Anyone who loves cheesecake and coffee.
- Bakers looking to elevate a classic dessert.
- Those wanting to impress guests with a homemade treat.
What to check first
Brewer type and filter type
This recipe calls for brewed coffee. A drip coffee maker or a pour-over setup works great. You want a clean, strong brew. If you’re using a fancy espresso machine, just make sure it’s dialed in. The filter type matters too – paper filters generally give a cleaner cup. Don’t use old, dusty filters.
Water quality and temperature
Your water is a big part of your coffee flavor. If your tap water tastes funky, it’ll make your coffee taste funky. Filtered water is usually best. For brewing, aim for water between 195°F and 205°F. Too cool and you won’t extract enough flavor. Too hot and you can scorch the grounds.
Grind size and coffee freshness
Freshly ground beans are king. Pre-ground coffee loses its aroma and flavor fast. For drip or pour-over, a medium grind is usually the sweet spot. It should look like coarse sand. If it’s too fine, you can get bitterness. Too coarse and it’ll be weak. Check the roast date on your beans; fresher is better.
Coffee-to-water ratio
This is where you control the coffee punch. For a strong brew that’ll shine through the cheesecake, you’ll want a higher coffee-to-water ratio than you might use for drinking. Think 1:15 or even 1:14. That means for every gram of coffee, you use 15 or 14 grams of water. This makes a concentrated brew.
Cleanliness/descale status
Make sure your coffee maker is spotless. Old coffee oils can turn rancid and mess with your flavor. If you haven’t descaled your machine in a while, now’s the time. A clean machine means clean coffee. The same goes for your baking pans and bowls.
Step-by-step (brew workflow)
1. Gather your ingredients.
- What to do: Get everything ready – cream cheese, sugar, eggs, sour cream, vanilla, and your brewed coffee. Measure it all out.
- What “good” looks like: All your ingredients are measured and within reach. No last-minute scrambling.
- Common mistake: Forgetting an ingredient or not measuring correctly. Avoid this by reading the recipe twice and prepping everything first.
2. Prepare your coffee.
- What to do: Brew a strong batch of coffee. Use your preferred method and a higher coffee-to-water ratio for a concentrated flavor. Let it cool slightly.
- What “good” looks like: A rich, aromatic coffee that smells amazing.
- Common mistake: Brewing weak coffee or using stale beans. This will result in a muted coffee flavor in your cheesecake.
3. Preheat your oven and prep the pan.
- What to do: Set your oven to 325°F (160°C). Grease and flour a 9-inch springform pan. You can also line the bottom with parchment paper.
- What “good” looks like: The oven is heating up, and the pan is ready to go.
- Common mistake: Forgetting to preheat the oven. This leads to uneven baking and a less-than-ideal texture.
For best results, consider using a high-quality springform pan to ensure easy release and a perfectly shaped cheesecake.
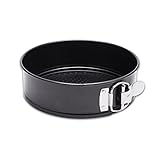
- HEALTHY COATING: Our Non-stick coating is a food grade safety coating with no harsh chemicals or hazardous substances. The true double layer coating allows the cake be easily removed without damage. Avoid making it difficult to clean the cake because it sticks to the pan or leaves a lot of cake residue.
- THE STAINLESS SPRINGFORM BUCKLE PROVIDES SMOOTH, EASY RELEASE: The stainless steel springform buckle has been upgraded which is stronger and easier to switch but will not fall off or crack, allowing the cake to be pulled out perfectly with little effort.
- OVEN-SAFE UP TO 450℉: The premium material allows the pan to heat up quickly and evenly during the heating process on the stove or in the oven, with a heat resistance of up to 450°F, the food can be baked safely and presents a perfect look.
- MAKING IT YOUR FAVOURITE BAKING TOOL: Now this is the proven choice in restaurant and bakery kitchens and is also the best gadget for DIY desserts and food if you love baking stuff like cheese cake, yogurt cake, mousse, coffee cake, lasagna, quiche, paella, cookies, fruit pie, pecan pie and any similar recipe. And it also makes a great and practical gift for your friends. Hand wash recommended.
4. Make the crust.
- What to do: Combine crushed graham crackers, sugar, and melted butter. Press this mixture firmly into the bottom and slightly up the sides of the prepared springform pan.
- What “good” looks like: A compact, even layer of crust that holds its shape.
- Common mistake: Not pressing the crust firmly enough. It can crumble when you slice the cheesecake.
5. Beat the cream cheese.
- What to do: In a large bowl, beat softened cream cheese until it’s completely smooth and creamy. No lumps allowed.
- What “good” looks like: Silky smooth cream cheese with no visible lumps.
- Common mistake: Using cold cream cheese or not beating it long enough. Lumps are the enemy of a smooth cheesecake.
Using a good quality cream cheese is key to achieving that smooth, rich texture in your cheesecake.

- PHILLY CREAM CHEESE: One 8 oz block of Philadelphia Original Cream Cheese
- SIMPLE INGREDIENTS: Our original cream cheese brick is made with fresh milk and real cream for multi-dimensional flavor
- CHARMINGLY REAL: Philadelphia stays charmingly real with no preservatives
- SOFT CREAM CHEESE: Our cream cheese is easy to use, making it ideal for cooking and baking
- PLAIN CREAM CHEESE: Creamy and delicious, Philly cream cheese is perfect to use as an ingredient in recipes for cheesecake, frosting, potatoes, eggs, pasta and cream cheese fruit dip
6. Add sugar and flavorings.
- What to do: Gradually beat in the sugar, then the sour cream and vanilla extract. Mix until just combined.
- What “good” looks like: A light, fluffy mixture that’s well-incorporated.
- Common mistake: Overmixing at this stage. It can incorporate too much air, leading to cracks.
7. Incorporate the eggs.
- What to do: Add eggs one at a time, beating on low speed just until each is incorporated. Scrape down the sides of the bowl as needed.
- What “good” looks like: A smooth, homogenous batter.
- Common mistake: Overbeating the eggs. This adds air and can cause cracks and a soufflé-like texture.
8. Stir in the coffee.
- What to do: Gently fold in your cooled, strong brewed coffee until it’s evenly distributed throughout the batter.
- What “good” looks like: A marbled batter, or uniformly colored if it’s a darker brew. The coffee scent should be noticeable.
- Common mistake: Pouring in hot coffee, which can cook the eggs, or overmixing, which can break down the batter’s structure.
9. Pour batter into the pan.
- What to do: Pour the cheesecake batter over the prepared crust. Tap the pan gently on the counter a few times to release any large air bubbles.
- What “good” looks like: An even layer of batter with minimal air bubbles visible.
- Common mistake: Not tapping the pan. Larger bubbles can lead to holes in your finished cheesecake.
10. Prepare the water bath.
- What to do: Wrap the outside of your springform pan tightly with heavy-duty aluminum foil (at least two layers). Place the wrapped pan inside a larger roasting pan. Carefully pour hot water into the roasting pan until it comes about halfway up the sides of the springform pan.
- What “good” looks like: The springform pan is securely wrapped and sitting in a stable water bath.
- Common mistake: Not wrapping the pan well enough, allowing water to seep in. This will ruin your cheesecake.
11. Bake the cheesecake.
- What to do: Carefully place the roasting pan with the water bath and cheesecake into the preheated oven. Bake for 50-70 minutes, or until the edges are set and the center is still slightly jiggly.
- What “good” looks like: The cheesecake is mostly firm around the edges, with a slight wobble in the very center.
- Common mistake: Overbaking. This is the most common culprit for cracked cheesecakes.
12. Cool and chill.
- What to do: Turn off the oven, crack the oven door open slightly, and let the cheesecake cool in the oven for 1 hour. Then, remove from the water bath, remove the foil, and let it cool completely on a wire rack. Once cool, cover and refrigerate for at least 6 hours, preferably overnight.
- What “good” looks like: A fully cooled and chilled cheesecake that is firm to the touch.
- Common mistake: Trying to slice it too soon. It needs time to set properly in the fridge.
Common mistakes (and what happens if you ignore them)
| Mistake | What it causes | Fix |
|---|---|---|
| Using cold cream cheese | Lumpy batter, uneven texture | Let cream cheese sit at room temperature until soft but not melted. |
| Overmixing the batter | Cracks, soufflé texture, dense cake | Mix on low speed, especially after adding eggs. Stop when just combined. |
| Not using a water bath | Cracks, uneven baking, dry edges | Wrap pan securely and use a water bath for gentle, even heat. |
| Opening oven door too often | Temperature fluctuations, cracks, uneven baking | Resist the urge. Trust the timer and the visual cues. |
| Overbaking | Dry texture, cracks, rubbery consistency | Bake until the center is just slightly jiggly. It will continue to set as it cools. |
| Slicing too soon | Messy slices, cheesecake falling apart | Chill completely for at least 6 hours, ideally overnight. |
| Using weak or stale coffee | Muted or off coffee flavor | Brew strong, fresh coffee. Use a higher coffee-to-water ratio. |
| Not scraping down the bowl | Unmixed ingredients, uneven flavor distribution | Stop and scrape the sides and bottom of the bowl frequently to ensure everything is incorporated. |
| Adding eggs too quickly | Overmixing, incorporating too much air, cracks | Add eggs one at a time and mix on low speed until just blended. |
| Not chilling long enough | Soft, unstable cheesecake that won’t slice cleanly | Patience is key. A minimum of 6 hours, but overnight is best for optimal firmness and flavor. |
Decision rules (simple if/then)
- If the cream cheese has lumps, then continue beating until smooth because lumps lead to a grainy cheesecake.
- If the batter looks too thin, then don’t worry, it will thicken as it bakes because the eggs and heat set the structure.
- If the edges of the cheesecake are browning too quickly, then loosely tent the top with foil because this protects the surface from over-browning.
- If the center of the cheesecake is still very liquidy after the bake time, then bake for another 5-10 minutes because it needs a bit more time to set.
- If you don’t have a springform pan, then consider a regular cake pan, but know that removing it will be trickier because you can’t release the sides.
- If you want a more intense coffee flavor, then add a tablespoon of instant espresso powder to the batter because it boosts the coffee notes without adding much liquid.
- If your cheesecake cracks, then don’t fret, just cover it with a delicious topping like whipped cream or a chocolate ganache because no one will notice the crack.
- If the water in the water bath is boiling vigorously, then reduce the oven temperature slightly because this can cause the cheesecake to cook too quickly and unevenly.
- If you want to avoid a watery cheesecake, then ensure your springform pan is wrapped very securely with foil because water seepage is a common problem.
- If the cheesecake seems done but the center is still a bit too jiggly, then trust the cooling process because carryover heat will finish setting it.
FAQ
How much coffee should I use?
For a noticeable coffee flavor, brew your coffee extra strong. Aim for a ratio of about 1:15 coffee to water (e.g., 1 oz coffee to 15 oz water). You can adjust this based on how intense you want the coffee to be.
Can I use instant coffee instead of brewed coffee?
Yes, you can use instant espresso powder. Dissolve about 1-2 tablespoons in the amount of liquid called for in the recipe. This often provides a more concentrated coffee flavor without adding extra liquid that could affect the batter consistency.
Why did my cheesecake crack?
Cracks usually happen from overbaking, overmixing, or rapid temperature changes. Using a water bath and cooling the cheesecake gradually in the oven can help prevent this. Don’t worry too much; a cracked cheesecake still tastes great!
How do I know when the cheesecake is done?
The edges should look set, but the center should still have a slight wobble, like Jell-O. It will firm up as it cools in the oven and in the refrigerator. If the center is completely firm, it’s likely overbaked.
Can I make this ahead of time?
Absolutely! Cheesecakes are best made a day in advance. This allows them to chill thoroughly, which is crucial for texture and flavor development.
What kind of coffee beans are best?
Medium to dark roasts tend to work well for baking, as their flavors are more robust and less likely to get lost. A good quality Arabica bean will give you a nice balance of flavor and aroma.
How long does coffee cheesecake last?
Once baked and properly chilled, coffee cheesecake can be stored in the refrigerator, covered, for about 3-5 days.
What if I don’t have a springform pan?
You can try using a regular 9-inch cake pan, but it will be much harder to get the cheesecake out cleanly. You might need to bake it in the pan and serve directly from it, or carefully loosen the sides with a knife before inverting.
What this page does NOT cover (and where to go next)
- Detailed explanations of different coffee brewing methods beyond what’s needed for this recipe.
- Advanced cheesecake decorating techniques.
- Specific brand recommendations for coffee or baking ingredients.
- Troubleshooting for specific oven models or unusual baking issues.