Craft A Coffee Mug Tree For Display And Storage
Quick Answer
- Gather your materials: Wood planks, dowels, screws, and a drill.
- Cut to size: Plan your dimensions based on your mug collection and available space.
- Drill pilot holes: Essential for preventing wood splitting.
- Assemble the frame: Create a sturdy base and uprights.
- Attach dowels: Space them out to hold your mugs securely.
- Sand and finish: Smooth edges and protect the wood.
- Mount securely: Ensure it’s stable before loading up.
For your base and uprights, consider durable wood planks that will provide a sturdy foundation for your mug tree.
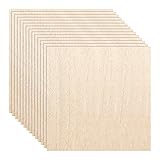
- 【High quality Balsa wood】 100% brand new and high quality, Light wood production, even-grained balsawood, each surface is smooth and does not have any splinters or any other damages
- 【Thin Balsa Wood Sheets】Sanded smooth, dimensions are exact while specific dimensional tolerances strictly maintained within 5%. Specific densities and grain classifications with minimal repairs and knots
- 【Unfinished Wood Chips】Natural color and unfinished, can be painted, pigmented, pigmented, marked, balsa wood ply is one of the essential models and DIY materials
- 【Usage】These balsa wood sheets can be applied for most handmade woodworking DIY craft projects, Ideal for all woodworking, Perfect for aircraft, boat, architectural model making, pyrography, painting, staining and etc
- 【Size】12 pieces of 11.8 x 11.8 Inch/300*300 mm with a thickness of 1/16Inch(1.5mm) balsa wood. Even with the simplest utility knife, balsa wood can be cut easily
Who This Is For
- Anyone with a growing collection of favorite mugs that are taking over cabinet space.
- Folks who like their coffee gear to look good and be easily accessible.
- DIYers who enjoy a weekend project that adds practical style to their kitchen.
What to Check First
Before you start cutting wood, let’s get a lay of the land.
- Your Mug Collection: How many mugs do you have? What are their sizes? Big, bulky mugs need more space. Delicate teacups might hang differently. Measure a few representative mugs. This helps dictate the size of your tree and the spacing of the arms.
- Available Space: Where will this mug tree live? On the counter? Mounted on the wall? Measure the spot. You don’t want to build something that’s too big or too small. Consider the height, width, and depth.
- Tools and Materials: Do you have a drill, saw, screws, and wood? If not, make a supply run. It’s no fun to get halfway through a project and realize you’re missing a key piece. Basic woodworking tools are usually enough for a simple mug tree.
- Design Ideas: Have you seen any mug trees you like? Browse online for inspiration. A simple vertical design is common, but you could get fancy with branches or a tiered approach. Sketch out your own idea based on your mugs and space.
Step-by-Step: How to Make a Coffee Mug Tree
Alright, let’s get building. This is for a basic, freestanding design.
1. Cut the Base: Take your wood plank for the base. Cut it to your desired size. A square or rectangular base (say, 8×8 inches or 6×10 inches) usually works well for stability.
- What “good” looks like: A flat, solid piece of wood with clean, straight edges.
- Common mistake: Not cutting the base large enough. This makes the whole tree wobbly. Avoid this by over-measuring your planned height and the weight of your mugs.
2. Cut the Upright: Cut a piece of wood for the main vertical support. This could be a 1×2 or 2×2 piece, about 18-24 inches tall, depending on how many tiers you want.
- What “good” looks like: A straight, sturdy piece of wood.
- Common mistake: Using wood that’s too thin or flimsy. It’ll bow under the weight of mugs. Stick to something substantial.
3. Attach Upright to Base: Center the upright piece on the base. Drill pilot holes through the base into the bottom of the upright. Secure with screws (2-3 should do it).
- What “good” looks like: The upright stands perfectly vertical and is firmly attached to the base. No wiggle room.
- Common mistake: Not using a level. The upright will be crooked, and your tree will look off. Use a level before screwing it down.
To securely attach the upright to the base, high-quality wood screws are essential for a stable and long-lasting connection.

- 【VARIOUS SIZES】FIXLINK wood screws assortment kit provides you with 8 common sizes from short to long. Contains #6 X 1/2", 5/8" and #8 x 3/4", 1", 1-1/4", 1-1/2", 2", 2-1/2". The wood screws set and M7 screw anchors meet your daily needs
- 【PREMIUM QUALITY】FIXLINK wood screws assortment kit use high-precision cutting technology, the deep and clear threads and sharp tips can easily penetrate wood and plastic and ensure firm fixation, and are not easy to deform and slide when used
- 【STORAGE PORTABLE】 Our self-tapping screw set packed according to the size, so it is efficient to find screw size required. Screws and anchors are packed in a durable environmental protection plastic box, very convenient to manage and store different size screws and easy to transport and carry
- 【WIDE APPLICATION】Self-tapping wood screw set comes with screw anchors, so it can be used on plastic or wood products, such as drywall, wooden boards, ceilings, partitions, etc. Widely used in furniture, DIY crafts, electrical products, communication equipment, ship assembly, machinery, and other maintenance work
- 【WORRY-FREE SERVICE】FIXLINK focuses on customer satisfaction, if you have any questions or are not satisfied, you can contact us by email, we will solve all your problems as soon as possible
4. Cut the Arms (Dowels): Cut several lengths of dowel rod (about 4-6 inches each). These will be your mug hangers. You’ll need 2-3 per “tier.”
- What “good” looks like: Uniform lengths, smooth ends.
- Common mistake: Cutting them too short. Mugs might slide off. Err on the side of slightly longer.
5. Mark Arm Placement: Decide where you want your arms. Mark points on the upright. Space them out vertically, and stagger them horizontally for each tier so mugs don’t bump into each other.
- What “good” looks like: Clear, evenly spaced marks.
- Common mistake: Not staggering the arms. Mugs will bang together and take up more space. Plan your layout before drilling.
6. Drill Pilot Holes for Arms: Drill pilot holes at your marked spots on the upright. The drill bit size should be slightly smaller than your dowel diameter.
- What “good” looks like: Clean holes, the right depth.
- Common mistake: Drilling too large a hole. The dowel won’t be snug. You can always widen a hole, but you can’t shrink one.
7. Insert the Arms: Apply a little wood glue into the pilot holes. Push the dowels firmly into the holes. You can tap them gently with a rubber mallet if needed.
- What “good” looks like: Arms are secure and point outwards at a slight downward angle (helps mugs stay on).
- Common mistake: Not using glue. The arms might loosen over time. Glue adds strength.
8. Sand Everything: Once the glue is dry, sand all the pieces. Start with medium-grit sandpaper and finish with fine-grit. Pay attention to edges and corners.
- What “good” looks like: Smooth to the touch, no splinters.
- Common mistake: Skipping this step. Rough edges can snag your mugs or even give you a splinter. It’s worth the elbow grease.
9. Apply Finish (Optional): Wipe down the tree to remove dust. Apply a coat of your chosen finish – stain, paint, or a clear sealant. Let it dry completely.
- What “good” looks like: Even coverage, no drips.
- Common mistake: Rushing the drying time. You can mess up the finish or get dust stuck in it. Patience is key here.
10. Mount (if applicable) or Place: If you designed it to be wall-mounted, attach appropriate hardware now. If it’s freestanding, find its permanent spot.
- What “good” looks like: It’s stable and level in its final location.
- Common mistake: Placing it on an uneven surface or not securing it properly if wall-mounted. It could tip over.
Common Mistakes (and What Happens If You Ignore Them)
| Mistake | What it Causes | Fix |
|---|---|---|
| Not planning dimensions | Tree is too big for space or too small for mugs | Measure your space and mugs first. Sketch a design. |
| Using flimsy wood for upright/base | Tree is wobbly, tips over easily | Use at least 1×2 for uprights and a solid base plank. |
| Not drilling pilot holes | Wood splits when screwing or inserting dowels | Always drill pilot holes, especially near edges. |
| Arms are too short | Mugs slide off easily | Cut arms long enough to securely hold the handle and base of your mug. |
| Arms are not staggered | Mugs bump into each other, less capacity | Plan arm placement to maximize space and prevent collisions. |
| Upright is not plumb (vertical) | Tree looks crooked, unstable | Use a level when attaching the upright to the base. |
| Skipping sanding | Splinters, rough edges snagging mugs | Sand thoroughly with progressively finer grit sandpaper. |
| Not using wood glue on dowels | Arms can loosen over time | Apply wood glue to pilot holes before inserting dowels for a stronger bond. |
| Rushing the finishing process | Uneven finish, dust trapped, smudges | Allow ample drying time between coats and before use. |
| Insecure mounting (for wall-mounted) | Tree falls off the wall, potential damage | Use appropriate wall anchors and screws for the weight of the tree and mugs. Mount into studs if possible. |
| Base is too small for height/weight | Tree is unstable, prone to tipping | Ensure the base is wide and heavy enough to counterbalance the upright and loaded mugs. |
| Arms are angled too steeply upwards | Mugs can slide off | Aim for a slight downward angle or horizontal position for arms. |
Decision Rules
- If you have a lot of oversized travel mugs, then make your arms longer (6+ inches) because they need more clearance.
- If you plan to mount it on drywall, then use wall anchors rated for the estimated weight because a simple screw won’t hold.
- If you’re unsure about wood types, then opt for pine or poplar because they are easy to work with and affordable.
- If you want a minimalist look, then use a thin, sturdy metal rod for the arms instead of dowels.
- If you have limited counter space, then design a taller, narrower tree or a wall-mounted version.
- If your mugs have very wide handles, then ensure adequate spacing between arms on the same level.
- If you want a rustic feel, then use unfinished wood and embrace its natural texture after sanding.
- If you’re building for a kid’s room (maybe for their own special mug), then make sure the base is extra heavy and stable.
- If you want a quick build, then skip the finishing step or use a spray-on sealant.
- If you have a collection of delicate teacups, then consider smaller dowels and a gentler hanging angle.
- If you’re using screws to attach the upright to the base, then use at least two screws for better stability.
FAQ
Q: How tall should my coffee mug tree be?
A: It depends on your mug size and how many tiers you want. A common height is 18-24 inches for a freestanding unit, but you can go taller or shorter. Measure your tallest mug and add space for hanging.
Q: What kind of wood is best for a mug tree?
A: Pine, poplar, or even oak are good choices. Pine and poplar are budget-friendly and easy to work with. Oak is harder and more durable but also more expensive. Just make sure it’s dry and free of major knots.
Q: How do I make sure my mug tree doesn’t tip over?
A: A wider, heavier base is key for freestanding trees. You can also add some weight to the base, like a few metal plates screwed underneath, if you have particularly heavy mugs. For wall-mounted, proper anchoring is essential.
Q: Can I use something other than dowels for the arms?
A: Absolutely! You could use small wooden pegs, metal rods, or even shaped pieces of wood. Just ensure whatever you choose is smooth and strong enough to hold your mugs.
Q: How far apart should the arms be spaced?
A: For freestanding trees, space them about 3-4 inches apart horizontally on each tier. Vertically, give at least 4-6 inches between tiers to prevent mugs from hitting each other. Staggering is your friend here.
Q: What if my mugs have really big handles?
A: If your mugs have unusually large handles, you might need to space the arms further apart or make the arms longer. You could also consider a design with fewer arms per tier to give each mug more room.
Q: Do I need to seal or paint the wood?
A: It’s not strictly necessary, but it’s a good idea. A finish protects the wood from moisture and stains, makes it easier to clean, and can enhance its appearance. It also helps prevent splinters.
Q: How many mugs can a typical mug tree hold?
A: A standard 2-tier tree with 3 arms per tier can hold around 6 mugs. You can build them with more tiers and arms to increase capacity. Just remember to balance stability with capacity.
What This Page Does Not Cover (And Where to Go Next)
- Advanced joinery techniques: This guide focuses on simple screw and glue methods. For more complex projects, explore mortise and tenon or dado joints.
- Specific wall-mounting hardware: The best hardware depends on your wall type (drywall, plaster, brick). Research anchors and screws appropriate for your situation.
- Complex design variations: We covered a basic tree. If you’re dreaming of intricate branches or rotating designs, look for specialized woodworking plans.
- Finishing techniques for specific woods: Achieving a perfect high-gloss finish on certain woods requires different approaches than basic staining or sealing.