Cozy Coffee: Brewing on a Wood Burning Stove
Quick answer
- Use a heavy-bottomed pot or kettle designed for direct heat.
- Keep a steady, low to medium heat under your brewing vessel.
- Freshly ground, medium-coarse coffee works best for most methods.
- Preheat your water to near boiling (around 200°F) before brewing.
- Stir gently if brewing directly in the pot to avoid scorching.
- Clean your equipment thoroughly after each use to prevent buildup.
- Consider a percolator or a simple pour-over setup.
- Be patient; wood stove brewing takes a little more attention.
Who this is for
- Cabin dwellers and campers who rely on wood stoves for heat.
- Anyone looking for a rustic, hands-on approach to their morning brew.
- Coffee lovers who appreciate the charm of analog brewing methods.
What to check first
Brewer type and filter type
Your setup matters. Are you using a direct-heat pot, a percolator, or something else? A heavy-bottomed stainless steel or cast iron pot is your friend here. Paper filters can work with a pour-over cone, but they need to be well-supported. Metal filters are more robust for this kind of environment.
For brewing directly on a wood stove, a heavy-bottomed stainless steel or cast iron pot is ideal. This type of wood burning stove coffee pot distributes heat evenly and is built to withstand direct heat.
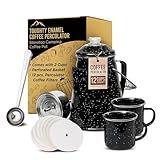
- STURDY ENAMEL BUILD: Crafted from heavy-duty metal and coated with kiln-hardened enamel, this coffee percolator resists scratches, chips, and wear. Ideal for rugged outdoor adventures or daily brewing needs.
- IDEAL FOR CAMPING BREWS: This stovetop coffee maker is designed for use over campfires, grills, or stovetops, delivering rich, flavorful coffee wherever you are. Ideal for camping, hiking, or outdoor gatherings.
- SEE-THROUGH GLASS KNOB FOR PRECISION: The heat-resistant, glass knob lets you monitor the brewing process, offering the ability to adjust the strength of your coffee and adding a classic, nostalgic touch to your brewing experience.
- 12-CUP CAPACITY WITH 2 CUPS AND COFFEE FILTERS INCLUDED: Brew up to 12 cups of coffee, ideal for groups or family. The set includes two enamel cups and 12 coffee filters, making it ideal for sharing coffee during your outdoor adventures.
- VERSATILE AND EASY TO CLEAN: This non-electric coffee maker works on gas, electric, or open fire stovetops. Its simple design ensures hassle-free cleanup, making it the great coffee companion for your outdoor and home brewing needs.
Water quality and temperature
Stale water makes stale coffee. Use good, clean water. Aim for that sweet spot, just off the boil – around 195°F to 205°F. Too hot and you’ll scorch the grounds. Too cool and you’ll get weak, sour coffee. A thermometer is handy, but you can learn to eyeball it by watching for the first few bubbles to rise.
Grind size and coffee freshness
Fresh beans, ground right before brewing. That’s the golden rule. For wood stove brewing, a medium to medium-coarse grind is usually a safe bet. Too fine and it’ll clog your filter or over-extract. Too coarse and it’ll be weak. Think coarse sand.
Coffee-to-water ratio
This is where you dial it in. A good starting point is around 1:15 to 1:17. That means for every gram of coffee, you use 15 to 17 grams of water. So, for a 12 oz cup (about 350g water), you’d use roughly 20-23 grams of coffee. Adjust to your taste.
Cleanliness/descale status
A dirty brewer is a flavor killer. Coffee oils build up fast. Make sure your pot, percolator basket, or pour-over cone is spotless. If you’re using a metal kettle, check for mineral buildup. Regular descaling keeps your water tasting clean and your coffee tasting bright.
Step-by-step (brew workflow)
Let’s say you’re going with a simple stovetop pot method. It’s straightforward and gets the job done.
1. Gather your gear. You’ll need your wood stove, a heat-resistant pot (stainless steel or cast iron is good), fresh coffee beans, a grinder, and your mug.
- What “good” looks like: Everything is clean and ready to go. No last-minute scrambling.
- Common mistake: Forgetting a crucial piece of equipment. Double-check before you start.
2. Heat your water. Fill your pot with your desired amount of water. Place it on the stove.
- What “good” looks like: Water is heating steadily. You’re not cranking the heat to max.
- Common mistake: Putting cold water directly onto scorching hot grounds. You want hot water ready to brew.
3. Grind your coffee. While the water heats, grind your beans to a medium-coarse consistency.
- What “good” looks like: A consistent grind, smelling fresh.
- Common mistake: Using pre-ground coffee that’s been sitting around. It loses flavor fast.
4. Bring water to temperature. Aim for just off the boil, around 200°F. Watch for small bubbles forming, not a rolling boil.
- What “good” looks like: Steam is rising, but it’s not a furious boil.
- Common mistake: Letting the water boil vigorously. This can scorch your coffee.
5. Add coffee grounds to the pot. Once the water is at temp, carefully remove the pot from the direct heat or lower the stove temperature significantly. Add your ground coffee.
- What “good” looks like: Grounds are submerged in the hot water.
- Common mistake: Dumping grounds into boiling water. This leads to bitterness.
6. Stir gently. Give the grounds a gentle stir to ensure they’re all saturated.
- What “good” looks like: All the grounds are wet and starting to bloom.
- Common mistake: Over-stirring, which can agitate fines and lead to a muddy cup.
7. Steep. Let the coffee steep for about 3-4 minutes. You can place the lid loosely on the pot.
- What “good” looks like: The coffee is brewing, aroma filling the air.
- Common mistake: Steeping too long. This leads to over-extraction and bitterness.
8. Strain the coffee. Carefully pour the brewed coffee through a fine-mesh sieve into your mug.
- What “good” looks like: A clear stream of coffee, minimal grounds in your mug.
- Common mistake: Pouring too fast, letting grounds slip through. Slow and steady wins the race.
9. Clean up. Rinse your pot and sieve immediately.
- What “good” looks like: Clean equipment ready for the next brew.
- Common mistake: Leaving grounds to dry and cake on. It makes cleaning much harder.
Common mistakes (and what happens if you ignore them)
| Mistake | What it causes | Fix |
|---|---|---|
| Using too high heat | Scorched coffee, bitter taste, burnt aroma | Use low to medium heat. Move pot off direct heat when adding grounds. |
| Using water that’s too hot (boiling) | Over-extraction, harshness, loss of delicate notes | Aim for 195-205°F. Let boiling water cool slightly. |
| Using water that’s too cool | Under-extraction, weak, sour coffee | Ensure water is hot enough to bloom the grounds effectively. |
| Using too fine a grind | Clogged filter, over-extraction, muddy coffee | Use medium-coarse to coarse grind. Check your grinder settings. |
| Using stale, pre-ground coffee | Flat, lifeless flavor, lack of aroma | Grind fresh beans just before brewing. Store beans in an airtight container away from light and heat. |
| Incorrect coffee-to-water ratio (too much coffee) | Over-extraction, very strong, potentially bitter | Start with a 1:15 to 1:17 ratio and adjust to taste. |
| Incorrect coffee-to-water ratio (too little coffee) | Under-extraction, weak, watery coffee | Start with a 1:15 to 1:17 ratio and adjust to taste. |
| Not cleaning equipment properly | Rancid oils, off-flavors, dull coffee | Rinse and clean all brewing equipment thoroughly after each use. Descale periodically. |
| Stirring too aggressively | Agitated fines, muddy coffee, bitterness | Stir gently only to saturate the grounds. |
| Not letting coffee steep long enough | Under-extraction, weak, sour coffee | Allow 3-4 minutes for steeping. Adjust based on grind size and taste. |
| Letting coffee boil after steeping | Over-extraction, burnt taste | Remove from heat or significantly reduce heat after steeping. |
Decision rules (simple if/then)
- If your coffee tastes bitter, then reduce the steep time or use a coarser grind because over-extraction is likely.
- If your coffee tastes weak and sour, then increase the coffee-to-water ratio or use hotter water because under-extraction is likely.
- If you notice a lot of sediment in your cup, then use a coarser grind or a finer sieve because your current method is letting too many fines through.
- If your brew is taking too long and tastes weak, then check your grind size; it might be too coarse.
- If your brew is overflowing or taking forever, then your grind is likely too fine or your heat is too high.
- If your coffee has a burnt taste, then your heat is too high or you’re steeping for too long.
- If your coffee tastes dull, then ensure you’re using fresh beans and clean equipment.
- If you’re using a percolator and it’s gurgling too aggressively, then reduce the heat slightly because it’s boiling too hard.
- If your pour-over is draining too fast, then your grind might be too coarse.
- If you have a metallic taste, then check your kettle or pot for mineral buildup and descale if necessary.
- If you’re brewing directly in a pot and the bottom is scorching, then use a heat diffuser or move the pot to a cooler part of the stove.
FAQ
Can I just boil coffee grounds in water?
You can, but it’s not ideal. This is often called cowboy coffee. It tends to result in a lot of sediment and can easily over-extract, leading to a bitter taste. Using a sieve or filter helps a lot.
While cowboy coffee can be brewed directly in a pot, using a sieve or filter is recommended to reduce sediment. If you prefer a cleaner cup, a pour over coffee maker setup can also work well with a fine-mesh filter.

- Pour Over Coffee: Manual Pour Over Coffee Maker allows you to brew an excellent cup of Coffee in minutes
- Stainless steel: Includes a new and improved permanent, stainless steel mesh filter that helps extract your coffee's aromatic oils and subtle flavors instead of being absorbed by a paper filter
- Coffee Carafe: Made of durable, heat-resistant borosilicate glass with Cork Band detailing that is both functional and elegant; single wall
- Quick and Easy: Simply add coarse ground Coffee to filter, pour a small amount of water in a circular motion over ground Coffee until soaked then add the remaining water and let drip
- Servings: Pour Over Coffee Maker makes 8 cups of Coffee, 4 oz each; dishwasher safe
What’s the best pot to use on a wood stove?
A heavy-bottomed stainless steel or cast iron pot is best. They distribute heat more evenly and are durable enough for direct heat. Avoid thin-walled aluminum pots.
How do I control the heat on a wood stove?
It takes practice. You can move the pot to different parts of the stove top (hotter near the firebox, cooler further away) or use a heat diffuser. Don’t be afraid to adjust the position or amount of wood.
Can I use a French press on a wood stove?
Yes, but with caution. You’ll heat the water in a separate kettle on the stove, then pour it over the grounds in the French press. Be careful not to overheat the glass carafe.
What if I don’t have a thermometer?
You can learn to tell by watching the water. Just before it boils, tiny bubbles will start to form on the bottom and sides. That’s usually around 195-200°F.
How much coffee should I use?
A good starting point is a ratio of 1 part coffee to 15-17 parts water by weight. For a standard 8 oz mug (about 237ml or grams of water), that’s roughly 14-16 grams of coffee. Adjust to your preference.
My coffee tastes muddy. What went wrong?
This usually means your grind is too fine for the method you’re using, or your filter isn’t fine enough. Try a coarser grind or a more effective filter.
How do I avoid scorching the coffee grounds?
Ensure your water is hot but not boiling when you add the grounds. Remove the pot from direct heat or significantly reduce the heat source once the water reaches temperature. Gentle stirring helps, but avoid vigorous agitation.
What this page does NOT cover (and where to go next)
- Specific wood stove models and their heat output variations. (Look for your stove’s manual.)
- Advanced roasting techniques for wood-fired coffee beans. (Explore home roasting guides.)
- Detailed comparisons of different filter materials. (Research filter types for your chosen brew method.)
- The science of water chemistry and its impact on coffee flavor. (Dive into coffee extraction theory.)
- Electric coffee makers. (This is about analog, remember?)