Coffee Maker Water Filter: How Often to Replace It
Quick answer
- Change your coffee maker’s water filter every 1-3 months, or as recommended by the manufacturer.
- Use filtered water whenever possible, even with a filter in your machine.
- A dirty filter can impact taste and clog your brewer.
- Check your coffee maker’s manual for specific recommendations.
- If your water is very hard, you might need to change it more often.
- Signs of a clogged filter include slow brewing and a stale taste.
Who this is for
- Home coffee drinkers who want the best possible taste from their brews.
- Anyone noticing a change in their coffee’s flavor or brewing speed.
- People who own a coffee maker with a built-in water filter system.
What to check first
Brewer type and filter type
Know what you’re working with. Is it a drip machine, a Keurig, a fancy espresso maker? They all have different needs. Some use paper filters, others have permanent mesh filters, and many have dedicated water filters. This guide focuses on those built-in water filters.
Water quality and temperature
The water you use is a huge part of your coffee. If your tap water tastes funky, your coffee will too. Using filtered water from the start is always a good move. And while the filter’s job isn’t temperature, make sure your water is the right temp for brewing – usually between 195-205°F.
Grind size and coffee freshness
Freshly ground beans make a world of difference. Pre-ground coffee loses its zing fast. Grind size matters too; too fine can clog a filter, too coarse and you get weak coffee. For most drip makers, a medium grind is the sweet spot.
Coffee-to-water ratio
This is your foundation for good coffee. A common starting point is 1:15 to 1:18 – that’s 1 gram of coffee to 15-18 grams of water. For a standard 8-cup pot (which is really about 40 oz), try around 55-60 grams of coffee. It’s an easy adjustment to dial in.
Cleanliness/descale status
A clean machine is a happy machine. If you haven’t descaled your coffee maker in a while, mineral buildup can mess with everything, including how the water flows through the filter. Regular descaling keeps things running smooth and tasting fresh.
Step-by-step (brew workflow)
1. Gather your supplies. You’ll need your coffee maker, fresh coffee beans, a grinder, filtered water, and your replacement water filter.
- Good looks like: Everything is clean and ready to go. No last-minute scrambling.
- Common mistake: Forgetting to buy new filters. You end up delaying your morning cup. Keep spares on hand.
When gathering your supplies, make sure you have a fresh water filter cartridge on hand. Having a spare ensures you’re always ready for a replacement.
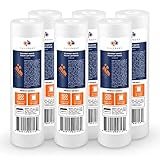
- Superior Sediment Filter Performance: This 5 micron water filter captures contaminants like rust, sand, dirt, and sludge with ease. Thanks to its multi-layered design, this sediment water filter replacement ensures your water is clean and clear.
- Easy Installation & Quick Replacement: With its universal fit, the 10x2.5 water filter installs in most standard filter housings within minutes. Spend less time on maintenance and more time enjoying fresh filtered water from your home water filter.
- Premium Food-Grade Material: Crafted from food-grade polypropylene, this 5 micron sediment filter delivers high standards of safety. Its melt-blown construction ensures no fiber shedding, giving you a reliable and clean well water filtration solution.
- Continuous Water Flow with No Pressure Drop: Designed for efficiency, Aquaboon house water filter provides stable water flow without reducing pressure. Whole house water filter replacement prevents blockages, ensuring a smooth, uninterrupted water supply.
- Extend Equipment Life with Advanced Filtration: The 5 micron water filter cartridge also extends the life of your home appliances by reducing buildup of harmful particles. Invest in sediment filters for well water to protect your valuable equipment.
2. Check your water filter status. Look at your coffee maker’s manual or any indicator lights. If it’s been 1-3 months, or the indicator says so, it’s time for a change.
- Good looks like: You know exactly when your filter needs replacing.
- Common mistake: Ignoring the filter until the coffee tastes off. This means it’s already impacting your brew.
3. Remove the old water filter. Most coffee makers have a compartment for the filter. Gently pull it out.
- Good looks like: The filter comes out easily without forcing.
- Common mistake: Yanking too hard and breaking the filter holder. Be gentle.
4. Prepare the new water filter. Many new filters need to be soaked in water for a few minutes. Check the packaging for instructions.
- Good looks like: The filter is properly prepped according to the manufacturer’s directions.
- Common mistake: Skipping the soaking step. This can lead to charcoal dust in your first few brews.
5. Install the new water filter. Place the new filter into the designated compartment. Make sure it’s seated correctly.
- Good looks like: The filter snaps or slides into place securely.
- Common mistake: Installing it backward or not fully securing it. This can lead to leaks or bypass.
6. Rinse the coffee maker. Run a cycle with just water (no coffee grounds) to flush out any residual dust from the new filter and rinse the system.
- Good looks like: Clear water runs through the machine.
- Common mistake: Not doing this rinse cycle. You might get a slightly dusty taste in your first pot.
7. Measure and grind your coffee beans. Use a good burr grinder for consistency. Aim for a medium grind for most drip machines.
- Good looks like: Uniformly sized coffee grounds.
- Common mistake: Using a blade grinder which creates inconsistent particle sizes, leading to uneven extraction.
8. Add coffee grounds to the filter basket. Use your preferred coffee-to-water ratio.
- Good looks like: Evenly distributed grounds in the filter.
- Common mistake: Overfilling the basket, which can cause grounds to overflow.
9. Add fresh, cold water to the reservoir. Use filtered water if you can.
- Good looks like: The correct amount of water for your desired brew.
- Common mistake: Using hot water or old water, which can affect brewing temperature and taste.
10. Start the brew cycle. Turn on your coffee maker and let it do its thing.
- Good looks like: A steady flow of coffee into your carafe.
- Common mistake: Interrupting the brew cycle. This can lead to under-extraction.
11. Enjoy your coffee. Pour a cup and savor the fresh, clean taste.
- Good looks like: A delicious cup of coffee.
- Common mistake: Letting brewed coffee sit on the burner too long. It gets bitter.
Common mistakes (and what happens if you ignore them)
| Mistake | What it causes | Fix |
|---|---|---|
| Not replacing the water filter | Stale, off-tasting coffee; mineral buildup | Replace the filter according to the manufacturer’s schedule. |
| Using tap water without filtering | Off-flavors in coffee; faster mineral buildup | Use filtered water or a good coffee maker water filter. |
| Using pre-ground coffee | Flat, stale taste; less aromatic coffee | Grind beans fresh just before brewing. |
| Incorrect grind size | Under-extracted (sour) or over-extracted (bitter) | Adjust grind size based on your brewer type. Medium is common. |
| Wrong coffee-to-water ratio | Weak, watery coffee or overly strong, bitter coffee | Measure your coffee and water accurately for consistency. |
| Not descaling regularly | Slow brewing, uneven heating, bad taste | Descale your machine every 1-3 months, depending on water hardness. |
| Using old, stale coffee beans | Lack of flavor, muted aroma | Buy fresh beans and store them properly in an airtight container. |
| Not rinsing the new filter | Potential charcoal dust taste in first brew | Always run a water-only cycle after installing a new filter. |
| Overfilling the brew basket | Grounds overflow into the carafe, messy brew | Measure your grounds and don’t pack them down too tightly. |
| Letting brewed coffee sit on hot plate | Bitter, burnt taste | Transfer coffee to a thermal carafe or drink it promptly. |
Decision rules (simple if/then)
- If your coffee tastes bitter, then check your grind size and coffee-to-water ratio because these are common causes of over-extraction.
- If your coffee tastes sour, then check your grind size and brew time because these can indicate under-extraction.
- If your coffee maker is brewing slowly, then check your water filter and descale status because mineral buildup or a clogged filter restricts water flow.
- If you notice a chalky residue in your carafe or on your machine, then it’s time to descale because mineral deposits are building up.
- If your water tastes bad straight from the tap, then your coffee will likely taste bad too, so use filtered water or replace your coffee maker’s filter more often.
- If you have very hard water, then you should plan to replace your coffee maker’s water filter more frequently than the recommended 1-3 months.
- If you don’t have a water filter in your coffee maker, but your tap water tastes good, then you might be okay, but a dedicated filter can still improve clarity and taste.
- If your coffee maker has an indicator light for the filter, and it’s on, then replace the filter because it’s signaling it’s time.
- If you’re unsure about your coffee maker’s specific filter needs, then consult the owner’s manual because manufacturers have precise recommendations.
- If you’re brewing with a French press or pour-over, and using a paper filter, then the filter itself is what you change each time, not a built-in water filter.
- If you notice a chemical smell from your coffee maker, then it might be time to clean or descale, or the water filter might be old and affecting the water quality.
FAQ
How long does a coffee maker water filter typically last?
Most coffee maker water filters are designed to last for 1 to 3 months of regular use. However, this can vary based on how much coffee you brew and the mineral content of your water. Always check your manufacturer’s guidelines.
What happens if I don’t change my coffee maker’s water filter?
Not changing your filter means it can no longer effectively remove impurities like chlorine and minerals. This leads to stale-tasting coffee and can allow mineral buildup (scale) to form inside your machine, potentially damaging it over time.
Can I use bottled water instead of changing the filter?
Using good quality bottled or filtered water is a great way to improve your coffee, even with a filter. However, it doesn’t replace the need for a filter if your machine has one. The machine’s filter is designed to work with the water as it flows through the brewing system.
How do I know if my coffee maker has a water filter?
Look for a compartment in the water reservoir designed to hold a filter cartridge. Many brands have them, and they’re often easily accessible for replacement. If you’re unsure, your coffee maker’s manual is the best place to check.
Does the type of coffee I use affect how often I change the filter?
No, the type of coffee bean or roast you use doesn’t directly impact how often you change the water filter. The filter’s lifespan is determined by the water quality and the volume of water that passes through it.
What if my coffee maker doesn’t have a water filter?
If your machine doesn’t have a built-in filter, consider using filtered water from a pitcher or faucet filter for brewing. This will help improve the taste of your coffee and reduce mineral buildup in your machine.
Can I reuse a coffee maker water filter?
No, coffee maker water filters are designed for single use and cannot be reused. Once they’ve done their job filtering impurities, they become saturated and ineffective.
What this page does NOT cover (and where to go next)
- Detailed troubleshooting for specific coffee maker brands (check your manual).
- The science behind water chemistry and coffee extraction (explore coffee brewing blogs).
- How to clean and descale different types of coffee makers (look for descaling guides).
- Reviews or comparisons of specific coffee maker models (visit appliance review sites).
- Advanced brewing techniques like latte art or cold brew methods (search for specialty coffee resources).