Coffee Jelly Without Cream: Easy Recipe
Quick Answer
- Use strong brewed coffee or espresso as your base for intense flavor.
- Agar-agar is the key gelling agent when avoiding dairy.
- Sweeten to your preference with sugar, syrup, or a dairy-free milk alternative.
- Chill thoroughly to achieve a firm, sliceable texture.
- Serve plain or with fresh fruit for a refreshing dessert.
- Adjust agar-agar amount for desired firmness; too little won’t set, too much can be rubbery.
Who This Is For
- Those who love the texture and flavor of coffee jelly but are avoiding dairy.
- Home cooks looking for a simple, elegant dessert that highlights coffee.
- Individuals seeking a refreshing, caffeine-infused treat, especially in warmer weather.
What to Check First
Before you begin making coffee jelly, a few key elements will ensure your success.
Coffee Type and Strength
The foundation of your coffee jelly is the coffee itself. You’ll want to use a coffee that has a robust flavor, as some of it will be diluted by the gelling agent and sweetener.
The foundation of your coffee jelly is the coffee itself. You’ll want to use a coffee that has a robust flavor, as some of it will be diluted by the gelling agent and sweetener. For the best results, consider using a high-quality, strong brewed coffee like this one.
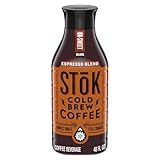
- Plenty to Go Around: One 48 fl oz bottle of ready to drink Unsweetened, Black, SToK Espresso Blend Cold Brew Coffee with 195 mg caffeine per 12 oz serving
- Brewed Low and Slow: SToK Espresso Blend Cold Brew Coffee drinks are steeped for at least 10 hours to bring you a dialed-in smoothness that’s never bitter
- Still Smooth: SToK's boldest brew with nutty, chocolaty, caramelized, smoky and dried fruit flavor notes
- Flavor Inspiration: Check out all the SToK cold brew coffee flavors, like Bright & Mellow and Not Too Sweet, so you can turn your passion for cold brew into action
- Make a Difference: SToK Cold Brew Coffee is made with responsibly-grown, Rainforest Alliance Certified beans
- What to look for:
- Strong brewed coffee (e.g., using a drip coffee maker with a higher coffee-to-water ratio than usual).
- Espresso (diluted slightly with water if you find it too intense).
- Cold brew concentrate (diluted to your taste).
- Common mistake: Using weak coffee.
- How to avoid: Brew your coffee stronger than you normally would for drinking. If you’re unsure, err on the side of making it more concentrated.
Gelling Agent: Agar-Agar
When making coffee jelly without cream, agar-agar is the go-to plant-based gelling agent. It’s derived from seaweed and provides a firm set without dairy.
- What to look for:
- Agar-agar powder or flakes. Powder is generally more potent and easier to measure precisely.
- Common mistake: Using gelatin (which is animal-derived and not suitable for a dairy-free recipe).
- How to avoid: Double-check your package to ensure it’s agar-agar. If using flakes, you might need more than powder.
Sweetener and Flavor Enhancers
The sweetness level is entirely up to your personal preference, and you can choose a variety of sweeteners.
- What to look for:
- Granulated sugar.
- Simple syrup (equal parts sugar and water, heated until sugar dissolves, then cooled).
- Maple syrup or agave nectar for a different flavor profile.
- A splash of vanilla extract can enhance the coffee flavor.
- Common mistake: Not tasting and adjusting sweetness before the jelly sets.
- How to avoid: Always taste your liquid mixture before pouring it into your mold. Remember that the flavor will be slightly less intense once chilled and set.
Water Quality
The water you use to brew your coffee or to make simple syrup can impact the final taste.
- What to look for:
- Filtered water.
- Good-tasting tap water.
- Common mistake: Using heavily chlorinated or off-tasting tap water.
- How to avoid: If your tap water doesn’t taste great on its own, use filtered water.
Equipment Cleanliness
Ensuring all your equipment is clean is crucial for food safety and to prevent any off-flavors.
- What to look for:
- Clean saucepan, whisk, measuring cups, and spoons.
- Clean serving dishes or molds.
- Common mistake: Using dishes that aren’t fully clean, which can introduce bacteria or unwanted tastes.
- How to avoid: Wash all utensils and containers thoroughly with hot, soapy water.
Step-by-Step Coffee Jelly Workflow
This workflow guides you through creating delicious coffee jelly without using any dairy cream.
1. Brew Strong Coffee:
- What to do: Brew about 2 to 2.5 cups of very strong coffee. Use your preferred brewing method but increase the coffee grounds or decrease the water for a concentrated flavor.
- What “good” looks like: The coffee should have a rich, dark color and an intense aroma, much stronger than your typical drinking coffee.
- Common mistake: Brewing weak coffee, which results in a bland jelly.
- How to avoid: Measure your coffee and water carefully, aiming for a significantly higher coffee-to-water ratio than usual.
2. Measure Agar-Agar:
- What to do: Measure out 1 to 1.5 teaspoons of agar-agar powder. The exact amount depends on the brand and desired firmness. Start with 1 teaspoon for a softer set, or 1.5 teaspoons for a firmer jelly.
- What “good” looks like: You have the correct amount of agar-agar powder measured precisely.
- Common mistake: Under-measuring or over-measuring agar-agar.
- How to avoid: Use a level measuring spoon and follow the agar-agar package instructions if available, as potency can vary.
3. Combine Coffee and Agar-Agar:
- What to do: Pour your brewed strong coffee into a medium saucepan. Sprinkle the agar-agar powder evenly over the surface of the cold coffee. Let it sit for about 5 minutes to hydrate.
- What “good” looks like: The agar-agar is evenly distributed and beginning to absorb the liquid.
- Common mistake: Adding agar-agar to hot liquid or not letting it hydrate.
- How to avoid: Always add agar-agar to a cold liquid and allow it a few minutes to bloom before heating.
4. Heat and Dissolve Agar-Agar:
- What to do: Place the saucepan over medium heat. Whisk constantly as the mixture heats up. Bring it to a gentle boil and continue whisking for 1 to 2 minutes to ensure the agar-agar is fully dissolved.
- What “good” looks like: The mixture is simmering gently, and you can no longer see any undissolved agar-agar particles. The liquid should be clear.
- Common mistake: Not boiling long enough, leading to a jelly that won’t set.
- How to avoid: Ensure the mixture reaches a boil and maintains it for the specified time while whisking.
5. Sweeten the Mixture:
- What to do: Remove the saucepan from the heat. Stir in your desired sweetener. Start with about 1/4 cup of sugar or simple syrup and add more to taste. You can also add a splash of vanilla extract here.
- What “good” looks like: The sweetener is fully dissolved, and the liquid tastes pleasantly sweet and coffee-flavored.
- Common mistake: Not tasting and adjusting sweetness.
- How to avoid: Taste the liquid carefully (it will be hot) and add more sweetener as needed before it cools too much.
6. Strain (Optional):
- What to do: If you used coffee grounds directly in the brewing process and want a perfectly smooth jelly, you can strain the mixture through a fine-mesh sieve into a clean bowl or pitcher.
- What “good” looks like: The liquid is now free of any coffee grounds or undissolved bits.
- Common mistake: Skipping straining if you desire a super smooth texture.
- How to avoid: If you prefer a perfectly smooth finish, don’t skip this step.
7. Pour into Molds:
- What to do: Carefully pour the hot liquid into individual serving glasses, ramekins, or a larger mold.
- What “good” looks like: The liquid is evenly distributed in your chosen containers.
- Common mistake: Pouring too quickly and splashing, or not filling containers evenly.
- How to avoid: Pour slowly and steadily, using a ladle or pitcher with a spout for better control.
8. Chill to Set:
- What to do: Allow the jelly to cool slightly at room temperature for about 15-20 minutes, then transfer the containers to the refrigerator. Chill for at least 3-4 hours, or until completely firm.
- What “good” looks like: The jelly is firm to the touch and will hold its shape when inverted.
- Common mistake: Not chilling long enough, resulting in a jelly that is too soft or liquid.
- How to avoid: Be patient and allow ample chilling time. Agar-agar needs time to fully set.
9. Serve:
- What to do: Once firm, your coffee jelly is ready to serve. You can unmold it if using a mold, or serve directly in the glasses.
- What “good” looks like: The jelly is firm, jiggly, and ready to be enjoyed.
- Common mistake: Trying to serve before it’s fully set.
- How to avoid: Give it the full chilling time.
Common Mistakes (and What Happens If You Ignore Them)
| Mistake | What It Causes | Fix |
|---|---|---|
| Using weak coffee | Bland, uninspired coffee flavor; the jelly tastes more like sweetened gelatin. | Brew coffee significantly stronger than you normally would for drinking. |
| Not fully dissolving agar-agar | Gritty texture; the jelly may not set properly or could have an unpleasant mouthfeel. | Whisk continuously and ensure the mixture boils gently for 1-2 minutes until all particles are dissolved. |
| Using too little agar-agar | The jelly will be too soft, wobbly, or may not set at all. | Add a small amount more agar-agar (1/4 tsp increments) to the hot liquid, re-boil briefly, and test for set. |
| Using too much agar-agar | The jelly will be too firm, rubbery, or hard. | Start with the lower end of the recommended range and adjust in future batches. It’s harder to fix once it’s already set. |
| Not tasting and adjusting sweetness | The jelly is either too sweet or not sweet enough for your liking. | Taste the liquid mixture before pouring it into molds and adjust sweetener levels as needed. |
| Not allowing enough chilling time | The jelly remains too soft, liquid, or difficult to unmold. | Chill for the recommended minimum of 3-4 hours, or until it is completely firm to the touch. |
| Using dairy cream when aiming for dairy-free | Contradicts the recipe’s purpose and may cause issues for those with intolerances. | Strictly use agar-agar and avoid any dairy products; opt for dairy-free milks or water if adding liquid. |
| Not re-boiling after adding sweetener | Agar-agar might not fully activate if the mixture cools too much before the boil. | Ensure the mixture reaches a boil <em>after</em> adding agar-agar and before adding sweetener if you are concerned about activation. |
| Pouring too quickly into molds | Splattering, uneven distribution, and potential burns from hot liquid. | Pour slowly and steadily, using a ladle or pitcher with a spout for control. |
| Using old or improperly stored agar-agar | Reduced gelling power, leading to a soft or unset jelly. | Check expiration dates and store agar-agar in a cool, dry place. If in doubt, use a bit more than usual. |
Decision Rules for Perfect Coffee Jelly
Here are some simple rules to help you troubleshoot and perfect your coffee jelly.
- If your coffee jelly doesn’t set after chilling, then you likely used too little agar-agar or didn’t boil it long enough, because agar-agar needs sufficient heat and quantity to activate its gelling properties.
- If your coffee jelly is too firm and rubbery, then you used too much agar-agar, because agar-agar creates a very firm gel at higher concentrations.
- If the coffee flavor is weak, then your base coffee wasn’t brewed strong enough, because the coffee flavor will be diluted by the agar-agar and sweetener.
- If you want a smoother jelly without coffee grounds, then strain the mixture after dissolving the agar-agar and before pouring into molds, because straining removes any solid particles.
- If you are unsure about the sweetness, then taste the liquid mixture before chilling and add more sweetener as needed, because it’s easier to adjust sweetness when the liquid is still warm.
- If you want to unmold the jelly cleanly, then ensure it is fully set and consider lightly oiling the mold before pouring, because a fully set jelly will release more easily.
- If your jelly has a slightly bitter taste, then you may have over-extracted your coffee, or the sweetener might not be balanced, because coffee bitterness can be amplified when concentrated.
- If you want to add a hint of vanilla, then stir it in after removing the mixture from the heat, because vanilla extract’s flavor is best preserved when not subjected to prolonged high heat.
- If you are making this for guests and want it to look polished, then use clear serving glasses or attractive ramekins, because presentation enhances the dessert experience.
- If you notice small lumps in your set jelly, then the agar-agar was likely not fully dissolved, because undissolved agar-agar can create an unpleasant texture.
- If you want a softer, more delicate jelly, then use closer to 1 teaspoon of agar-agar powder per 2-2.5 cups of liquid, because less agar-agar results in a less firm set.
FAQ
Can I use instant coffee instead of brewed coffee?
Yes, you can use instant coffee. Dissolve the instant coffee granules in the hot water according to package directions, ensuring it’s a strong brew, before adding the agar-agar.
How much agar-agar should I use?
Generally, 1 to 1.5 teaspoons of agar-agar powder is sufficient for 2 to 2.5 cups of liquid. The exact amount can vary by brand, so check your package for specific recommendations or start with the lower amount for a softer jelly.
Can I make this ahead of time?
Absolutely. Coffee jelly can be made up to 2-3 days in advance and stored, covered, in the refrigerator. This makes it a great make-ahead dessert for parties.
What can I serve with coffee jelly if I don’t want cream?
Fresh berries, a dollop of dairy-free whipped cream (coconut-based is common), a sprinkle of toasted nuts, or a drizzle of fruit coulis are excellent dairy-free accompaniments.
Is coffee jelly vegan?
Yes, when made with agar-agar and without any dairy products or other animal-derived ingredients, coffee jelly is vegan.
How do I unmold the coffee jelly?
To unmold, run a thin knife around the edge of the jelly to loosen it. Dip the bottom of the mold briefly in warm water (be careful not to melt the jelly) and then invert it onto a plate.
Can I adjust the sweetness level?
Yes, sweetness is entirely to your taste. Start with a smaller amount of sweetener and add more gradually, tasting as you go, until you achieve your desired level of sweetness.
What if my jelly is too soft?
If your jelly is too soft, it means you likely didn’t use enough agar-agar or didn’t boil it long enough. For future batches, increase the agar-agar amount slightly or ensure it boils for the full 1-2 minutes.
What This Page Does Not Cover (and Where to Go Next)
- Recipes for coffee jelly that do include dairy cream or condensed milk.
- Advanced flavor pairings or complex garnish techniques.
- Detailed information on the chemical properties of agar-agar versus gelatin.
If you’re interested in exploring these areas, you might want to search for “traditional coffee jelly recipes,” “gourmet dessert garnishes,” or “plant-based gelling agents comparison.”