Brewing Sun Coffee: A Refreshing Method
Quick Answer
- Use a cold brew method for a smoother, less acidic coffee.
- Start with a coarse grind; think sea salt.
- Aim for a 1:8 coffee-to-water ratio to begin.
- Filter thoroughly to remove sediment.
- Let it steep for 12-24 hours, depending on your taste.
- Dilute to your preference before serving over ice.
Who This Is For
- Folks who want a less bitter, naturally sweet coffee.
- Anyone sensitive to the acidity of hot-brewed coffee.
- Campers and outdoor enthusiasts looking for a simple, portable brew.
What to Check First
Brewer Type and Filter Type
This method is all about cold brewing. That means no heat. You’ll need a vessel to steep your grounds in and something to filter them out. A French press works great. So does a simple jar with a cheesecloth or a dedicated cold brew maker. The filter is key to a clean cup. Paper filters can work, but they might clog. Metal or mesh filters are often preferred for cold brew.
For a simple setup, a glass jar with a lid is a great starting point for your cold brew journey. You can easily find one to get started.
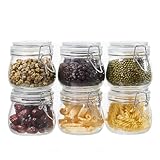
- 【Premium Glass Jars with Airtight Lids】These airtight glass jars feature a wire clip fastening system with clear preserving seals, locking in freshness and flavor. Ideal for dry goods and long-term food storage.
- 【Perfect Size: 17 oz Capacity – Set of 6】Each jar holds 17oz, just right for storing beans, flour, sugar, cereal, pasta, or snacks. Comes as a 6 pack to organize your kitchen efficiently.
- 【Durable & Safe Food Storage Containers】Made from thick, lead-free, glass food storage containers that are BPA-free, odor-resistant, and safe for everyday use.
- 【Multi-Purpose Glass Canisters for Kitchen & Pantry】Great for kitchen canning and pickling jars – also suitable for DIY jam, honey, kimchi, spices, and more. A functional and elegant solution for pantry storage jars.
- 【Stylish & Practical Storage Jars】Sleek square design saves space and looks beautiful on shelves. These glass storage jars are easy to stack and clean, combining utility with minimalist decor.
Water Quality and Temperature
Use good water. If your tap water tastes funky, your coffee will too. Filtered water is usually best. For cold brew, the temperature is obviously cold, but the starting point matters. Room temperature water is fine to start. It’ll cool down as it steeps. Don’t use hot water; that defeats the purpose.
Grind Size and Coffee Freshness
This is critical. You want a coarse grind. Think breadcrumbs or sea salt, not powder. A fine grind will over-extract and make your coffee muddy and bitter, even when cold. Freshly ground beans are always the way to go. Grind right before you brew. Stale coffee just won’t cut it.
Coffee-to-Water Ratio
This is your starting point. A common ratio for cold brew is 1:8. That’s one part coffee to eight parts water by weight. So, if you use 100 grams of coffee, you’d use 800 grams (or milliliters) of water. You can adjust this later based on how strong you like it. It’s a solid baseline.
Cleanliness/Descale Status
Your brewer and storage containers should be spotless. Old coffee oils can go rancid and ruin your batch. If you’re using a machine, make sure it’s descaled. Even with cold brew, a clean setup is non-negotiable. Wash everything thoroughly after each use.
Step-by-Step (Brew Workflow)
1. Measure Your Coffee.
- What to do: Weigh out your whole coffee beans.
- What “good” looks like: Beans ready for grinding.
- Common mistake: Guessing the amount. This leads to inconsistent strength. Always measure.
2. Grind Your Coffee.
- What to do: Grind the beans to a coarse consistency.
- What “good” looks like: Grounds resembling coarse sand or sea salt.
- Common mistake: Grinding too fine. This will result in a cloudy, bitter brew. Use a burr grinder if you can.
3. Add Grounds to Brewer.
- What to do: Place the coarse coffee grounds into your chosen brewing vessel.
- What “good” looks like: All grounds are contained within the brewing chamber or filter.
- Common mistake: Overfilling the brewer. Leave some headspace for water.
4. Add Water.
- What to do: Pour cold or room-temperature filtered water over the grounds.
- What “good” looks like: All grounds are saturated. You can give it a gentle stir to ensure this.
- Common mistake: Using hot water. This is cold brew, remember? Stick to cold.
5. Steep.
- What to do: Cover the brewer and let it sit at room temperature or in the fridge.
- What “good” looks like: A patient wait. 12 to 24 hours is the sweet spot.
- Common mistake: Steeping for too short a time. You won’t get full flavor extraction.
6. Press (if using French Press).
- What to do: Slowly and steadily press the plunger down.
- What “good” looks like: The plunger moves smoothly without excessive resistance.
- Common mistake: Plunging too fast. This can force fine particles through the filter.
7. Filter (if not using French Press).
- What to do: Carefully strain the coffee concentrate through your filter setup.
- What “good” looks like: A clear, sediment-free liquid. You might need to filter twice.
- Common mistake: Not filtering enough. Sediment makes for a gritty cup.
8. Dilute.
- What to do: Add fresh water or milk to the coffee concentrate.
- What “good” looks like: A balanced flavor that suits your taste. Start with a 1:1 ratio of concentrate to water.
- Common mistake: Drinking the concentrate straight. It’s super strong!
9. Serve.
- What to do: Pour over ice and enjoy.
- What “good” looks like: A refreshing, smooth coffee drink.
- Common mistake: Not serving it cold. Cold brew is meant to be chilled.
Common Mistakes (and What Happens If You Ignore Them)
| Mistake | What It Causes | Fix |
|---|---|---|
| Grinding too fine | Bitter, muddy coffee; clogged filters | Use a coarse grind; check your grinder settings. |
| Using stale coffee beans | Flat, lifeless flavor; no aroma | Use freshly roasted, whole beans; grind right before brewing. |
| Not filtering enough | Gritty texture; unpleasant mouthfeel | Filter twice; use a finer mesh filter or paper filter if needed. |
| Steeping for too short a time | Weak, underdeveloped flavor; sour notes | Extend steeping time to at least 12 hours. |
| Steeping for too long | Over-extracted, bitter, and sometimes metallic taste | Reduce steeping time; aim for 12-24 hours max. |
| Using poor quality water | Off-flavors; dull coffee taste | Use filtered or spring water. |
| Not cleaning equipment | Rancid oils; off-flavors; potential mold | Wash all equipment thoroughly after each use. |
| Not diluting the concentrate | Overwhelmingly strong, undrinkable coffee | Dilute with water or milk to your preferred strength. |
| Using hot water | Defeats the purpose of cold brewing; creates heat | Always use cold or room-temperature water for steeping. |
| Over-extraction | Bitter, harsh, and astringent coffee | Use a coarse grind, proper ratio, and correct steeping time. |
Decision Rules
- If your coffee tastes bitter, then try a coarser grind because fine grounds over-extract.
- If your coffee tastes weak, then increase the coffee-to-water ratio (use more coffee) because you need more grounds for extraction.
- If your coffee tastes sour, then steep for a longer period because it may not have extracted enough flavor.
- If your coffee has a muddy texture, then filter it again using a finer filter because sediment is the culprit.
- If you’re brewing for the first time, then start with a 1:8 ratio because it’s a standard baseline.
- If you’re sensitive to caffeine, then consider a shorter steep time or a lighter roast because darker roasts and longer steeps can increase caffeine.
- If you want a smoother flavor, then use a dark roast because it tends to be less acidic.
- If your coffee tastes bland, then ensure your beans are fresh because stale beans lose their flavor.
- If you notice off-flavors, then clean your brewing equipment thoroughly because old oils can go rancid.
- If you prefer a bolder flavor, then reduce the dilution ratio after brewing because you’re starting with a strong concentrate.
FAQ
What’s the best coffee bean for cold brew?
You can use most beans, but medium to dark roasts often shine. They tend to be less acidic and have a naturally sweeter profile that works well with cold brewing.
How long can I store cold brew concentrate?
Properly stored in an airtight container in the fridge, cold brew concentrate can last for about 7 to 10 days. It’s best enjoyed fresh, though.
Why is my cold brew cloudy?
Cloudiness usually comes from a grind that’s too fine or insufficient filtering. Make sure your grounds are coarse and that you’ve filtered out all the sediment.
Can I use pre-ground coffee?
You can, but it’s not ideal. Pre-ground coffee is usually too fine for cold brew and loses its freshness quickly. If you must, look for the coarsest grind available and use it immediately.
Does cold brew have more caffeine?
It often does, especially if you use a higher coffee-to-water ratio and a longer steep time. The concentrate is potent. Remember to dilute it.
What’s the difference between cold brew and iced coffee?
Iced coffee is typically hot-brewed coffee that’s cooled down and served over ice, which can lead to a more acidic taste. Cold brew is brewed with cold water, resulting in a smoother, less acidic flavor.
Can I reheat cold brew?
You can, but it’s generally not recommended. The point of cold brew is its smooth, cold profile. Reheating can alter the flavor and might make it taste bitter.
How much water do I use to dilute?
Start with a 1:1 ratio of concentrate to water. Taste it and adjust. Some people like it stronger, some weaker. It’s all about personal preference.
What This Page Does Not Cover (and Where to Go Next)
- Specific bean origin flavor profiles and how they interact with cold brew. (Explore single-origin coffee guides.)
- Advanced filtration techniques beyond basic straining. (Look into specialized cold brew filters.)
- The science behind caffeine extraction in cold brewing. (Research coffee chemistry resources.)
- Comparisons of different commercial cold brew makers. (Check out product reviews.)