Brewing Coffee Like Tea: Exploring The Method
Quick answer
- Yes, you can brew coffee using a method similar to tea.
- This involves steeping ground coffee in hot water, then separating the grounds.
- Think of it as a French press or a simple immersion brew, but potentially with finer grounds.
- The key is controlling steep time and grind size for the best flavor.
- It’s a flexible method that lets you experiment.
- You’ll need a way to strain the grounds out.
Who this is for
- Anyone curious about alternative coffee brewing methods.
- Campers or travelers who want a simple way to brew with minimal gear.
- Those who enjoy the ritual of making coffee and want to try something new.
For those new to immersion brewing, a dedicated coffee immersion brewer can simplify the process and ensure consistent results.

- This product comes with an 02 SWITCH dripper and a 40-pack of 02 size V60 filters.
- This dripper is designed to be a hybrid that allows your to brew like a standard pourover and an immersion brewer.
- Plastic switch activates a stainless steel ball valve that open and closes the dripper allowing coffee to flow or stay in place.
- This dripper is compatible with 02 size V60 filters.
- Glass V60 cone is made of Hario's signature heatpoof glass.
What to check first
Brewer type and filter type
What are you using to hold the coffee and water? Is it a dedicated brewer, a jar, or something else? For straining, will you use a fine mesh sieve, cheesecloth, or a paper filter? The type of filter will impact the clarity and body of your coffee. A finer filter will catch more sediment, giving you a cleaner cup.
Water quality and temperature
Good coffee starts with good water. If your tap water tastes off, your coffee will too. Filtered water is usually best. For temperature, aim for just off the boil, around 195-205°F. Too hot, and you risk scorching the grounds. Too cool, and you won’t extract enough flavor.
To precisely hit that ideal temperature range, a coffee kettle thermometer is an invaluable tool for any home brewer.
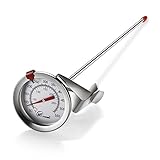
- Multi-purpose: Mechanical induction, can be directly and accurately measure the oil pan, frying, barbecue temperature control.
- Measuring a wide range: This Candy thermometer has a range of 50 degrees Fahrenheit to 550 degrees Fahrenheit, measurable boiling or frozen things.
- Compact stainless steel construction: The durable, stainless-steel casing provides strength and corrosion resistance. Easy to use and easy to clean.
- Equipped with temperature clamp: Can be used to hold the thermometer when the temperature is measured, which prevents the thermometer from falling into the container at the measured temperature
- Reliable and friendly customer service: Always be ready to respond within a 24-hour time frame.
Grind size and coffee freshness
This is crucial for brewing coffee like tea. A medium to medium-fine grind often works well, similar to what you’d use for a pour-over or Aeropress. If your grind is too fine, you’ll get a muddy, over-extracted cup. Too coarse, and it’ll be weak. Always use freshly roasted beans and grind them right before brewing. Stale coffee just won’t cut it.
Coffee-to-water ratio
A good starting point is a 1:15 ratio – that’s 1 gram of coffee to 15 grams (or ml) of water. For example, 20 grams of coffee to 300 ml of water. You can adjust this to your taste. More coffee means a stronger brew, less coffee means a weaker one. Don’t be afraid to play around here.
Cleanliness/descale status
This is non-negotiable. Any old coffee oils or mineral buildup will make your brew taste bitter and stale, no matter how good your beans are. Make sure your brewing vessel and any straining tools are sparkling clean. If you use an electric kettle or a machine, descale it regularly according to the manufacturer’s instructions.
Step-by-step (brew workflow)
1. Heat your water.
- What to do: Heat fresh, filtered water to about 195-205°F.
- What “good” looks like: The water is steaming but not violently boiling. A kettle with a thermometer is handy, or let boiling water sit for 30-60 seconds.
- Common mistake: Using water that’s too hot or too cool. Avoid scorching your grounds with boiling water.
2. Grind your coffee.
- What to do: Grind your fresh coffee beans to a medium or medium-fine consistency.
- What “good” looks like: The grounds should resemble coarse sand or fine sea salt.
- Common mistake: Grinding too fine or too coarse. Too fine clogs filters and over-extracts. Too coarse leads to weak coffee.
3. Prepare your brewing vessel and strainer.
- What to do: Have your heat-safe container (jar, mug, French press carafe) ready. Place your chosen strainer (sieve, cheesecloth-lined colander) over a second container or mug.
- What “good” looks like: Everything is clean and ready to go.
- Common mistake: Not having a reliable way to separate the grounds. You don’t want coffee sediment in your cup.
4. Add coffee grounds.
- What to do: Place the measured coffee grounds into your brewing vessel.
- What “good” looks like: The grounds are evenly distributed.
- Common mistake: Uneven distribution can lead to uneven extraction.
5. Bloom the coffee (optional but recommended).
- What to do: Pour just enough hot water (about twice the weight of the coffee) over the grounds to saturate them. Let it sit for 30 seconds.
- What “good” looks like: You’ll see the grounds puff up and release gas (CO2). This is called the bloom.
- Common mistake: Skipping the bloom. This releases trapped gases and improves flavor.
6. Add the remaining water.
- What to do: Gently pour the rest of the hot water over the grounds, ensuring all are saturated. Stir gently if needed.
- What “good” looks like: All the coffee grounds are submerged in water.
- Common mistake: Pouring too aggressively, which can agitate the grounds unevenly.
7. Steep the coffee.
- What to do: Let the coffee steep. A good starting point is 3-4 minutes.
- What “good” looks like: The aroma is developing, and the color is deepening.
- Common mistake: Steeping for too long or too short. Too long makes it bitter; too short makes it weak.
8. Strain the coffee.
- What to do: Carefully pour the brewed coffee through your prepared strainer into your serving mug.
- What “good” looks like: The coffee flows through cleanly, leaving most of the grounds behind.
- Common mistake: Rushing the pour, which can force fine particles through the strainer.
9. Serve and enjoy.
- What to do: Serve immediately.
- What “good” looks like: A flavorful, aromatic cup of coffee.
- Common mistake: Letting it sit too long after brewing, which can lead to over-extraction and a bitter taste.
Common mistakes (and what happens if you ignore them)
| Mistake | What it causes | Fix |
|---|---|---|
| Using stale, pre-ground coffee | Flat, dull, or bitter flavor | Buy fresh beans and grind them just before brewing. |
| Water too hot (> 205°F) | Scorched, bitter, acrid taste | Let water sit for 30-60 seconds after boiling before pouring. |
| Water too cool (< 195°F) | Weak, sour, underdeveloped flavor | Use a thermometer or let boiling water sit for the right amount of time. |
| Grind too fine | Clogged strainer, muddy coffee, bitter, over-extracted | Use a coarser grind, similar to French press or coarse sea salt. |
| Grind too coarse | Weak, watery, underdeveloped flavor | Use a finer grind, closer to medium-fine or table salt. |
| Incorrect coffee-to-water ratio | Too strong or too weak | Weigh your coffee and water. Start with 1:15 and adjust to taste. |
| Steeping for too long (> 5 minutes) | Bitter, astringent, harsh flavor | Set a timer. For this method, 3-4 minutes is usually sufficient. |
| Not cleaning equipment properly | Rancid, stale, bitter aftertaste | Wash all brewing gear with hot water and soap after each use. |
| Not straining thoroughly | Gritty, sediment-filled cup, harsh flavor | Use a fine mesh sieve or multiple layers of cheesecloth. Pour slowly. |
| Ignoring the bloom (if using fresh beans) | Less complex flavor, potential for bitterness | Pour a small amount of water to saturate grounds and let sit for 30 seconds before adding more. |
Decision rules (simple if/then)
- If your coffee tastes bitter, then try a coarser grind because fine grinds can over-extract.
- If your coffee tastes weak, then use more coffee or a finer grind because too little coffee or too coarse a grind leads to under-extraction.
- If your coffee has a lot of sediment, then use a finer strainer or pour more slowly because the current strainer isn’t catching all the fines.
- If your coffee tastes sour, then check your water temperature and steep time because it might be under-extracted.
- If you’re using pre-ground coffee, then expect a less vibrant flavor because freshness is key.
- If you want a cleaner cup with less body, then use a paper filter if possible, or a very fine mesh sieve, because this will catch more oils and fines.
- If you’re brewing outdoors with minimal gear, then a simple jar and a bandana or fine cloth can work in a pinch, because improvisation is part of camping.
- If you want to control the extraction precisely, then weigh your coffee and water using a scale because it’s the most accurate way to get consistent results.
- If your coffee tastes “off” or stale, then check the cleanliness of your equipment, because old oils are the usual culprit.
- If you’re experimenting with ratios, then start with 1:15 and adjust by 0.5 grams of coffee or water at a time, because small changes can have a big impact.
- If your bloom is weak or non-existent, then your coffee might be stale, or your water might not be hot enough, because the bloom is a sign of CO2 release.
FAQ
Can I use coffee grounds like tea leaves?
Yes, essentially. The principle is steeping ground material in hot water and then separating it. The main difference is that coffee grounds are much smaller and denser than tea leaves.
What kind of coffee beans work best?
Any type can work, but freshly roasted, whole beans ground right before brewing will give you the best results. Lighter roasts tend to highlight brighter, more acidic notes, while darker roasts offer bolder, chocolatey flavors.
How long should I steep the coffee?
A good starting point is 3 to 4 minutes. Steeping for too long can lead to over-extraction and bitterness, while too short a time will result in a weak, underdeveloped cup.
What if I don’t have a fancy strainer?
A fine-mesh sieve is ideal. If you don’t have one, you can try using a clean piece of cheesecloth or even a tightly woven bandana over a mug. Just be aware that the filtration might not be as perfect.
Will this method make my coffee taste like tea?
No, it will still taste like coffee. The “like tea” refers to the brewing method (immersion and straining), not the flavor profile of the beverage itself.
Is this method good for making cold brew?
While you can use this immersion method for cold brew, the typical cold brew process involves much longer steep times (12-24 hours) and coarser grounds. This method is more suited for hot coffee.
How much coffee should I use?
A common ratio is 1:15, meaning 1 gram of coffee for every 15 grams of water. For example, 20 grams of coffee for 300 grams (ml) of water. Adjust to your preference.
Can I reuse the coffee grounds?
Generally, no. The first steep extracts most of the desirable flavors. Reusing grounds will likely result in a weak and unpleasant cup.
What this page does NOT cover (and where to go next)
- Detailed comparisons of specific coffee bean origins and their flavor profiles.
- Advanced techniques for controlling extraction beyond basic grind and time adjustments.
- The science behind coffee extraction and the chemical compounds involved.
- Specific recommendations for electric kettles or grinders.
- Commercial brewing equipment and their operational nuances.