Brewing a Delicious Cup of Cold Brew Coffee
Quick answer
- Use coarse grounds. Think sea salt, not sand.
- Steep for 12-24 hours. Longer usually means stronger.
- Use a 1:4 to 1:8 coffee-to-water ratio. Adjust to your taste.
- Filter well. Double filtering helps remove sediment.
- Dilute your concentrate. Cold brew is strong, so water or milk is key.
- Store in the fridge. It lasts about 1-2 weeks.
Who this is for
- Anyone who wants smooth, less acidic coffee without the bitterness.
- Campers and travelers looking for a portable, make-ahead coffee solution.
- Folks who like to prep their coffee the night before for a quick morning pour.
What to check first
Brewer type and filter type
Most people use a jar, a French press, or a dedicated cold brew maker. The key is containment and filtration. If you’re using a French press, the built-in filter is your main tool. For jars, you’ll need a separate fine-mesh sieve, cheesecloth, or a coffee filter.
For an easy and affordable setup, a simple glass jar with a lid works wonderfully for steeping your cold brew.
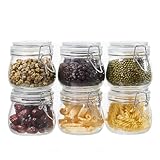
- 【Premium Glass Jars with Airtight Lids】These airtight glass jars feature a wire clip fastening system with clear preserving seals, locking in freshness and flavor. Ideal for dry goods and long-term food storage.
- 【Perfect Size: 17 oz Capacity – Set of 6】Each jar holds 17oz, just right for storing beans, flour, sugar, cereal, pasta, or snacks. Comes as a 6 pack to organize your kitchen efficiently.
- 【Durable & Safe Food Storage Containers】Made from thick, lead-free, glass food storage containers that are BPA-free, odor-resistant, and safe for everyday use.
- 【Multi-Purpose Glass Canisters for Kitchen & Pantry】Great for kitchen canning and pickling jars – also suitable for DIY jam, honey, kimchi, spices, and more. A functional and elegant solution for pantry storage jars.
- 【Stylish & Practical Storage Jars】Sleek square design saves space and looks beautiful on shelves. These glass storage jars are easy to stack and clean, combining utility with minimalist decor.
Water quality and temperature
Tap water can sometimes impart off-flavors. Filtered water is usually best. You don’t need hot water for cold brew, obviously. Room temperature or slightly cooler is fine. Don’t overthink this one; good water makes good coffee.
Grind size and coffee freshness
This is crucial for cold brew. You want a coarse grind. Think chunky sea salt. Too fine, and you’ll get sludge and over-extraction. Freshly ground beans are always better, but for cold brew, even pre-ground coffee can work if it’s not stale.
Coffee-to-water ratio
This determines the strength of your concentrate. A common starting point is 1:4 (one part coffee to four parts water by weight). Some go as high as 1:8 for a less intense concentrate. You can always dilute it later.
Cleanliness/descale status
Make sure your brewing vessel and any filters are clean. Old coffee oils can turn rancid and ruin your batch. If you use a machine or a French press, give it a good scrub.
Step-by-step (brew workflow)
1. Measure your coffee. Use a kitchen scale for best results. A common starting point is 4 oz of coffee for 16 oz of water (1:4 ratio).
- What “good” looks like: Evenly measured coffee, ready for grinding.
- Common mistake: Guessing the amount. This leads to inconsistent strength. Use a scale.
2. Grind your coffee. Aim for a coarse, uniform grind.
- What “good” looks like: Grounds resemble coarse sand or sea salt.
- Common mistake: Using a fine grind. This makes the coffee bitter and hard to filter.
3. Combine coffee and water. Put the grounds in your brewing vessel (jar, French press, etc.) and add the measured water.
- What “good” looks like: All coffee grounds are saturated.
- Common mistake: Not fully saturating the grounds. Stir gently to ensure everything is wet.
4. Stir gently. Give it a good, but gentle, stir to ensure all grounds are wet.
- What “good” looks like: No dry clumps of coffee.
- Common mistake: Over-stirring. This can agitate the grounds too much and lead to bitterness.
5. Cover and steep. Seal your container. Let it sit at room temperature or in the fridge.
- What “good” looks like: The container is sealed and undisturbed.
- Common mistake: Leaving it uncovered. This can let in unwanted odors or debris.
6. Steep for 12-24 hours. The longer it steeps, the stronger and more concentrated it will be. 18 hours is a good middle ground.
- What “good” looks like: The liquid has darkened significantly.
- Common mistake: Steeping for too short a time. This results in weak, watery coffee.
7. Filter the coffee. If using a French press, slowly press the plunger. If using a jar, pour through a fine-mesh sieve lined with cheesecloth or a paper filter.
- What “good” looks like: Clear liquid with minimal sediment.
- Common mistake: Rushing the filtration. This lets more sediment through. Be patient.
To ensure a smooth, sediment-free cold brew, consider using specialized coffee filters designed for cold brew, or line your sieve with cheesecloth.

- Cold brew bags bulk: You will receive 150 pieces disposable cold brew coffee filter bags with drawstring. Enough quantity can meet your daily needs and share them with your family or friend
- Filter bags size: Each cold brew coffee pouches measures 4x6 inches/ 10x15 cm, can hold a cup of coffee grind and suitable for 32 oz jars. After brewing, put it in the refrigerator and enjoy the delicious cold brew coffee after 12-24 hours
- Material: These disposable coffee filter bags are made of degradable non-woven fabric, safe and odorless. The drawstring is designed to be easy to use, and the top drawstring prevents internal particles from escaping
- Fine mesh design: These cold brew pouches have sturdy double thread stitching and fine mesh design that allows the water to fully soak the coffee powders, whether coarse, medium and fine. No flavor is affected and no particles remain
- Multi-purpose: These large tea bags can be used for hot and cold brew coffee, and are also suitable for loose leaf tea, herbs, soup stocks, spices, hot pots, seasonings, foot baths, etc
8. Double filter if needed. For an extra-smooth cup, filter it a second time.
- What “good” looks like: Crystal clear concentrate.
- Common mistake: Skipping this step if you notice sediment. It makes a difference.
9. Dilute your concentrate. Cold brew is a concentrate. Pour it over ice and add water, milk, or your favorite creamer. A 1:1 or 1:2 ratio of concentrate to liquid is a good start.
- What “good” looks like: A perfectly balanced, drinkable coffee.
- Common mistake: Drinking the concentrate straight. It’s way too strong!
10. Serve and enjoy. Add ice, sweetener, or milk as desired.
- What “good” looks like: A refreshing, delicious cup of coffee.
- Common mistake: Not tasting and adjusting. Your first batch might need tweaking.
Common mistakes (and what happens if you ignore them)
| Mistake | What it causes | Fix |
|---|---|---|
| Using fine coffee grounds | Bitter coffee, muddy sediment, hard to filter | Use a coarse grind (like sea salt). |
| Not steeping long enough | Weak, watery, underdeveloped flavor | Steep for at least 12 hours, ideally 18-24. |
| Steeping for too long (over 24 hours) | Bitter, overly strong, potentially unpleasant | Stick to the 12-24 hour range. Taste and adjust for future brews. |
| Using stale coffee beans | Flat, dull, lifeless flavor | Use fresh beans, or at least coffee that hasn’t been sitting for months. |
| Not filtering thoroughly | Gritty, muddy coffee, unpleasant mouthfeel | Use a fine-mesh sieve, cheesecloth, or paper filter. Double filter if needed. |
| Not diluting the concentrate | Extremely strong, undrinkable coffee | Always dilute your cold brew concentrate with water or milk. |
| Using poor quality water | Off-flavors that affect the coffee | Use filtered water. |
| Not cleaning brewing equipment | Rancid coffee oils, stale flavors | Clean your brewer and filters thoroughly after each use. |
| Not stirring gently after adding water | Uneven extraction, some grounds not saturated | Stir gently to ensure all grounds are wet. |
Decision rules (simple if/then)
- If your cold brew tastes bitter, then you likely used too fine a grind or steeped too long. Try a coarser grind next time, or reduce steeping time.
- If your cold brew tastes weak, then you probably didn’t steep it long enough or used too little coffee. Increase steeping time or use a stronger coffee-to-water ratio.
- If you have a lot of sediment in your final brew, then your filtration wasn’t fine enough. Use a finer filter, like cheesecloth or a paper filter, and consider double filtering.
- If you want a stronger concentrate, then use a higher coffee-to-water ratio (e.g., 1:4 instead of 1:8).
- If you prefer a milder concentrate, then use a lower coffee-to-water ratio (e.g., 1:8 instead of 1:4).
- If you’re in a hurry, then make your cold brew ahead of time. It’s a great way to have coffee ready to go.
- If you notice off-flavors, then check your water quality or the cleanliness of your equipment.
- If you want to experiment with flavor, then try different coffee beans. The beans themselves make a huge difference.
- If you’re brewing for a crowd, then scale up your recipe. Just maintain your chosen ratio.
- If you want to reduce acidity, then cold brew is your friend. The process naturally lowers acidity compared to hot brewing.
FAQ
How long does cold brew last?
Your cold brew concentrate will last about 1-2 weeks in the refrigerator. It’s best to store it in an airtight container.
Can I use any coffee beans for cold brew?
Yes, you can use most coffee beans. However, medium to dark roasts tend to yield richer, more chocolatey flavors that work well with the cold brew method.
What’s the difference between cold brew concentrate and ready-to-drink cold brew?
Concentrate is a strong, undiluted brew that needs to be diluted with water or milk. Ready-to-drink cold brew is already diluted to be consumed as is.
Do I need a special cold brew maker?
No, you don’t. A simple mason jar and a fine-mesh sieve, or a French press, work perfectly well for making cold brew.
Why is my cold brew cloudy?
Cloudiness usually comes from fine coffee particles that made it through the filter. Using a finer filter, like cheesecloth or a paper filter, and filtering twice can help.
Can I reheat cold brew?
While you can reheat cold brew, it’s generally meant to be served cold. Reheating can alter its smooth flavor profile. If you must, do it gently.
How much water should I add to dilute the concentrate?
This is up to your taste! A good starting point is a 1:1 ratio of concentrate to water or milk. Taste and adjust until it’s perfect for you.
Is cold brew less caffeinated than hot coffee?
Generally, cold brew concentrate has more caffeine per ounce than hot coffee because of the higher coffee-to-water ratio used in brewing. However, once diluted, the caffeine level can be comparable or even higher depending on the dilution.
What this page does NOT cover (and where to go next)
- Specific machine reviews or comparisons. (Check out coffee gear review sites.)
- Advanced brewing techniques like nitro cold brew. (Look for specialized guides on nitro systems.)
- Detailed coffee bean sourcing or origin profiles. (Explore coffee roaster websites and specialty coffee blogs.)
- Troubleshooting specific equipment malfunctions. (Consult your brewer’s manual or manufacturer support.)