Achieving Perfect Coffee in a Cafetiere
Quick answer
- Use fresh, whole bean coffee. Grind it just before brewing.
- Aim for a medium-coarse grind. It should look like coarse sand.
- Heat your water to 195-205°F. Not boiling, but close.
- Use a 1:15 coffee-to-water ratio. That’s about 2 tablespoons per 6 oz water.
- Let it bloom for 30 seconds after adding hot water.
- Steep for 4 minutes total.
- Press the plunger slowly and steadily.
- Clean your cafetiere after every use.
Who this is for
- Anyone who loves rich, full-bodied coffee.
- Folks who want a simple, no-fuss brewing method.
- Campers and travelers who need a reliable coffee maker on the go.
What to check first
Brewer type and filter type
You’ve got a cafetiere. That means a glass or metal carafe with a plunger and a metal mesh filter. This filter lets more oils and fine sediment through than paper, giving you that classic full-bodied taste. No paper filters needed here, friend.
Water quality and temperature
Your coffee is mostly water, so good water matters. Tap water can have off-flavors. Filtered water is usually best. For temperature, you want it hot but not scalding. Think 195-205°F. A kettle with a thermometer is handy, or just let boiling water sit for about 30 seconds off the boil.
Grind size and coffee freshness
This is a big one. Freshly roasted, whole bean coffee is key. Grind it right before you brew. For a cafetiere, you want a medium-coarse grind. Too fine, and you’ll get sludge. Too coarse, and it’ll be weak. It should look like coarse sand or breadcrumbs.
For the best flavor, always start with fresh, whole bean coffee. Grinding your beans right before brewing makes a significant difference in taste and aroma.
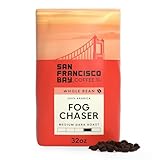
- Our iconic Fog Chaser is a blend of dark and medium roasted beans which results in a enjoyable medium dark roast coffee. It's a great combination of flavor, balance and smoothness that will chase away even the thickest morning fog.
- For finest taste, store in a cool, dark place and grind beans just berfore brewing
- QUALITY COFFEE: San Francisco Bay Coffee uses only 100% arabica coffee and certified Kosher coffee beans. Hand picked and grown in high altitude. We're so confident you'll love it, we back it with a satisfaction guarantee.
- SUSTAINABLY AND ECO- FARMED COFFEE: We offer a wide selection of sustainably grown, sourced, and packaged coffee from whole bean to ground, flavored to decaf, and much more.
- SF BAY COFFEE is a family owned, American made company with a rich tradition. Our reputation reflects on us as a family so if you're ever not happy with your purchase, call us and we'll make it right.
Coffee-to-water ratio
Getting the ratio right is crucial for balance. A good starting point is 1:15. That means for every gram of coffee, use 15 grams of water. For us home brewers, that’s roughly 2 tablespoons (about 10-12 grams) of coffee for every 6 ounces (about 180 ml) of water. You can adjust this to your taste, but start here.
Cleanliness/descale status
A dirty cafetiere is a flavor killer. Old coffee oils go rancid. Make sure your plunger and carafe are clean. If you have hard water, scale can build up. Descale regularly, usually with vinegar or a dedicated descaling solution. Check your manual for specifics.
Step-by-step (brew workflow)
1. Heat your water.
- What to do: Get your water to 195-205°F.
- What “good” looks like: Bubbles forming, but not a rolling boil.
- Common mistake: Using boiling water. This scorches the coffee and makes it bitter. Avoid it by letting the kettle sit for 30 seconds after it boils.
2. Grind your coffee.
- What to do: Grind fresh, whole beans to a medium-coarse consistency.
- What “good” looks like: Even particles, like coarse sand.
- Common mistake: Grinding too fine. This clogs the filter and makes your coffee muddy and over-extracted. Use a burr grinder if you can.
3. Preheat the cafetiere.
- What to do: Pour a little hot water into the empty carafe, swirl it around, and discard.
- What “good” looks like: The glass is warm to the touch.
- Common mistake: Skipping this step. A cold carafe will drop your brew temperature, leading to under-extraction and weak coffee.
4. Add coffee grounds.
- What to do: Put your measured, freshly ground coffee into the preheated carafe.
- What “good” looks like: An even bed of grounds at the bottom.
- Common mistake: Not measuring. Eyeballing it leads to inconsistent results. Use a scale or consistent scoops.
To ensure consistent results, it’s best to measure your coffee grounds accurately. Using a coffee scale is the most reliable way to achieve the perfect ratio every time.

- Barista-Level Precision: A 0.1g high-precision sensor with a rapid refresh rate responds instantly to changes in weight, helping you achieve consistent results across espresso, pour over, drip coffee, Chemex, V60, and filter coffee brewing.
- Integrated Brew Timer: A built-in count-up and count-down timer tracks bloom, extraction, and espresso shots. Ideal for dialing in espresso, timing Chemex and V60 pour over recipes, or steeping tea. Auto-shutoff helps preserve battery life between brews.
- Durable Waterproof Silicone Cover: The heat-resistant, dishwasher-safe silicone cover helps protect the coffee scale's spacious 5.25" x 5.25" weighing surface from splashes, spills, and hot equipment. The grooved surface provides added stability and makes cleanup quick and easy.
- Versatile Measurement Options: Quick-tare and 6 unit options make it easy to weigh coffee beans, espresso shots, matcha portions, and more. Choose from g, ml, lb, lb:oz, oz, and fl oz for added flexibility in the kitchen and coffee bar.
- Intuitive Design: A bright dual-color LCD display clearly separates weight and timer readings, while simple controls make daily brewing easy. Includes 3 AAA batteries and is backed by 5 years of coverage, with support from our St. Louis-based team whenever you need a hand.
5. Bloom the coffee.
- What to do: Pour just enough hot water over the grounds to saturate them. Wait 30 seconds.
- What “good” looks like: The grounds puff up and release CO2 bubbles.
- Common mistake: Pouring all the water at once. This skips the bloom, which helps release trapped gases for a more even extraction and better flavor.
6. Add the rest of the water.
- What to do: Gently pour the remaining hot water over the bloomed grounds.
- What “good” looks like: All the grounds are submerged.
- Common mistake: Agitating the grounds too much. Just pour steadily. You can give it a gentle stir if you like, but don’t go crazy.
7. Place the lid on.
- What to do: Put the lid on the carafe, but don’t press the plunger down yet.
- What “good” looks like: The lid is seated, keeping heat in.
- Common mistake: Pressing the plunger too early. This can force grounds through the filter or lead to a weaker brew.
8. Steep.
- What to do: Let the coffee steep for 4 minutes total (including the bloom time).
- What “good” looks like: A rich aroma filling the air.
- Common mistake: Steeping too long or too short. Too long makes it bitter; too short makes it weak. 4 minutes is the sweet spot.
9. Press the plunger.
- What to do: Slowly and steadily press the plunger all the way down.
- What “good” looks like: Smooth, even resistance. No sputtering or sudden drops.
- Common mistake: Pressing too fast or too hard. This can force fine grounds past the filter and make your coffee gritty. Be gentle.
10. Serve immediately.
- What to do: Pour the coffee into your mug right away.
- What “good” looks like: A clean, delicious cup.
- Common mistake: Leaving coffee in the carafe. It continues to extract and will become bitter and over-extracted.
Common mistakes (and what happens if you ignore them)
| Mistake | What it causes | Fix |
|---|---|---|
| Using stale, pre-ground coffee | Flat, papery, or bitter taste; lack of aroma | Buy fresh, whole beans and grind them just before brewing. |
| Grind size too fine | Muddy coffee, bitter taste, clogged filter | Use a medium-coarse grind; aim for coarse sand texture. |
| Water too hot (boiling) | Scorched coffee, bitter, harsh flavor | Use water between 195-205°F; let boiling water rest 30 seconds. |
| Water too cool | Weak, sour, under-extracted coffee | Ensure water is in the 195-205°F range. Preheating the carafe helps. |
| Incorrect coffee-to-water ratio | Coffee too strong or too weak | Start with 1:15 ratio (e.g., 2 tbsp coffee to 6 oz water) and adjust. |
| Skipping the bloom | Uneven extraction, less flavor, potential bitterness | Pour a little water first, let grounds bubble for 30 seconds before adding more. |
| Steeping for too long | Bitter, over-extracted, harsh coffee | Stick to 4 minutes total steep time. |
| Pressing the plunger too fast | Gritty coffee, grounds in the cup | Press slowly and steadily with even pressure. |
| Leaving coffee in the pot | Over-extraction, bitter, stale taste | Pour all coffee into mugs or a separate carafe immediately after pressing. |
| Not cleaning the cafetiere | Rancid oil taste, stale coffee, metallic notes | Wash thoroughly with soap and water after every use. |
Decision rules (simple if/then)
- If your coffee tastes bitter, then try a coarser grind because a finer grind can over-extract.
- If your coffee tastes weak and sour, then try a finer grind because a coarser grind can under-extract.
- If your coffee tastes bitter, then check your water temperature and try a slightly lower temp because too hot water scorches the grounds.
- If your coffee tastes weak, then try a slightly hotter water temp (up to 205°F) because cooler water won’t extract as well.
- If your coffee tastes weak, then increase your coffee dose because you might not be using enough grounds.
- If your coffee tastes too strong, then decrease your coffee dose because you might be using too much.
- If your coffee has a lot of sediment, then press the plunger more slowly because fast pressing can force fines through.
- If your coffee has a papery taste, then your beans are likely stale, so buy fresh beans.
- If your coffee tastes off or metallic, then clean your cafetiere thoroughly because old oils can build up.
- If you’re getting inconsistent results, then start measuring your coffee and water accurately because consistency is key.
- If your coffee is consistently good but you want more body, then consider a slightly finer grind because this lets more oils through.
- If your coffee is consistently good but you want a cleaner cup, then consider a slightly coarser grind because this lets fewer fines through.
FAQ
What’s the best grind size for a cafetiere?
You want a medium-coarse grind. Think coarse sand or sea salt. Too fine, and you’ll get sludge and bitterness. Too coarse, and it’ll be weak.
How much coffee should I use?
A good starting point is a 1:15 coffee-to-water ratio. That’s about 2 tablespoons of coffee for every 6 ounces of water. Adjust to your taste, but this gives you a balanced cup.
Can I use pre-ground coffee?
You can, but it’s not ideal. Pre-ground coffee loses its freshness fast. For the best flavor, grind whole beans right before you brew.
How long should I let the coffee steep?
Aim for 4 minutes total steeping time, including the bloom. Any longer and it can get bitter; any shorter and it might be weak.
Why is my coffee bitter?
It could be a few things: grind too fine, water too hot, or steeped too long. Try adjusting one variable at a time.
Why is my coffee weak?
This usually means your grind is too coarse, your water isn’t hot enough, or you’re not using enough coffee.
Do I need to clean my cafetiere every time?
Yes, absolutely. Old coffee oils go rancid and will ruin the taste of your next brew. A quick rinse and wash with soap is usually enough.
What’s the “bloom” and why is it important?
The bloom is when you add a little hot water to the grounds, and they puff up and release CO2. It allows for a more even extraction and better flavor by getting rid of those initial gases.
What this page does NOT cover (and where to go next)
- Specific coffee bean origins and their flavor profiles. (Explore different single-origin coffees.)
- Advanced techniques like pulsed pouring or immersion refractometry. (Look into advanced brewing guides.)
- Detailed water chemistry and its impact on extraction. (Research water for coffee brewing.)
- Comparisons of different cafetiere materials (glass vs. stainless steel). (Read reviews of various cafetiere models.)
- Espresso machine brewing methods. (Check out guides on espresso.)