Troubleshooting Your Breville Coffee Maker: Checking the Fuse
Quick answer
- Many Breville coffee makers do not have user-accessible fuses.
- If your machine is completely dead with no lights or sounds, it could be a power issue, not necessarily a blown fuse.
- Always start with the simplest checks: power outlet, cord, and circuit breaker.
- For most internal issues, including suspected blown fuses, professional repair or contacting Breville support is recommended.
- Some older or simpler models might have internal fuses, but locating and replacing them requires technical expertise and can void warranties.
- Refer to your specific Breville model’s manual for detailed troubleshooting guidance.
If you’re troubleshooting a Breville coffee maker and suspect a power issue, it’s worth ensuring you have a reliable unit. The Breville coffee maker (ASIN B093DYPBYR) is a popular choice known for its durability.

- Perfect Coffee Every Time: This pump-free coffee maker heats water to the correct temperature for coffee extraction
- Brew-Volume Selector switch for brewing half or full carafes Easy to Use: The Moccamaster brews a full 40 oz pot of coffee in 4-6 minutes using one switch
- Easy to Use: The Moccamaster brews a full 40 oz pot of coffee in 4-6 minutes using one switch
- Quiet and Safe: The Moccamaster Select quietly brews your coffee and automatically turns off after 100 minutes
- Delicious Coffee and Peace of Mind: Moccamaster coffee brewers have a 5-year warranty
What this problem usually is (and is not)
- This problem usually refers to a Breville coffee maker that won’t turn on, or suddenly stopped working mid-brew.
- It is not typically about minor performance issues like weak coffee or slow brewing, which have different causes.
- It is not usually a simple fix like replacing a burnt-out light bulb; internal electrical components are more complex.
- It is not safe to assume your machine has a user-serviceable fuse; many modern appliances are designed differently.
- Attempting to open and repair internal components without proper knowledge can be dangerous due to electrical hazards and can void your warranty.
- The “fuse” issue is often a symptom of a larger electrical problem within the machine or its power supply.
Likely causes (triage list)
Power Supply Issues:
- No power to the outlet: Ensure the outlet is working by plugging in another appliance. This rules out a faulty outlet.
- Tripped circuit breaker: Check your home’s electrical panel for any tripped breakers. Resetting it might resolve power loss.
- Damaged power cord: Visually inspect the power cord for any cuts, frays, or kinks. A damaged cord can prevent power from reaching the machine.
Machine Setup & Internal Issues:
- Machine not properly plugged in: Double-check that the power cord is securely seated in both the wall outlet and the machine’s power port.
- Faulty internal power switch: The internal switch that initiates power-on could be malfunctioning. This is not user-serviceable.
- Blown internal fuse (rare/model-dependent): Some machines may have internal fuses, but they are often not designed for user replacement.
- Overheating protection tripped: Some machines have thermal cutoffs that temporarily disable the unit if it overheats. Allow it to cool down completely.
- Main control board failure: The primary electronic board that manages all functions could have failed.
For those experiencing issues with more advanced machines, consider the Breville espresso machine (ASIN B00CH9QWOU). It’s designed with robust internal components, though like any appliance, it requires proper care.
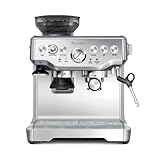
- The Breville Barista Express delivers third wave specialty coffee at home using the 4 keys formula and is part of the Barista Series that offers all in one espresso machines with integrated grinder to go from beans to espresso in under one minute
- DOSE CONTROL GRINDING: Integrated precision conical burr grinder grinds on demand to deliver the right amount of freshly ground coffee directly into the portafilter for your preferred taste with any roast of bean
- OPTIMAL WATER PRESSURE: Low pressure pre-infusion gradually increases pressure at the start and helps ensure all the flavors are drawn out evenly during the extraction for a balanced tasting cup
- Receive 2 free bags of specialty coffee when you purchase and register any Breville coffee machine; T and Cs apply
- PRECISE ESPRESSO EXTRACTION: Digital temperature control (PID) delivers water at precisely the right temperature, ensuring optimal espresso extraction
Fix it step-by-step (brew workflow)
This workflow focuses on external checks before considering internal issues.
1. Check the power outlet:
- What to do: Plug a known working appliance (like a lamp or phone charger) into the same outlet.
- What “good” looks like: The other appliance powers on and functions correctly.
- Common mistake: Assuming the outlet is fine because other devices sometimes work there. Avoid this by testing with a device that is currently working.
2. Inspect the power cord:
- What to do: Carefully examine the entire length of the power cord for any visible damage, such as cuts, burns, or exposed wires. Check the plug itself for bent pins.
- What “good” looks like: The cord is intact, with no signs of wear or damage, and the plug is straight.
- Common mistake: Overlooking minor nicks or abrasions that could still compromise safety. Avoid this by looking closely under good lighting.
3. Verify the circuit breaker:
- What to do: Go to your home’s electrical panel and check if the breaker for the kitchen or coffee maker’s circuit is in the “off” or middle position.
- What “good” looks like: The breaker is firmly in the “on” position. If it was tripped, resetting it and seeing if the coffee maker powers on is the goal.
- Common mistake: Pushing a tripped breaker back to “on” without confirming it stays there, or assuming the breaker is fine if other things on the circuit work. Avoid this by ensuring the breaker is fully engaged in the “on” position and noting if it trips again immediately.
4. Ensure secure connections:
- What to do: Firmly push the power cord into both the wall outlet and the back of your Breville coffee maker.
- What “good” looks like: The cord is snugly connected at both ends and doesn’t feel loose.
- Common mistake: Believing a connection is secure when it’s only partially inserted. Avoid this by giving a gentle tug to ensure it’s seated properly.
5. Attempt a power cycle:
- What to do: Unplug the coffee maker from the wall outlet, wait for 60 seconds, and then plug it back in.
- What “good” looks like: The machine’s lights turn on, or you hear a fan/pump engage, indicating it’s receiving power.
- Common mistake: Not waiting long enough for the internal electronics to fully reset. Avoid this by strictly adhering to the 60-second waiting period.
6. Check for overheating protection:
- What to do: If the machine recently stopped working, allow it to cool down for at least 30-60 minutes. Ensure it’s in a well-ventilated area.
- What “good” looks like: After cooling, the machine powers on normally.
- Common mistake: Trying to power on a machine that is still warm, thus re-engaging the safety feature. Avoid this by being patient and allowing ample cooling time.
7. Consult your Breville manual:
- What to do: Locate your specific Breville coffee maker model’s user manual. Look for troubleshooting sections related to power issues.
- What “good” looks like: The manual provides specific guidance for your model, potentially including information on internal fuses or other components.
- Common mistake: Relying on generic advice for all coffee makers instead of consulting the manual for your exact model. Avoid this by always referring to the manufacturer’s documentation.
8. Contact Breville Support or Professional Repair:
- What to do: If the above steps don’t resolve the issue, and your manual doesn’t offer further user-serviceable solutions, it’s time to seek professional help.
- What “good” looks like: You have a clear path forward, whether it’s returning the machine for service, repair, or replacement.
- Common mistake: Continuing to troubleshoot internal electrical components yourself, risking further damage or personal injury. Avoid this by recognizing when a problem is beyond basic user intervention.
Prevent it next time
- Regular Cleaning: Follow your Breville manual’s schedule for cleaning the brew group, portafilter, and drip tray.
- Routine Descaling: Descale your machine every 1-3 months, depending on water hardness and usage, to prevent mineral buildup.
- Use Filtered Water: Always use filtered or bottled water to reduce mineral deposits, which can strain the machine’s heating element and pump.
- Proper Water Storage: Store fresh water in the machine’s reservoir and replace it daily to prevent stagnation and bacterial growth.
- Correct Coffee-to-Water Ratio: Use the recommended coffee grounds to water ratio for your brew method to avoid overworking the machine.
- Use Appropriate Filters: Ensure you are using the correct type and size of filter for your brewing basket or machine.
- Inspect Power Cord Regularly: Periodically check the power cord for any signs of wear or damage.
- Ensure Ventilation: Make sure the coffee maker has adequate space around it for air circulation to prevent overheating.
- Listen for Unusual Noises: Pay attention to any new or strange sounds the machine makes, as these can indicate developing issues.
- Avoid Overfilling: Do not overfill the water reservoir or coffee grounds basket, as this can cause strain or malfunction.
Common mistakes (and what happens if you ignore them)
| Mistake | What it causes | Fix