Making Delicious Spanish Coffee at Home
Quick Answer
- Clean your Spanish coffee maker thoroughly before brewing.
- Use fresh, quality coffee beans, ground medium-fine.
- Employ filtered water for a cleaner taste.
- Measure your coffee and water accurately for consistency.
- Heat the water to the right temperature, usually just off the boil.
- Preheat your cup to keep the coffee hot.
- Don’t over-extract; aim for a balanced brew time.
Who This Is For
- Anyone who loves the rich, strong flavor of Spanish coffee.
- Home baristas looking to master a specific brewing method.
- Those who’ve inherited or bought a Spanish coffee maker and want to know how to use it.
What to Check First
Brewer Type and Filter Type
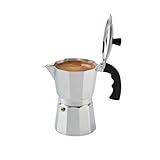
This guide assumes you’re talking about the classic stovetop moka pot, often called a Spanish coffee maker. It’s usually made of aluminum or stainless steel. It has three chambers: a base for water, a filter basket for grounds, and a top chamber where the brewed coffee collects. No paper filters here, just the metal basket.
If you’re looking to make authentic Spanish coffee, a classic stovetop moka pot, often referred to as a Spanish coffee maker, is the essential tool. This guide will walk you through using one.
- Note: 1)Too coarse a grind, too little coffee, or insufficiently tamping the grounds before brewing can all lead to inadequate pressure for a proper brew. 2)It is important to note that the amount of espresso extracted will vary depending on the grind size and amount and reprogramming may be needed when the size and amount are adjusted
- Made with Durable Aluminum that Keeps Coffee Warm
- 6-Cup Capacity with Cool Touch Handle and Knob for Easy Handling
- It's Small and Portable Design Makes it Easy for Sharing Espresso
- Designed with a Flip up Top and Side Pour Spout for Easy Serving
Water Quality and Temperature
Tap water can sometimes have off-flavors that mess with your coffee. Filtered water is your friend. For a moka pot, you want your water to be hot before you start, but not boiling. Think around 180-190°F (82-88°C). Some folks even preheat their water in a kettle to speed things up and control the temp better.
Grind Size and Coffee Freshness
This is crucial. You want a grind that’s medium-fine, like granulated sugar. Too fine and it’ll clog the filter, leading to bitter coffee. Too coarse and the water will rush through, giving you weak coffee. Always use freshly roasted beans. Grind them right before you brew for the best flavor. Stale beans are a buzzkill.
Coffee-to-Water Ratio
A good starting point is a 1:15 ratio – that’s 1 gram of coffee for every 15 grams (or ml) of water. For a typical 6-cup moka pot, this might be around 30-40 grams of coffee for the amount of water it holds. It’s not an exact science, and you can adjust this to your taste. A little experimentation goes a long way.
Cleanliness/Descale Status
If your moka pot looks grimy or has old coffee residue, your coffee will taste bad. Period. After each use, rinse all parts thoroughly with hot water. Avoid soap, as it can leave a residue. Periodically, you’ll need to descale it. Check your manual for specific instructions, but a vinegar or citric acid solution usually does the trick.
Step-by-Step: How to Use Your Spanish Coffee Maker
1. Disassemble the Brewer: Unscrew the top chamber from the base. Remove the filter basket.
- Good looks like: All three pieces are separate and clean.
- Common mistake: Forgetting to remove the filter basket or not emptying old grounds. Avoid this by always checking all parts.
2. Fill the Base with Water: Pour filtered water into the bottom chamber. Fill it up to the line or just below the safety valve.
- Good looks like: Water level is correct, not over the valve.
- Common mistake: Overfilling the base. This can force water through the grounds too quickly or even cause a steam leak. Don’t go past that valve.
3. Add Coffee Grounds: Fill the filter basket with your medium-fine ground coffee. Don’t tamp it down hard; just level it off gently.
- Good looks like: Basket is full but not packed. Grounds are even.
- Common mistake: Tamping the coffee too much. This is like packing a pillow too tight – water can’t get through properly. Just a gentle shake to level is fine.
4. Insert Filter Basket: Place the filled filter basket into the base chamber. Make sure it sits snugly.
- Good looks like: Basket is seated correctly and level.
- Common mistake: Not seating the basket properly. This can lead to uneven extraction or grounds getting into the top chamber. Give it a gentle push to ensure a good fit.
5. Screw on the Top Chamber: Carefully screw the top chamber onto the base. Make sure it’s tight, but don’t overtighten.
- Good looks like: The two parts are sealed tightly.
- Common mistake: Not screwing it on tight enough. This can cause steam and hot water to escape, which is dangerous and makes weak coffee. Twist until it feels secure.
6. Place on Stove: Put the assembled brewer on your stovetop over medium heat.
- Good looks like: Brewer is centered on the burner.
- Common mistake: Using heat that’s too high. This can scorch the coffee and make the metal too hot to handle. Medium heat is your friend.
7. Watch for Coffee Flow: After a few minutes, coffee will start to bubble up into the top chamber.
- Good looks like: A steady, rich stream of coffee, not sputtering or gurgling violently.
- Common mistake: Letting it boil aggressively. This leads to bitter, burnt-tasting coffee. You want a gentle flow.
8. Remove from Heat: As soon as the top chamber is about two-thirds to three-quarters full, and the stream slows to a trickle, remove the brewer from the heat.
- Good looks like: You stopped the brew before it started sputtering or making a lot of noise.
- Common mistake: Leaving it on the heat too long. This over-extracts the last bit of coffee, which is usually bitter. Pull it off when the flow slows.
9. Cool the Base (Optional): Some people run the base under cold water for a second to stop the brewing process immediately.
- Good looks like: The sputtering stops quickly.
- Common mistake: Not stopping the brew effectively. This can still lead to over-extraction. A quick rinse is usually enough.
10. Stir and Serve: Stir the coffee in the top chamber to ensure consistency. Pour into your preheated cup.
- Good looks like: A rich, aromatic coffee.
- Common mistake: Not stirring. The first bit of coffee is stronger than the last. Stirring mixes it up.
Common Mistakes (and What Happens If You Ignore Them)
| Mistake | What It Causes | Fix |
|---|---|---|
| Using stale coffee beans | Weak, flat, or bitter flavor | Use freshly roasted beans and grind just before brewing. |
| Grind too fine | Bitter coffee, clogged filter, slow brew | Use a medium-fine grind (like granulated sugar). |
| Grind too coarse | Weak, watery, under-extracted coffee | Use a medium-fine grind. |
| Tamping coffee grounds too hard | Bitter coffee, uneven extraction, potential overflow | Gently level the grounds; do not press them down. |
| Overfilling the water base | Watery coffee, potential steam leaks, safety hazard | Fill only to the level of the safety valve. |
| Not screwing the brewer together tightly | Steam and water leaks, weak coffee, burns | Screw the top and base together firmly but without excessive force. |
| Using heat that’s too high | Scorched coffee, bitter taste, metal too hot | Use medium heat on the stovetop. |
| Leaving brewer on heat too long | Bitter, burnt taste from over-extraction | Remove from heat as soon as the coffee flow slows to a trickle. |
| Using dirty or un-descaled brewer | Off-flavors, metallic taste, poor extraction | Clean thoroughly after each use; descale regularly. |
| Not stirring the brewed coffee | Inconsistent strength in the cup | Stir the coffee in the top chamber before pouring. |
Decision Rules
- If your coffee tastes bitter, then check your grind size and the heat setting, because too fine a grind or too high a heat will cause over-extraction.
- If your coffee is weak, then check your grind size and coffee-to-water ratio, because too coarse a grind or not enough coffee will lead to under-extraction.
- If you see steam or hot water leaking from the sides, then stop the brewing immediately and check that the top chamber is screwed on tightly, because a loose seal is a safety hazard and ruins the brew.
- If your coffee has a metallic taste, then clean your brewer thoroughly, possibly with a descaling solution, because old residue can impart unwanted flavors.
- If the coffee is sputtering and gurgling loudly, then remove it from the heat immediately, because this indicates over-extraction and a burnt taste.
- If you’re unsure about water temperature, then using preheated water from a kettle (around 180-190°F) is a good way to get consistent results, because it reduces the time the brewer is on the stove, minimizing the risk of scorching.
- If your coffee basket is hard to get grounds into evenly, then try a slightly coarser grind, because sometimes a very fine grind can be difficult to work with in a moka pot.
- If you get grounds in your coffee cup, then ensure the filter basket is seated properly and that you didn’t overfill the coffee grounds, because these are the most common reasons for grounds escaping.
- If your coffee tastes bland, then try using fresher beans or a slightly finer grind, because freshness and grind size have a huge impact on flavor.
- If you want a stronger brew, then increase the amount of coffee slightly or decrease the water volume a tiny bit, because these adjustments will alter the coffee-to-water ratio.
FAQ
Q: Can I use pre-ground coffee in my Spanish coffee maker?
A: Yes, but it’s not ideal. For the best flavor, use whole beans and grind them just before brewing to a medium-fine consistency. If you must use pre-ground, look for one specifically labeled for moka pots.
Q: How often should I clean my moka pot?
A: Clean it after every single use by rinsing all parts with hot water. You should also descale it every few months, depending on your water hardness, to remove mineral buildup.
Q: Why does my coffee taste burnt?
A: This is usually caused by using heat that’s too high or leaving the moka pot on the stove for too long. The coffee brews under pressure, and too much heat will scorch it.
Q: What’s the deal with the safety valve?
A: The small valve on the base is a safety feature. It releases excess pressure if the coffee grounds or water cause too much steam buildup. Never cover it or overfill the water past it.
Q: Can I make espresso with a moka pot?
A: Moka pots brew a strong, concentrated coffee, but it’s not true espresso. Espresso machines use much higher pressure. Moka pot coffee is often called “stovetop espresso” for its intensity.
Q: What kind of coffee beans are best for a moka pot?
A: Medium to dark roasts generally work well. They have robust flavors that stand up to the brewing method. Experiment with different origins and roasts to find your favorite.
Q: My moka pot is aluminum. Can I wash it with soap?
A: It’s generally recommended to avoid soap with aluminum moka pots. Soap can strip the seasoning and leave a metallic taste. A good rinse with hot water is usually sufficient.
Q: How do I know when the brewing is finished?
A: Listen for the coffee to start sputtering and gurgling, and watch the stream slow to a trickle. That’s your cue to remove it from the heat.
What This Page Does Not Cover (and Where to Go Next)
- Detailed history of the moka pot and its inventor.
- Specific recommendations for coffee bean origins or roasters.
- Advanced techniques like “crema” manipulation in moka pots.
- Troubleshooting specific issues not covered here, like lid warping or handle damage.
- Comparison to other brewing methods like pour-over or Aeropress.